Qdrant is the open source vector database that powers retrieval at scale for AI applications. This guide walks through installing Qdrant on Ubuntu LTS, covering both the Docker path most teams use and the native .deb path when you need a system service without Docker. The same steps apply to Ubuntu 26.04, 24.04, and 22.04, with version-aware commands for each.
By the end you will have Qdrant running, the REST API responding, the built in Web UI loaded in a browser, and a first collection holding a few vectors so you can confirm search works. We tested every command in this guide on a fresh Ubuntu 24.04 LTS VM. Companion code lives at c4geeks/qdrant/install-ubuntu, and the canonical reference for any flag in this article is the official Qdrant documentation.
If you are new to vector databases as a category, our vector search vs traditional search explainer walks through why dense retrieval beats keyword matching for fuzzy intent queries. If you are weighing Qdrant against a Postgres extension, the install pgvector on PostgreSQL walkthrough sets up the other end of the self host spectrum.
Before you begin
You will need the following:
- Ubuntu 26.04, 24.04, or 22.04 LTS server with at least 2 GB of RAM. The official Docker image runs on amd64 and arm64.
- A user account with
sudorights. - Network access to
github.com(release downloads) anddownload.docker.com(Docker repo). - Two free TCP ports:
6333(REST and Web UI) and6334(gRPC). - Roughly 1 GB of disk for the image plus whatever your dataset needs in
/var/lib/qdrant/storage.
Refresh the package index so the rest of the steps run cleanly:
sudo apt update
sudo apt install -y ca-certificates curl jq
Method 1: Install Qdrant with Docker
Docker is the recommended install path for almost every Qdrant deployment. The image is the same one the maintainers ship to production, so what runs on your laptop is what runs in the cluster.
Step 1: Install the Docker engine
Add the Docker apt repository and install the engine plus the Compose plugin:
sudo install -m 0755 -d /etc/apt/keyrings
sudo curl -fsSL https://download.docker.com/linux/ubuntu/gpg \
  -o /etc/apt/keyrings/docker.asc
sudo chmod a+r /etc/apt/keyrings/docker.asc

. /etc/os-release
echo "deb [arch=$(dpkg --print-architecture) signed-by=/etc/apt/keyrings/docker.asc] \
  https://download.docker.com/linux/ubuntu ${VERSION_CODENAME} stable" \
  | sudo tee /etc/apt/sources.list.d/docker.list >/dev/null

sudo apt update
sudo apt install -y docker-ce docker-ce-cli containerd.io \
  docker-buildx-plugin docker-compose-plugin
Add your user to the docker group so you do not need sudo for routine commands. Log out and back in for the group change to take effect:
sudo usermod -aG docker $USER
docker --version
docker compose version
Step 2: Detect the latest Qdrant release and pull the image
Pull a specific Qdrant tag so your environment is reproducible. Capture the latest release tag into a shell variable, then use it everywhere:
export QDRANT_VERSION=$(curl -s https://api.github.com/repos/qdrant/qdrant/releases/latest | jq -r .tag_name)
echo $QDRANT_VERSION

docker pull qdrant/qdrant:${QDRANT_VERSION}  # https://github.com/qdrant/qdrant/releases
Step 3: Run Qdrant with persistent storage
Create a host directory for the vector data, bind it into the container at the canonical /qdrant/storage path, and start the service:
sudo mkdir -p /var/lib/qdrant/storage

docker run -d \
  --name qdrant \
  --restart unless-stopped \
  -p 6333:6333 -p 6334:6334 \
  -v /var/lib/qdrant/storage:/qdrant/storage:z \
  qdrant/qdrant:${QDRANT_VERSION}
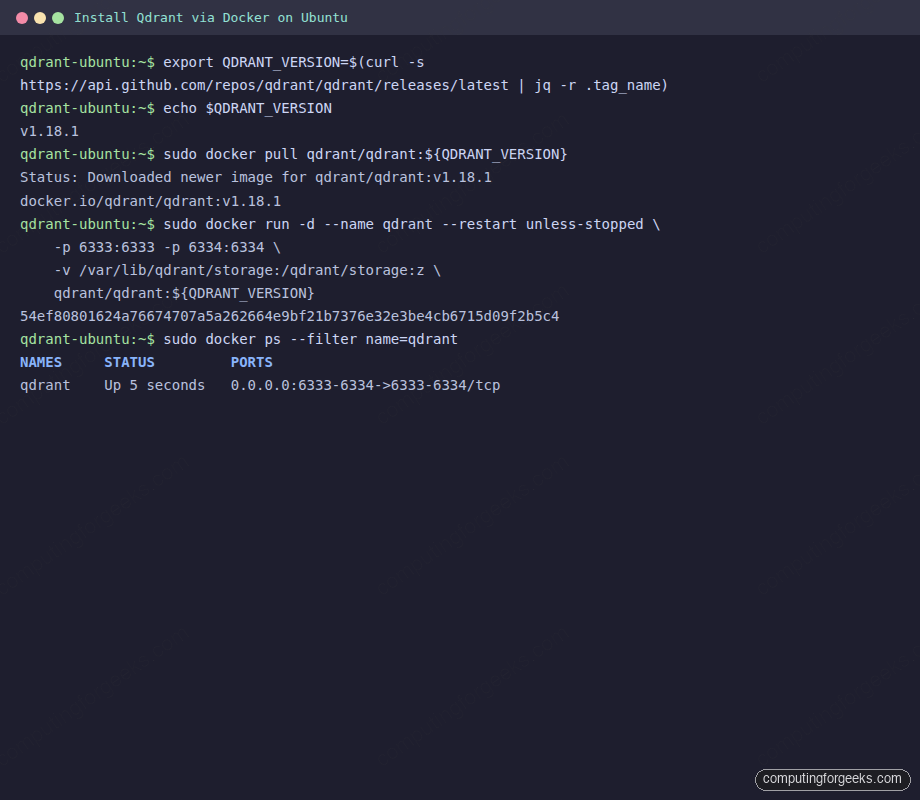
Confirm the container is running and the ports are bound:
docker ps --filter name=qdrant --format "table {{.Names}}\t{{.Status}}\t{{.Ports}}"The output should show the container in the Up state with both REST and gRPC ports mapped to the host:
Step 4: Verify the install
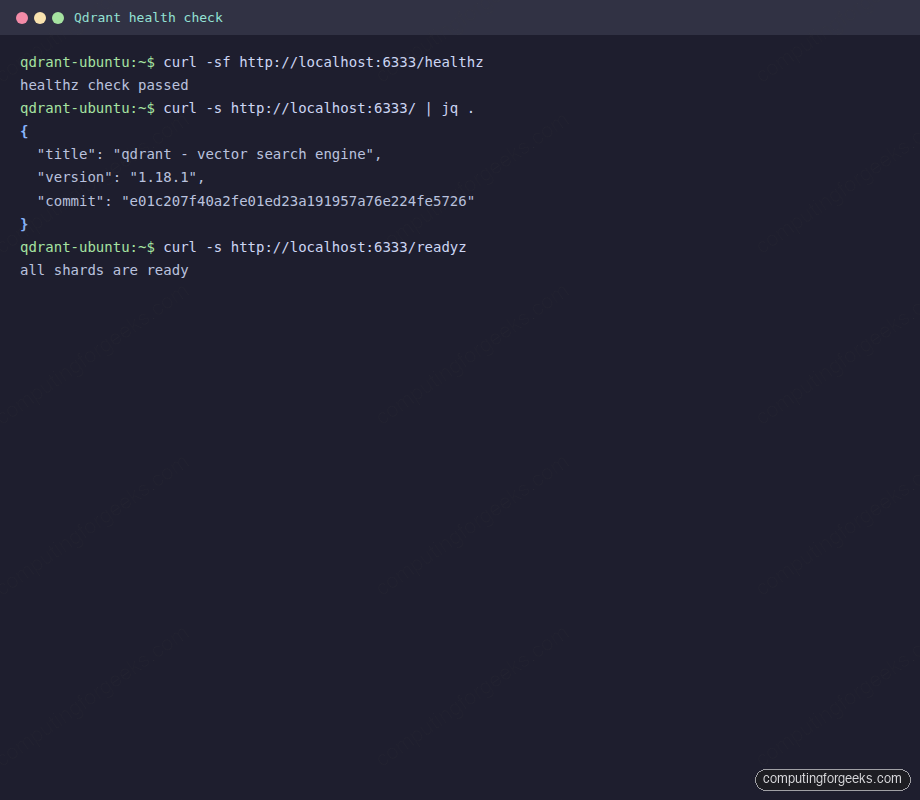
Qdrant exposes three quick endpoints to confirm the service is alive, ready to serve queries, and on the expected version:
curl -sf http://localhost:6333/healthz
curl -s http://localhost:6333/ | jq .
curl -s http://localhost:6333/readyz
You should see the health probe pass, the version response confirm the running tag, and readiness report that the shards are loaded:
Step 5: Create your first collection and search
A collection holds points (your vectors plus their metadata). Create one called demo with four dimensional vectors and cosine distance, then upsert three sample points:
curl -s -X PUT http://localhost:6333/collections/demo \
  -H "Content-Type: application/json" \
  -d '{"vectors":{"size":4,"distance":"Cosine"}}'

curl -s -X PUT http://localhost:6333/collections/demo/points \
  -H "Content-Type: application/json" \
  -d '{
    "points": [
      {"id":1, "vector":[0.1,0.2,0.3,0.4], "payload":{"city":"Nairobi"}},
      {"id":2, "vector":[0.2,0.3,0.4,0.5], "payload":{"city":"Berlin"}},
      {"id":3, "vector":[0.9,0.8,0.7,0.6], "payload":{"city":"Tokyo"}}
    ]
  }'
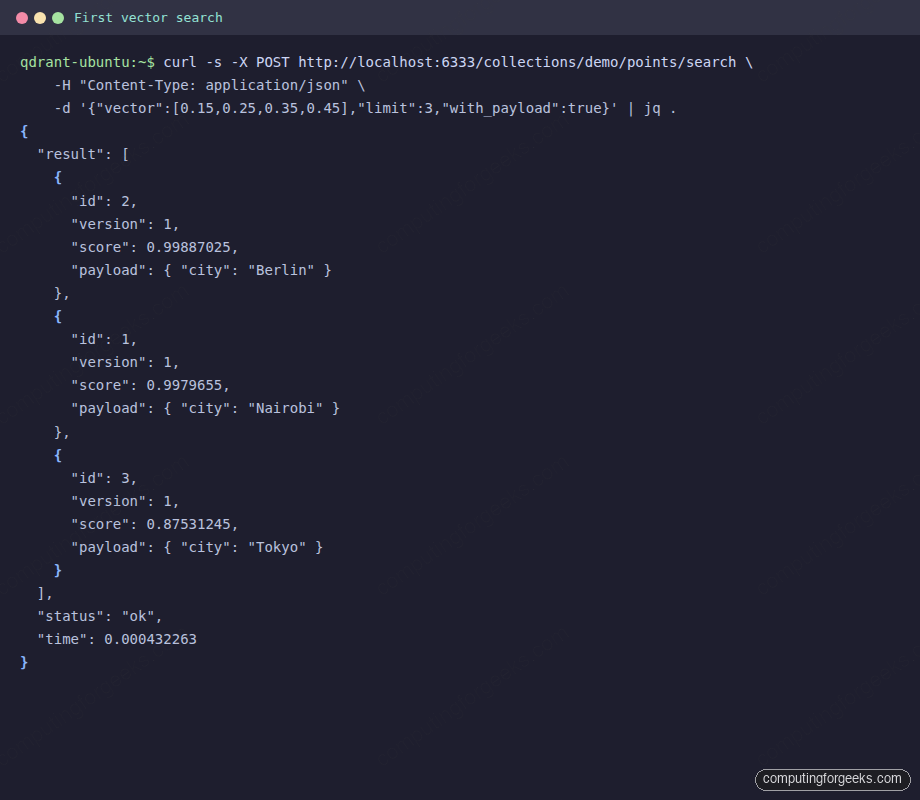
Now run a similarity search. The vector closest to the query gets the highest score:
curl -s -X POST http://localhost:6333/collections/demo/points/search \
  -H "Content-Type: application/json" \
  -d '{"vector":[0.15,0.25,0.35,0.45],"limit":3,"with_payload":true}' \
  | jq .
Berlin lands first, Nairobi second, Tokyo last because its vector points the other way. This is your end to end sanity check that ingest, index, and query all work:
Step 6: Open the built in Web UI
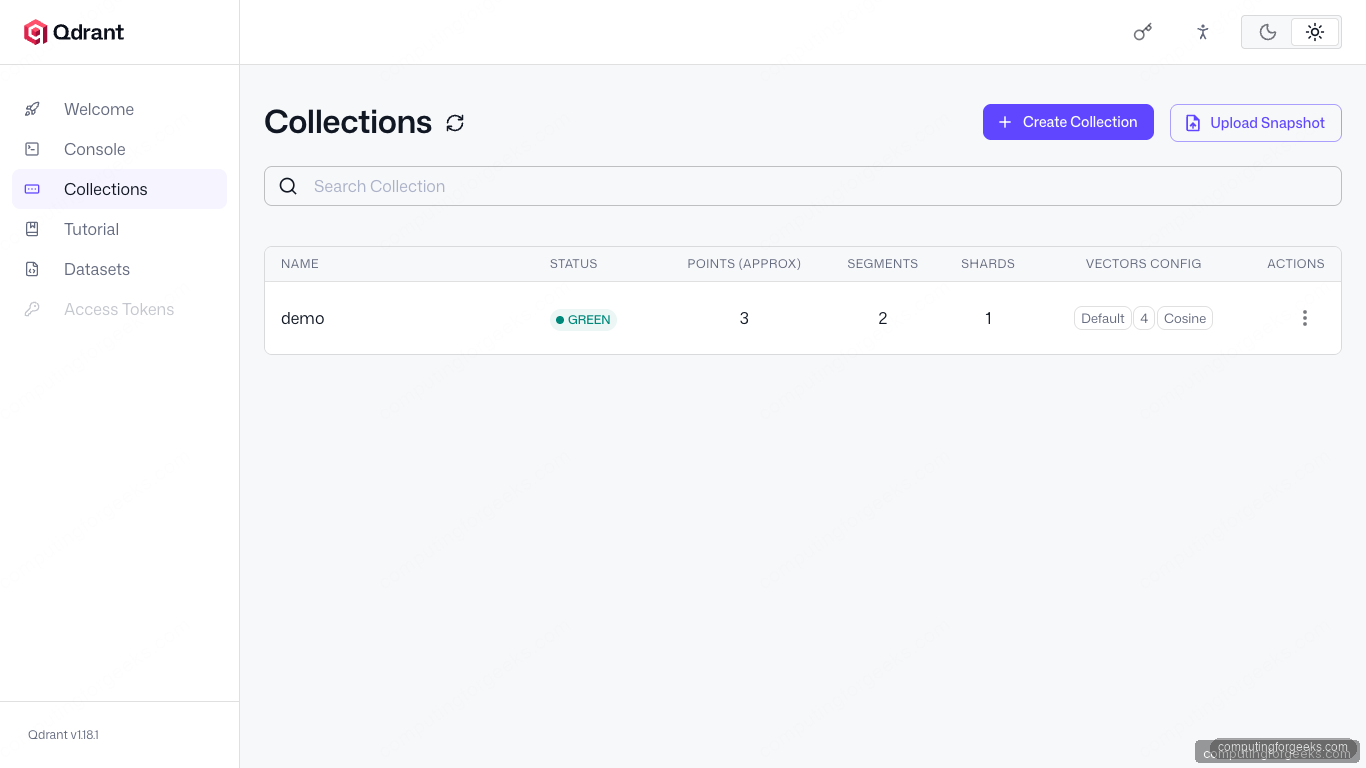
Every Qdrant container ships with a browser based UI at /dashboard. Open http://<server-ip>:6333/dashboard in a browser. The Collections panel lists the demo collection you just created, with status, point count, and vector config:
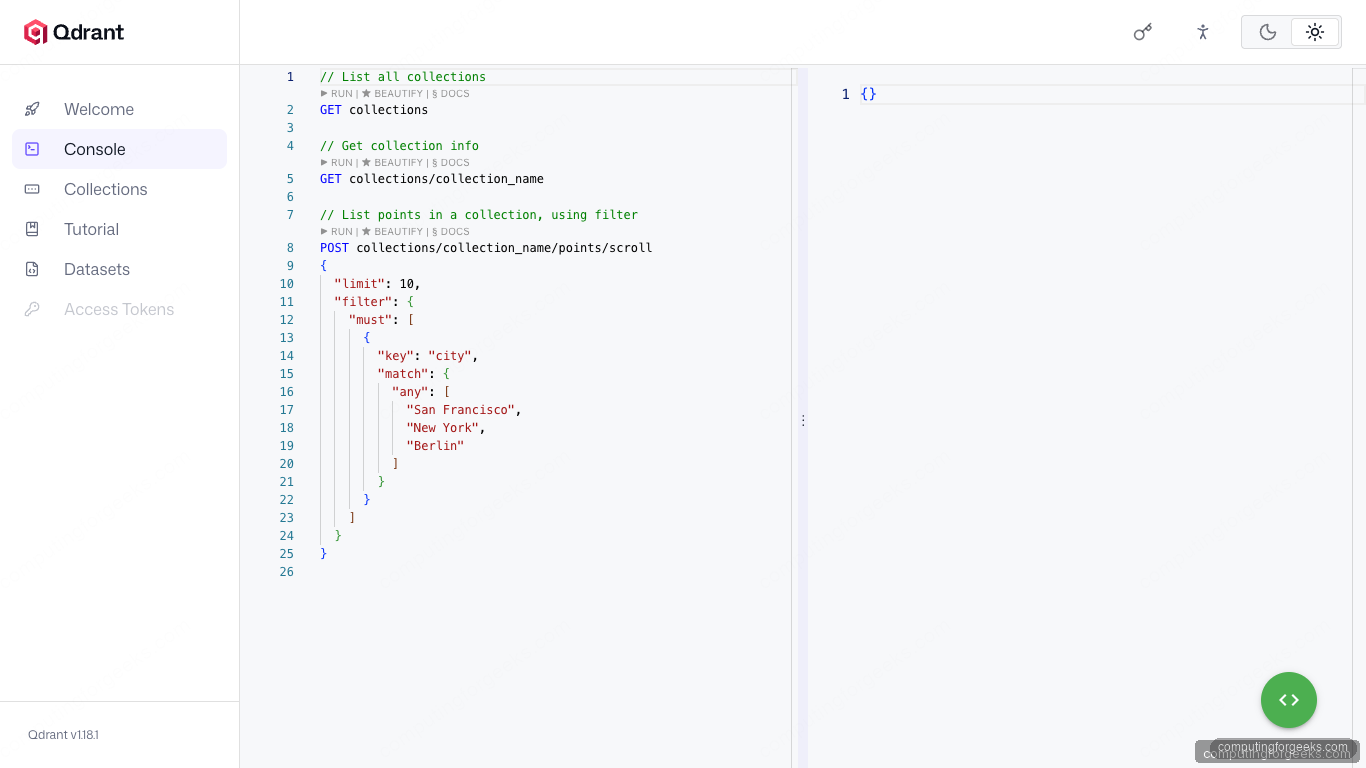
Click Console in the sidebar to run REST calls directly from the browser. Useful for quick experiments and onboarding teammates who do not have curl in their muscle memory:
Docker Compose alternative
If you prefer Compose, the equivalent setup with an API key and a memory limit fits in one file. Save this as docker-compose.yml next to a .env that defines QDRANT_VERSION and QDRANT_API_KEY:
services:
  qdrant:
    image: qdrant/qdrant:${QDRANT_VERSION}  # https://github.com/qdrant/qdrant/releases
    container_name: qdrant
    restart: unless-stopped
    ports:
      - "6333:6333"
      - "6334:6334"
    volumes:
      - ./qdrant_storage:/qdrant/storage:z
      - ./qdrant_snapshots:/qdrant/snapshots:z
    environment:
      QDRANT__SERVICE__API_KEY: ${QDRANT_API_KEY}
      QDRANT__TELEMETRY_DISABLED: "true"
    deploy:
      resources:
        limits:
          memory: 4G
Generate a strong API key and bring the stack up:
echo "QDRANT_VERSION=${QDRANT_VERSION}" > .env
echo "QDRANT_API_KEY=$(openssl rand -base64 32)" >> .env

docker compose up -d
docker compose logs -f --tail=20 qdrant
Every subsequent curl now needs the api-key header:
curl -s http://localhost:6333/collections \
  -H "api-key: $(grep QDRANT_API_KEY .env | cut -d= -f2)"
Method 2: Native .deb install with systemd
The native path drops the Docker layer and lets systemd manage Qdrant directly. Use this when your host policy forbids Docker, when you need tighter integration with journalctl, or when the rest of your stack uses native packages.
Download the official .deb for the latest release. The release page publishes amd64 and arm64 packages:
QDRANT_PKG_VERSION="${QDRANT_VERSION#v}"
cd /tmp
curl -fL --retry 3 -o "qdrant_${QDRANT_PKG_VERSION}-1_amd64.deb" \
  "https://github.com/qdrant/qdrant/releases/download/${QDRANT_VERSION}/qdrant_${QDRANT_PKG_VERSION}-1_amd64.deb"  # https://github.com/qdrant/qdrant/releases

sudo apt install -y "./qdrant_${QDRANT_PKG_VERSION}-1_amd64.deb"
Create a dedicated system user and storage directory, then drop a systemd unit:
sudo useradd -r -s /sbin/nologin qdrant
sudo mkdir -p /var/lib/qdrant/storage /etc/qdrant
sudo chown -R qdrant:qdrant /var/lib/qdrant
Write the unit file at /etc/systemd/system/qdrant.service:
[Unit]
Description=Qdrant Vector Database
After=network.target

[Service]
Type=simple
User=qdrant
Group=qdrant
WorkingDirectory=/var/lib/qdrant
ExecStart=/usr/bin/qdrant
Restart=on-failure
RestartSec=5
LimitNOFILE=65536

[Install]
WantedBy=multi-user.target
Reload systemd, enable, and start the service:
sudo systemctl daemon-reload
sudo systemctl enable --now qdrant
sudo systemctl status qdrant --no-pager
journalctl -u qdrant -n 20 --no-pager
The same health endpoint works against the native install:
curl -sf http://localhost:6333/healthzOpen the firewall safely
Never expose Qdrant on a public interface without authentication. The default Docker run is open, which is fine on a laptop and dangerous on a VPS. If UFW is enabled, allow REST and gRPC from a trusted CIDR only:
TRUSTED_CIDR="10.0.0.0/8"   # adjust to your office or VPN range

sudo ufw allow from $TRUSTED_CIDR to any port 6333 proto tcp
sudo ufw allow from $TRUSTED_CIDR to any port 6334 proto tcp
sudo ufw reload
sudo ufw status numbered
For internet facing deployments, bind Qdrant to 127.0.0.1 and put Nginx with TLS plus an API key in front. The full hardening walkthrough is the next article in this series.
Upgrade Qdrant
Upgrades are usually a tag swap. With Docker, stop the container, re-detect the latest tag, and recreate. The storage volume persists across the swap:
export QDRANT_VERSION=$(curl -s https://api.github.com/repos/qdrant/qdrant/releases/latest | jq -r .tag_name)
docker pull qdrant/qdrant:${QDRANT_VERSION}  # https://github.com/qdrant/qdrant/releases
docker stop qdrant && docker rm qdrant
docker run -d --name qdrant --restart unless-stopped \
  -p 6333:6333 -p 6334:6334 \
  -v /var/lib/qdrant/storage:/qdrant/storage:z \
  qdrant/qdrant:${QDRANT_VERSION}
With Docker Compose, edit QDRANT_VERSION in .env and run docker compose pull && docker compose up -d. With the native install, download the new .deb and let apt install upgrade in place, then restart the service.
Troubleshooting common issues
Port 6333 already in use
If docker run fails with bind: address already in use, find what is holding the port and either stop it or remap the Qdrant ports:
sudo ss -ltnp | grep -E ':(6333|6334)\b'

# Remap if you cannot free the port
docker run -d --name qdrant -p 16333:6333 -p 16334:6334 \
  -v /var/lib/qdrant/storage:/qdrant/storage:z \
  qdrant/qdrant:${QDRANT_VERSION}
Container restarts in a loop
Look at the logs first. The most common culprit is a permission error on the bind mount when SELinux or AppArmor labels conflict:
docker logs --tail=50 qdrant
sudo chown -R 1000:1000 /var/lib/qdrant/storage
Web UI loads but Collections list is empty
The Web UI ships empty on a fresh install. Create your first collection through the Console panel or via curl, then click the refresh icon next to the Collections heading.
Where to next
You now have a working Qdrant on Ubuntu, a sample collection, and the Web UI for quick experiments. The series builds outward from here: secure Qdrant with API key, TLS, and Nginx is the next stop for any host reachable beyond localhost, and the Qdrant Web UI tour covers every panel in the dashboard. To wire Qdrant into a local LLM pipeline, our self hosted RAG with Ollama guide pairs naturally with Qdrant as a drop in for the vector store, and the Ollama commands cheat sheet covers the embedding side.