Cloudreve is an open source, self-hosted file management platform written in Go and React. Version 4 ships PostgreSQL support, ten storage backends (Local, S3, MinIO, Cloudflare R2, Backblaze B2, GCS, OneDrive, Aliyun OSS, Tencent COS, and Remote slave nodes), WebDAV, OnlyOffice and Collabora co-editing through WOPI, Aria2 and qBittorrent remote downloads, full text search via Apache Tika plus Meilisearch, and a clean React UI that runs comfortably on a 2 vCPU, 4 GB RAM machine.
This guide installs the latest Cloudreve v4 release using the upstream Docker Compose stack (Cloudreve plus PostgreSQL 17 plus Redis) on Ubuntu 24.04 LTS, Ubuntu 26.04 LTS, and Debian 13 (trixie). The same commands work on all three because Docker abstracts away the distro. The production notes at the end cover the start order race you will hit if you copy the upstream compose file as is.
Why Cloudreve v4
Cloudreve sits in the same self hosted file space as Nextcloud, Seafile, and FileBrowser, but the v4 release pushes it ahead of all three on a few points that matter to operators. It is a single Go binary fronting a React SPA, so the runtime footprint is small. It speaks ten storage backends out of the box and lets you assign different backends to different user groups. It ships native WebDAV, native Aria2 and qBittorrent integration for remote downloads, and a real AI semantic search option that calls OpenAI, Hugging Face, or AWS Bedrock embeddings. The community edition is GPL-3.0; the Pro edition adds OIDC SSO, desktop sync, Stripe paid shares, and audit events.
Prerequisites
- A server running Ubuntu 24.04 LTS, Ubuntu 26.04 LTS, or Debian 13 (trixie) with sudo access
- 2 vCPU, 4 GB RAM, and at least 20 GB free disk. The Cloudreve image plus PostgreSQL plus Redis pull about 600 MB; the rest is for file uploads and database growth
- Outbound HTTPS to
download.docker.comanddocker.io - TCP 5212 open for the web UI, plus TCP and UDP 6888 if you plan to use BitTorrent remote downloads
- A DNS A record pointing to the server if you intend to expose Cloudreve to the public internet (the production notes section at the end covers reverse proxy and TLS)
Step 1: Update the system and install base utilities
Pull the latest package indexes and install curl, ca-certificates, and the QEMU guest agent if you are running on a Proxmox, KVM, or cloud hypervisor.
sudo apt-get update
sudo apt-get install -y ca-certificates curl qemu-guest-agent
Step 2: Install Docker CE and the Compose plugin
Cloudreve runs as a Docker container, so you need a current Docker Engine plus the Compose v2 plugin. Use the official Docker apt repository because the distro packaged Docker on Ubuntu and Debian is often months behind the upstream release.
Ubuntu 24.04 LTS and Ubuntu 26.04 LTS
sudo install -m 0755 -d /etc/apt/keyrings
sudo curl -fsSL https://download.docker.com/linux/ubuntu/gpg \
  -o /etc/apt/keyrings/docker.asc
sudo chmod a+r /etc/apt/keyrings/docker.asc

echo "deb [arch=$(dpkg --print-architecture) signed-by=/etc/apt/keyrings/docker.asc] \
https://download.docker.com/linux/ubuntu $(. /etc/os-release && echo "$VERSION_CODENAME") stable" \
  | sudo tee /etc/apt/sources.list.d/docker.list > /dev/null

sudo apt-get update
sudo apt-get install -y docker-ce docker-ce-cli containerd.io \
  docker-buildx-plugin docker-compose-plugin
If you want a deeper walkthrough of the Docker install itself, the dedicated Install Docker CE on Ubuntu 26.04 LTS guide covers cgroup tweaks, log rotation, and the rootless mode.
Debian 13 (trixie)
sudo install -m 0755 -d /etc/apt/keyrings
sudo curl -fsSL https://download.docker.com/linux/debian/gpg \
  -o /etc/apt/keyrings/docker.asc
sudo chmod a+r /etc/apt/keyrings/docker.asc

echo "deb [arch=$(dpkg --print-architecture) signed-by=/etc/apt/keyrings/docker.asc] \
https://download.docker.com/linux/debian $(. /etc/os-release && echo "$VERSION_CODENAME") stable" \
  | sudo tee /etc/apt/sources.list.d/docker.list > /dev/null

sudo apt-get update
sudo apt-get install -y docker-ce docker-ce-cli containerd.io \
  docker-buildx-plugin docker-compose-plugin
Add your user to the docker group
sudo usermod -aG docker $USER
sudo systemctl enable --now docker qemu-guest-agent
newgrp docker
docker --version
docker compose version
You should see Docker Engine 29.x (or whatever is current) and Docker Compose v2.30 or newer. If newgrp docker drops you into a sub shell, exit and re open the SSH session so the group membership sticks.
Step 3: Create the Cloudreve Docker Compose project
Create a dedicated directory for the stack so the named volumes and the compose file live together. Then drop the Cloudreve plus PostgreSQL plus Redis stack in it. This is the upstream stack from github.com/cloudreve/docker-compose, lightly trimmed.
mkdir -p ~/cloudreve && cd ~/cloudreve
cat > docker-compose.yml <<'EOF'
services:
  cloudreve:
    image: cloudreve/cloudreve:v4
    container_name: cloudreve
    depends_on:
      postgresql:
        condition: service_healthy
      redis:
        condition: service_started
    restart: unless-stopped
    ports:
      - 5212:5212
      - 6888:6888
      - 6888:6888/udp
    environment:
      - CR_CONF_Database.Type=postgres
      - CR_CONF_Database.Host=postgresql
      - CR_CONF_Database.User=cloudreve
      - CR_CONF_Database.Name=cloudreve
      - CR_CONF_Database.Port=5432
      - CR_CONF_Redis.Server=redis:6379
    volumes:
      - backend_data:/cloudreve/data

  postgresql:
    image: postgres:17
    container_name: postgresql
    restart: unless-stopped
    environment:
      - POSTGRES_USER=cloudreve
      - POSTGRES_DB=cloudreve
      - POSTGRES_HOST_AUTH_METHOD=trust
    healthcheck:
      test: ["CMD-SHELL", "pg_isready -U cloudreve -d cloudreve"]
      interval: 5s
      timeout: 5s
      retries: 10
    volumes:
      - database_postgres:/var/lib/postgresql/data

  redis:
    image: redis:latest
    container_name: redis
    restart: unless-stopped
    volumes:
      - redis_data:/data

volumes:
  backend_data:
  database_postgres:
  redis_data:
EOF
The change from the upstream compose file: a real PostgreSQL healthcheck (pg_isready) plus condition: service_healthy on the Cloudreve dependency. Without those two lines, Cloudreve starts before PostgreSQL accepts connections, panics with a connection refused on the first migration call, and only comes up after the restart: unless-stopped policy kicks it back. It works, but it pollutes the logs with a panic and a stack trace on every fresh start. The healthcheck eliminates the race.
For a deeper dive on the database side, the Install PostgreSQL 18 on Ubuntu 26.04 LTS guide and the Install PostgreSQL 17 on Debian 13 / 12 guide cover the host packaged builds if you would rather run PostgreSQL on the host instead of in a container.
Step 4: Launch the Cloudreve stack
cd ~/cloudreve
docker compose pull
docker compose up -d
docker compose ps
You should see all three containers listed as Up. Cloudreve binds to 5212/tcp for the web UI and to 6888/tcp plus 6888/udp for the bundled Aria2 BitTorrent listener. PostgreSQL and Redis only expose ports inside the Docker network, which is what you want.
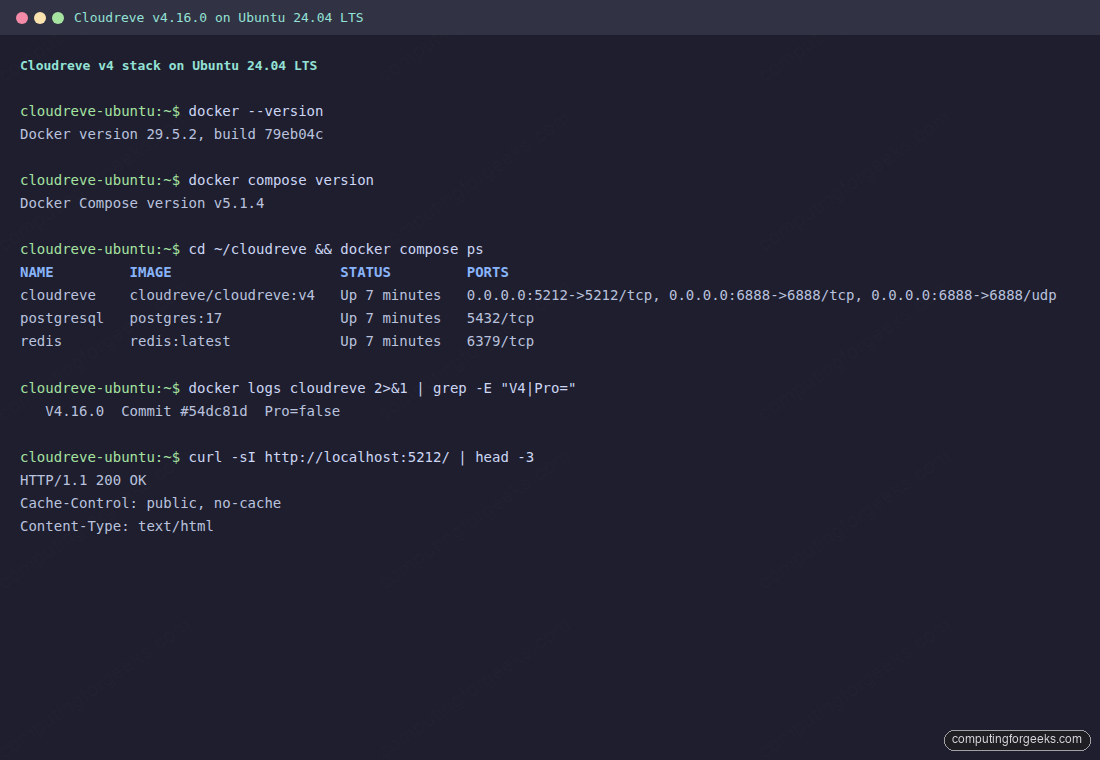
On Debian 13, the output looks effectively identical because Docker normalises the runtime across distros.
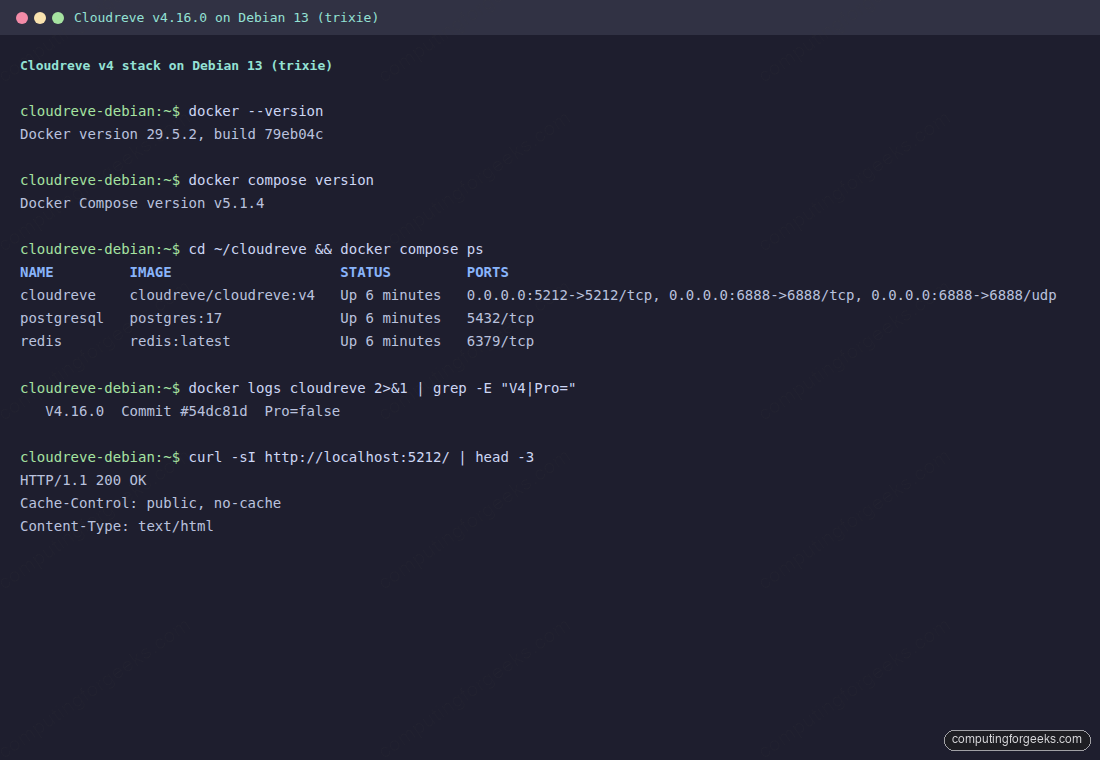
Confirm the Cloudreve container is serving HTTP and the version banner matches the release you intended to install.
curl -sI http://localhost:5212/ | head -3
docker logs cloudreve 2>&1 | grep -E "V4|Pro="
Expected output: an HTTP/1.1 200 OK on the curl, and a banner line like V4.16.0 Commit #54dc81d Pro=false on the log grep. The Community build always reports Pro=false.
Step 5: Register the administrator account
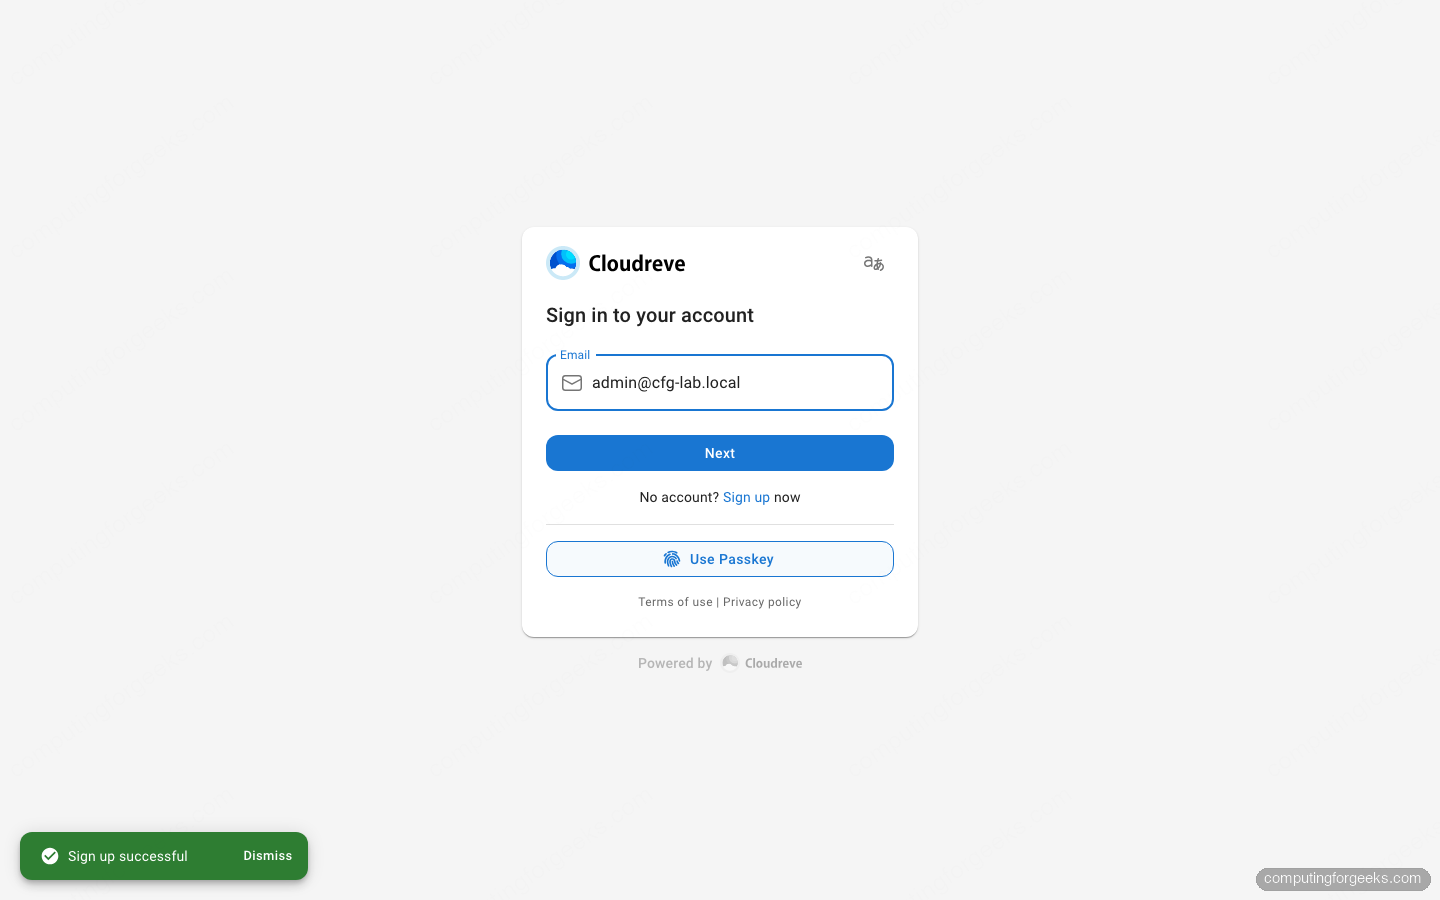
Cloudreve v4 does not pre create an admin user and does not print credentials in the logs. The first user who registers becomes the administrator. Browse to http://YOUR_SERVER_IP:5212/, click Sign up now, and submit your email plus a strong password.
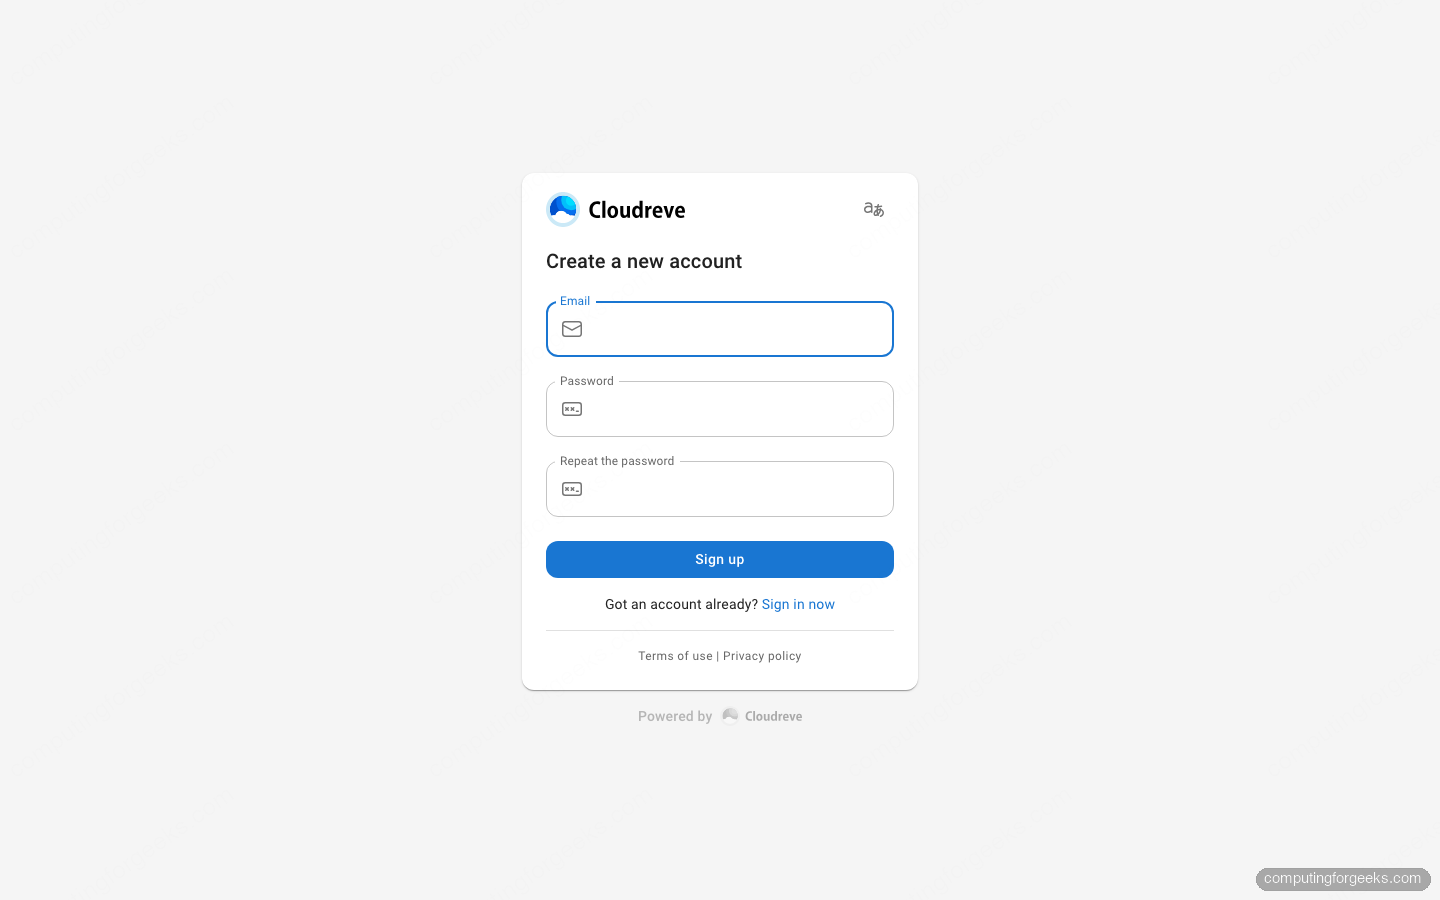
After submitting the form you get a green Sign up successful toast and are redirected to the sign in screen. The sign in flow is two steps: enter your email, click Next, then enter your password.
You can verify the user was inserted by querying the PostgreSQL container directly.
docker exec postgresql psql -U cloudreve -d cloudreve \
  -c "SELECT id, email, nick, status FROM users;"
The first row should show your email with status set to active. If signups need to be locked down after this point (which is what you want on any server reachable from the internet), open the admin panel, navigate to Settings → Login and registration, and disable public registration.
Step 6: Tour the Cloudreve dashboard
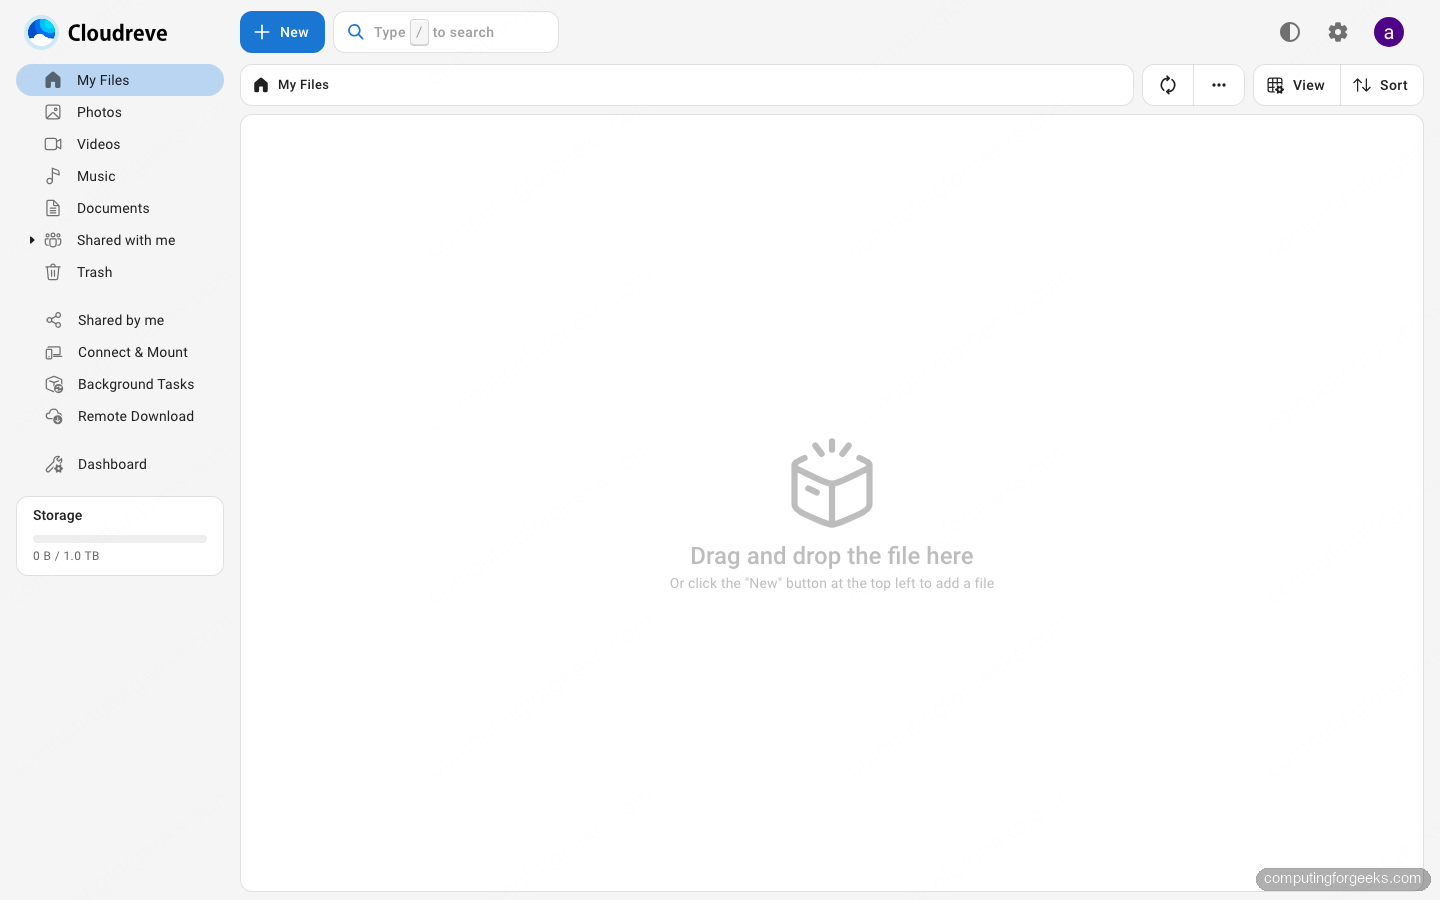
After signing in, you land on the file browser. The left sidebar exposes virtual folders (My Files, Photos, Videos, Music, Documents), the trash, sharing, mounted remote backends, and remote downloads. The header has the global + New button and a search bar.
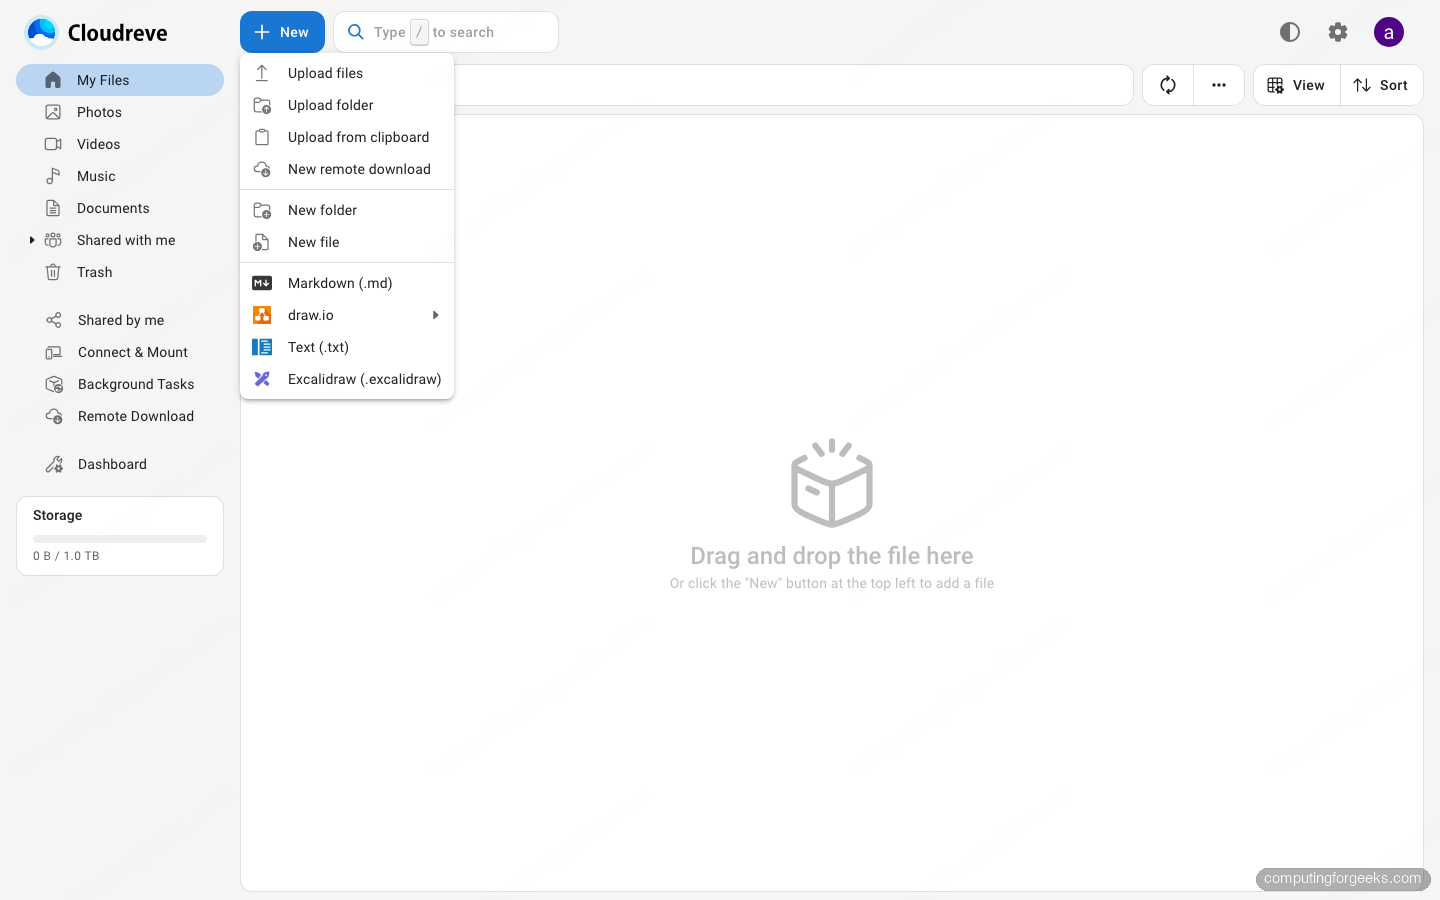
The + New button is the entry point for everything you can put into Cloudreve: file uploads, folder uploads, paste from clipboard, Aria2 or qBittorrent remote downloads, new folders, and new files in the bundled in browser editors (Markdown, draw.io, plain text, Excalidraw).
Click the Dashboard entry in the sidebar to enter the admin panel. The first thing Cloudreve does on a fresh install is prompt you to confirm the site URL. Set it to whatever your reverse proxy will serve (for now, http://YOUR_SERVER_IP:5212; once you put Caddy or Nginx in front, change it to https://your.domain).
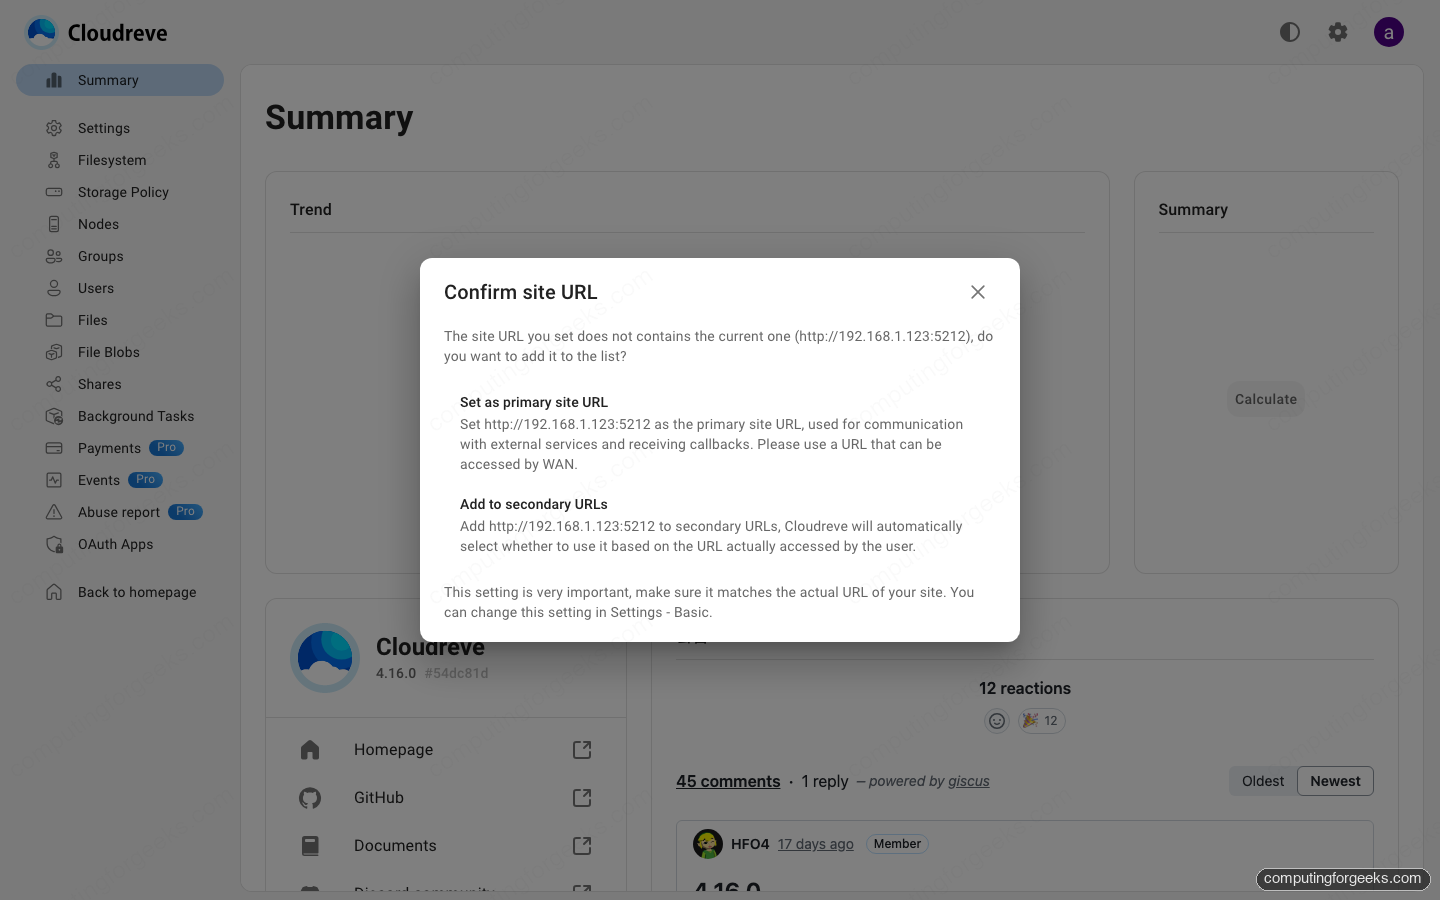
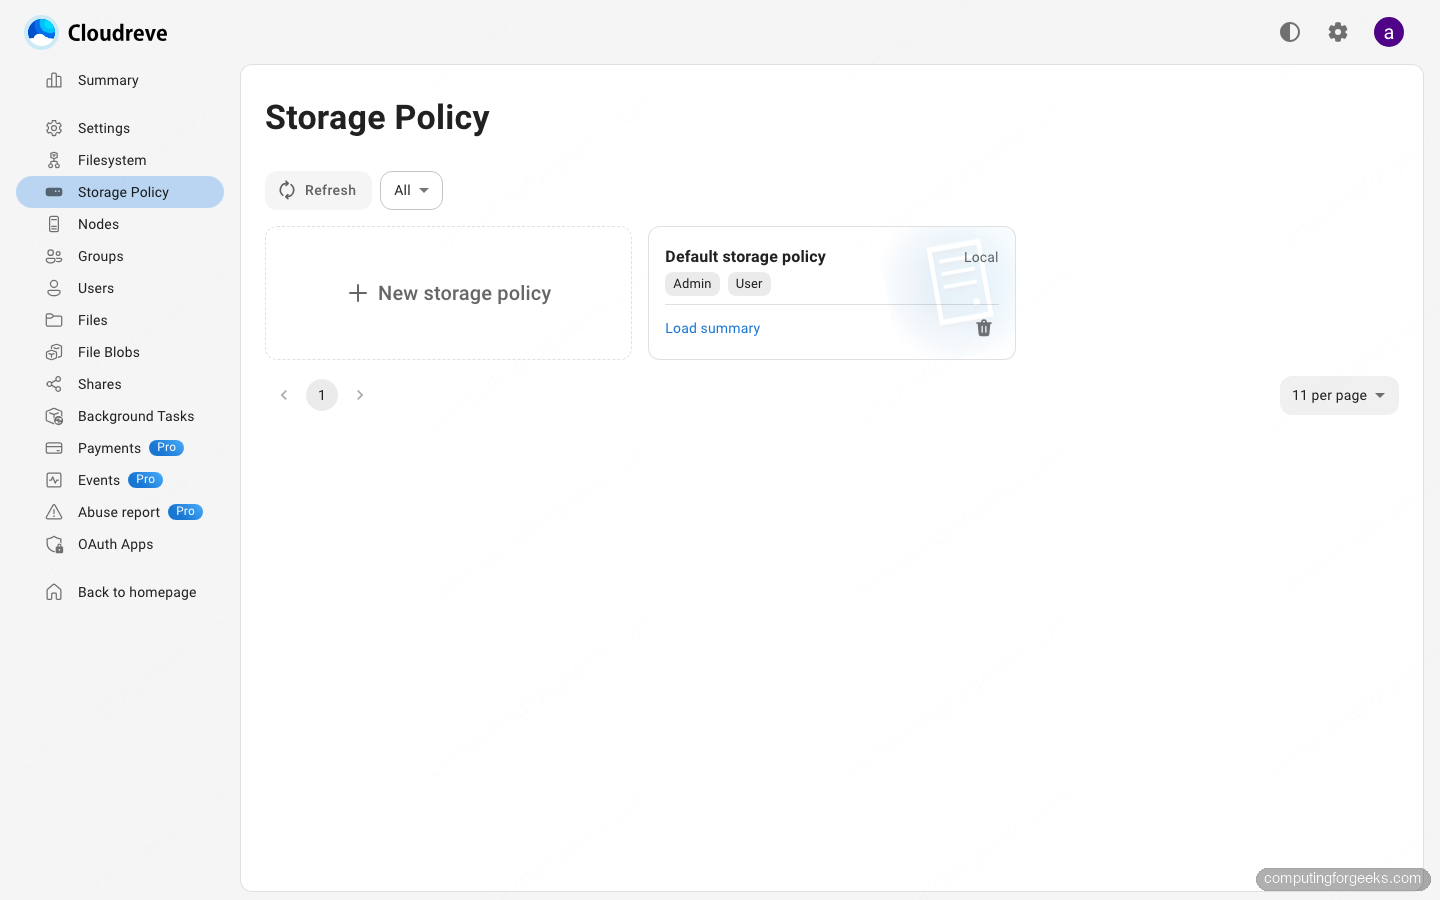
The admin sidebar lists every subsystem you will touch over the life of a Cloudreve deployment: Settings, Filesystem, Storage Policy, Nodes (for slave nodes), Groups, Users, Files, File Blobs, Shares, Background Tasks, OAuth Apps, plus four Pro only entries (Payments, Events, Abuse report, and OAuth Apps).
The Storage Policy page is where the ten storage backends actually live. A fresh install has one Default storage policy bound to the Local filesystem and assigned to both the Admin and User groups.
Step 7: Open the firewall ports
If UFW or nftables is enabled (default on most cloud images), allow the Cloudreve ports.
# Ubuntu (ufw)
sudo ufw allow 5212/tcp comment 'Cloudreve web UI'
sudo ufw allow 6888/tcp comment 'Cloudreve Aria2 BT'
sudo ufw allow 6888/udp comment 'Cloudreve Aria2 BT'
sudo ufw reload

# Debian 13 (nftables)
sudo nft add rule inet filter input tcp dport 5212 accept
sudo nft add rule inet filter input tcp dport 6888 accept
sudo nft add rule inet filter input udp dport 6888 accept
If Cloudreve will sit behind a reverse proxy (recommended on any public host), only port 443 needs to face the internet; 5212 can stay bound to 127.0.0.1. Change the ports: mapping in docker-compose.yml to 127.0.0.1:5212:5212 and recreate the container.
Production notes
Put it behind a reverse proxy with TLS
Never expose Cloudreve directly on port 5212 on the public internet. Front it with Caddy (one line site block, automatic Let’s Encrypt) or Nginx. A minimal Caddyfile reads:
files.example.com {
    reverse_proxy 127.0.0.1:5212
    encode zstd gzip
    request_body {
        max_size 10GB
    }
}
Bump max_size to whatever your largest expected upload is. After the proxy is live, update the primary site URL inside Cloudreve (Dashboard → Settings → Basic) to the HTTPS URL so share links and email callbacks point to the right host.
Switch off trust authentication on PostgreSQL
The upstream compose file sets POSTGRES_HOST_AUTH_METHOD=trust on the PostgreSQL container. That is fine for a single host lab because the database port is not exposed outside the Docker network, but it is not what you want long term. Replace it with a real password:
# In docker-compose.yml, postgresql.environment:
- POSTGRES_PASSWORD=use_a_strong_password_here

# Then in cloudreve.environment, add:
- CR_CONF_Database.Password=use_a_strong_password_here
Recreate the stack with docker compose down && docker compose up -d. The Cloudreve container reads the new env var at boot and updates conf.ini.
Back up three things
- The PostgreSQL database (
docker exec postgresql pg_dump -U cloudreve cloudreve) - The
backend_datavolume (holdsconf.ini, the avatar cache, and the local storage policy uploads) - The remote object store, if you have moved off the Local storage policy
The PostgreSQL dump alone is not enough; without the backend_data volume you lose the master encryption key (if file encryption is enabled) and the local uploads.
Pin the image tag for reproducible upgrades
The upstream compose uses cloudreve/cloudreve:v4, a moving tag that follows the latest 4.x release. For a production deployment, pin to a specific patch version (cloudreve/cloudreve:4.16.0) so a docker compose pull on a different day does not silently roll the database forward. Watch the Cloudreve release page for new tags and read the changelog before bumping.
What’s next
The Local storage policy works for a homelab. For real deployments, the next steps are wiring an S3 compatible bucket (MinIO, Cloudflare R2, AWS S3, Backblaze B2) so uploads survive a host rebuild, putting Cloudreve behind Caddy or Nginx with a real TLS certificate, and enabling the bundled WebDAV endpoint for macOS Finder, Windows Explorer, and rclone mounts. Those guides ship next in this series.