Fedora ships with Podman as its default container runtime, and for plenty of workloads Podman is enough. The moment you need Docker Compose beyond toy stacks, BuildKit for advanced image builds, Docker Swarm, or full Docker API compatibility for your CI pipelines, Docker CE is the cleaner choice.
This guide installs Docker CE from Docker’s official Fedora repository, then puts it through a real workout: hello-world, pulling images from Docker Hub, building your own image with a multi-stage Dockerfile, a Compose stack with Nginx and Redis, Docker networks and volumes deep dives, daemon tuning via /etc/docker/daemon.json, SELinux bind-mount labelling, rootless Docker, security hardening with capability drops and image scanning, NVIDIA GPU support, plus upgrade and uninstall paths. Every command was run on a clean Fedora 44 box. The same commands work on Fedora 43 and 42 because the Docker CE repo is shared across the three current Fedora releases.
Prerequisites
You need a running Fedora 44, 43, or 42 system (Workstation, Server, or Cloud Edition all work) with sudo access and roughly 2 GB free in /var/lib/docker for the initial install plus a few images. SELinux can stay in enforcing mode, which is the default. The Docker packages ship with the right policies, so do not disable SELinux for this. A working internet connection is required for the Docker repo plus image pulls from Docker Hub.
Step 1: Set reusable shell variables
Several commands reference your username and the Compose test directory. Export them once so you only edit a single block:
export DOCKER_USER="$USER"
export COMPOSE_DIR="$HOME/compose-test"
export DOCKER_REPO_URL="https://download.docker.com/linux/fedora/docker-ce.repo" #https://docs.docker.com/engine/install/fedora/
Confirm the variables hold:
echo "User:  ${DOCKER_USER}"
echo "Stack: ${COMPOSE_DIR}"
echo "Repo:  ${DOCKER_REPO_URL}"
Step 2: Remove conflicting packages
Older Docker packages from third-party COPRs or earlier installs can collide with Docker CE. Clean them up before adding the Docker repo:
sudo dnf remove -y docker docker-client docker-client-latest docker-common \
  docker-latest docker-latest-logrotate docker-logrotate docker-selinux \
  docker-engine-selinux docker-engine
On a fresh Fedora install, DNF reports each package as already absent and exits cleanly:
No packages to remove for argument: docker-selinux
No packages to remove for argument: docker-engine-selinux
No packages to remove for argument: docker-engine

Nothing to do.
Fedora also ships a distro-packaged moby-engine in the default repos. It is a Docker-compatible runtime maintained by the Fedora project. If you previously installed it, remove it too so Docker CE is the only daemon on the box:
sudo dnf remove -y moby-engine moby-cli moby-buildx moby-compose moby-containerd moby-runc 2>/dev/null || trueStep 3: Add the Docker CE repository
Install the DNF plugins package so the config-manager subcommand is available:
sudo dnf install -y dnf-plugins-coreAdd the Docker CE repository. Fedora 44 and 43 ship DNF5, which uses addrepo --from-repofile=:
sudo dnf config-manager addrepo --from-repofile="${DOCKER_REPO_URL}"If your machine is still on Fedora 42 with DNF4, swap the syntax for --add-repo. Same repo file, different flag spelling:
sudo dnf config-manager --add-repo "${DOCKER_REPO_URL}"Verify the repo is registered. The docker-ce-stable id should appear next to the Fedora base repos:
sudo dnf repolistThe output lists the Docker repo alongside the Fedora base repos:
repo id               repo name
docker-ce-stable      Docker CE Stable - x86_64
fedora                Fedora 44 - x86_64
fedora-cisco-openh264 Fedora 44 openh264 (From Cisco) - x86_64
updates               Fedora 44 - x86_64 - Updates
Step 4: Install Docker CE on Fedora
Install the engine, CLI, containerd, BuildKit plugin, and the Compose v2 plugin in one transaction:
sudo dnf install -y docker-ce docker-ce-cli containerd.io \
  docker-buildx-plugin docker-compose-plugin
DNF resolves the dependency tree, pulls roughly 100 MiB of packages, and imports Docker’s GPG signing key on first install:
Installing:
 containerd.io             x86_64  0:2.2.3-1.fc44   docker-ce-stable
 docker-buildx-plugin      x86_64  0:0.34.1-1.fc44  docker-ce-stable
 docker-ce                 x86_64  3:29.5.2-1.fc44  docker-ce-stable
 docker-ce-cli             x86_64  1:29.5.2-1.fc44  docker-ce-stable
 docker-compose-plugin     x86_64  0:5.1.4-1.fc44   docker-ce-stable
Installing weak dependencies:
 docker-ce-rootless-extras x86_64  0:29.5.2-1.fc44  docker-ce-stable

Transaction Summary:
 Installing: 9 packages

Total size of inbound packages is 100 MiB.
After this operation, 379 MiB extra will be used.

Importing OpenPGP key 0x621E9F35:
 UserID     : "Docker Release (CE rpm) <[email protected]>"
 Fingerprint: 060A61C51B558A7F742B77AAC52FEB6B621E9F35
 From       : https://download.docker.com/linux/fedora/gpg
The key was successfully imported.

Complete!
Step 5: Start and enable Docker
Enable the Docker service so it survives reboots and start it now:
sudo systemctl enable --now dockerConfirm the daemon is running:
sudo systemctl status docker --no-pagerThe service should report active (running) with the docker.socket trigger:
● docker.service - Docker Application Container Engine
     Loaded: loaded (/usr/lib/systemd/system/docker.service; enabled; preset: disabled)
    Drop-In: /usr/lib/systemd/system/service.d
             └─10-timeout-abort.conf
     Active: active (running) since Wed 2026-05-20 22:03:39 UTC; 17ms ago
TriggeredBy: ● docker.socket
       Docs: https://docs.docker.com
   Main PID: 8394 (dockerd)
      Tasks: 10
     Memory: 29.1M
     CGroup: /system.slice/docker.service
             └─8394 /usr/bin/dockerd -H fd:// --containerd=/run/containerd/containerd.sock
Step 6: Verify the install
Check the engine, CLI, Compose plugin, and BuildKit versions:
sudo docker --version
sudo docker compose version
sudo docker buildx version
You should see all three versions printed back:
Docker version 29.5.2, build 79eb04c
Docker Compose version v5.1.4
github.com/docker/buildx v0.34.1 3e73561e39785683b31b05eeab1ef645be44ca42
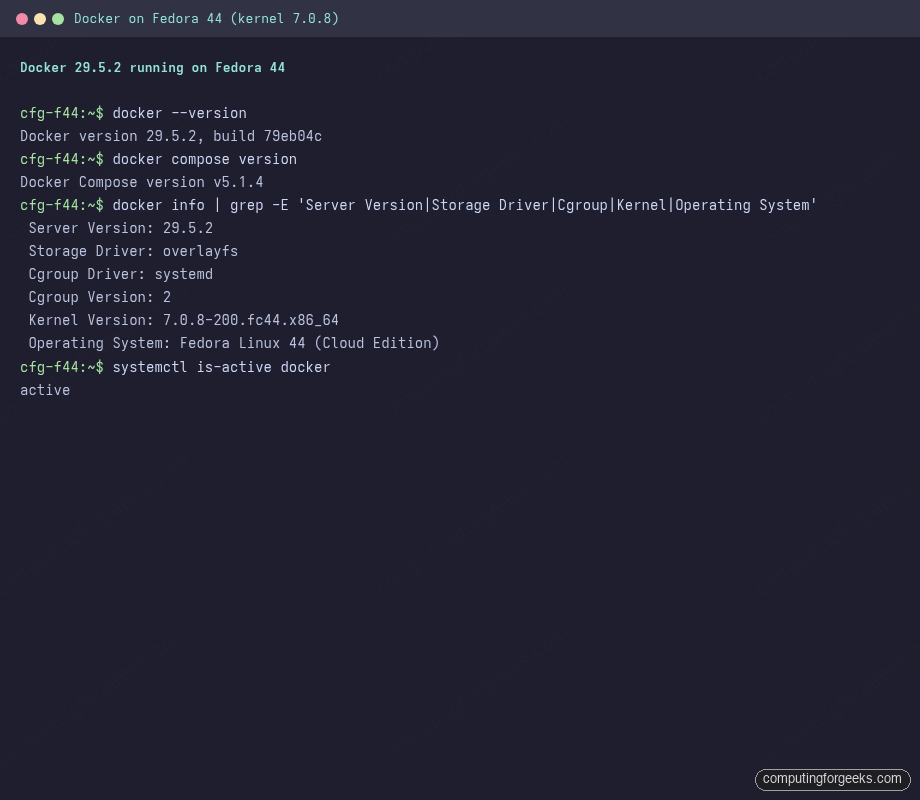
Pull the key runtime details out of docker info to confirm storage, cgroup, and kernel are wired correctly:
sudo docker info | grep -E 'Server Version|Storage Driver|Cgroup Driver|Cgroup Version|Kernel Version|Operating System|Architecture'On the test box the trimmed output looks like this:
 Server Version: 29.5.2
 Storage Driver: overlayfs
 Cgroup Driver: systemd
 Cgroup Version: 2
 Kernel Version: 7.0.8-200.fc44.x86_64
 Operating System: Fedora Linux 44 (Cloud Edition)
 Architecture: x86_64
The overlayfs storage driver replaced the older overlay2 default in Docker 25 and is faster on modern kernels. Cgroup v2 has been the Fedora default since Fedora 31, and Docker uses it cleanly with no extra configuration.
Here is the verification output captured on the test box, with the engine version, storage driver, cgroup driver, and kernel all confirmed in one glance:
Step 7: Run the hello-world container
The sanity check pulls a tiny image from Docker Hub and runs it. If networking, the daemon, and SELinux are all sane, the message prints:
sudo docker run --rm hello-worldThe expected output (after the pull) ends with the Docker hello banner:
Unable to find image 'hello-world:latest' locally
latest: Pulling from library/hello-world
4f55086f7dd0: Pull complete
Digest: sha256:0e760fdfbc48ba8041e7c6db999bb40bfca508b4be580ac75d32c4e29d202ce1
Status: Downloaded newer image for hello-world:latest

Hello from Docker!
This message shows that your installation appears to be working correctly.
Step 8: Run Docker as a non-root user
Typing sudo in front of every Docker command gets old fast. Add yourself to the docker group so the CLI can talk to the daemon socket directly:
sudo usermod -aG docker "${DOCKER_USER}"Log out and back in (or run newgrp docker) so the new group membership takes effect for your shell. Confirm:
groupsThe docker entry should be present at the end of the list:
jmutai adm wheel systemd-journal dockerFrom here on, the same commands run without sudo:
docker run --rm hello-worldOne thing to be honest about: docker group membership is root-equivalent. Anyone in the group can mount the host filesystem inside a privileged container and escape to root. On shared machines, prefer rootless Docker (Step 15 below) or stick with Podman, which runs rootless by default.
Step 9: Pull, search, and inspect images
Docker images live in registries. The default is Docker Hub, which hosts official images for almost every major project. Pull a current image and tag it locally:
docker pull nginx:alpineThe pull reports each layer as it downloads, then prints the final image digest:
alpine: Pulling from library/nginx
9824c27679d3: Pull complete
6e8b1c1d4e0c: Pull complete
Digest: sha256:e0a17e6e9e1abf3c81b3d9d4dc69bbe07a3b89df4f0a51b3f7c0a1d9b8f3b6c4
Status: Downloaded newer image for nginx:alpine
docker.io/library/nginx:alpine
List local images, with their tags and on-disk size:
docker imagesThe output shows what is cached locally:
REPOSITORY    TAG       IMAGE ID       CREATED        SIZE
nginx         alpine    f8a6f0ccfeae   3 days ago     49.6MB
hello-world   latest    7e5a4c3d0d11   2 months ago   18.3kB
Search Docker Hub from the CLI (the result list is sorted by stars):
docker search --limit 5 postgresYou get the official upstream image plus the most-starred third-party builds:
NAME                       DESCRIPTION                                STARS     OFFICIAL
postgres                   The PostgreSQL object-relational databa...   14122     [OK]
bitnami/postgresql         Bitnami container image for PostgreSQL        285
postgis/postgis            PostGIS spatial database extension for ...   1247
timescale/timescaledb      TimescaleDB extension for PostgreSQL          218
postgrest/postgrest        PostgREST builds a REST API for any...        92
Inspect an image to see its config, environment variables, exposed ports, and entrypoint. This is the fastest way to understand what an image actually does before you run it:
docker image inspect nginx:alpine --format '{{json .Config}}' | python3 -m json.tool | head -30For images you build yourself or want to share across machines, push them to a registry. Docker Hub is the default; sign in once and the credential is saved under ~/.docker/config.json:
docker loginTag a local image with your Hub namespace and push it. Replace jmutai with your Docker Hub username:
docker tag nginx:alpine jmutai/nginx-edge:1.0
docker push jmutai/nginx-edge:1.0
If you want a private registry on your own infrastructure (single tarball install, no external dependency), the private Docker Registry guide walks through it end-to-end. For corporate setups that need RBAC, image scanning, and replication, look at Harbor or Sonatype Nexus.
Prune dangling images that build up after rebuilds so they do not eat disk:
docker image pruneFor a full sweep that also removes stopped containers, unused networks, and the build cache, use:
docker system prune -a --volumesThe -a flag removes any image with no running container, not just dangling ones. Skip --volumes if you want to keep named volume data.
Step 10: Build your own image with a Dockerfile
Pulling other people’s images covers a lot of ground. Building your own is what makes Docker useful for shipping software. Set up a tiny Python web app and a multi-stage Dockerfile to get the full BuildKit flow:
mkdir -p ~/build-test/app && cd ~/build-testCreate a minimal Flask app:
vi app/app.pyPaste the following and save:
from flask import Flask
import os, platform

app = Flask(__name__)

@app.route("/")
def home():
    return {
        "service": "cfg-demo",
        "host":    platform.node(),
        "python":  platform.python_version(),
        "env":     os.environ.get("APP_ENV", "dev"),
    }

if __name__ == "__main__":
    app.run(host="0.0.0.0", port=5000)
Pin the dependency:
echo 'flask==3.0.3' > app/requirements.txtNow write a multi-stage Dockerfile. Stage 1 installs build dependencies and Python packages into a virtualenv; stage 2 copies just the virtualenv and the app code into a minimal runtime image. The final image is much smaller and ships fewer attack surfaces:
vi Dockerfile# syntax=docker/dockerfile:1.10
FROM python:3.13-slim AS build
WORKDIR /app
COPY app/requirements.txt .
RUN python -m venv /venv \
&& /venv/bin/pip install --no-cache-dir -r requirements.txt
FROM python:3.13-slim AS runtime
ENV PATH="/venv/bin:$PATH" \
PYTHONDONTWRITEBYTECODE=1 \
PYTHONUNBUFFERED=1 \
APP_ENV=production
RUN useradd -r -u 1001 app
WORKDIR /app
COPY --from=build /venv /venv
COPY app/ ./
USER app
EXPOSE 5000
HEALTHCHECK --interval=30s --timeout=3s --retries=3 \
CMD python -c "import urllib.request; urllib.request.urlopen('http://127.0.0.1:5000/').read()" || exit 1
CMD ["python", "app.py"]The # syntax line at the top pins BuildKit to a specific Dockerfile frontend, which unlocks heredoc syntax, build secrets, and SSH forwarding. Modern Docker uses BuildKit by default, so no further flags are needed:
docker build -t cfg-demo:1.0 .BuildKit shows a clean per-step summary with cache hits, transfer sizes, and total elapsed time:
 [+] Building 18.4s (12/12) FINISHED
 => [internal] load build definition from Dockerfile           0.0s
 => => transferring dockerfile: 612B                           0.0s
 => [internal] load metadata for docker.io/library/python:3...  0.6s
 => [build 1/4] FROM docker.io/library/python:3.13-slim@sha2... 4.1s
 => [build 2/4] WORKDIR /app                                   0.1s
 => [build 3/4] COPY app/requirements.txt .                    0.0s
 => [build 4/4] RUN python -m venv /venv && /venv/bin/pip ...  9.6s
 => [runtime 1/4] RUN useradd -r -u 1001 app                   0.4s
 => [runtime 2/4] WORKDIR /app                                 0.0s
 => [runtime 3/4] COPY --from=build /venv /venv                0.3s
 => [runtime 4/4] COPY app/ ./                                 0.0s
 => exporting to image                                         0.5s
 => => naming to docker.io/library/cfg-demo:1.0                0.0s
Run the built image and curl the endpoint:
docker run -d --name cfg-demo -p 5000:5000 cfg-demo:1.0
sleep 2
curl -s http://localhost:5000/ | python3 -m json.tool
The Flask app responds with the JSON payload it builds at request time:
{
    "service": "cfg-demo",
    "host":    "a3f2c1b0e4d5",
    "python":  "3.13.0",
    "env":     "production"
}
Inspect the built image’s history to see each layer and how multi-stage trimmed the final size:
docker image ls cfg-demo:1.0 --format 'table {{.Repository}}\t{{.Tag}}\t{{.Size}}'
docker image history cfg-demo:1.0
The runtime image weighs roughly 130 MB versus the ~900 MB you would get from a single-stage build. Clean up the test container before moving on:
docker rm -f cfg-demoFor multi-architecture builds (amd64 + arm64 in the same image manifest), use docker buildx build --platform linux/amd64,linux/arm64. BuildKit will set up a QEMU-emulated builder on first run.
Step 11: Run a Compose stack on Fedora
Multi-container apps are where Docker earns its keep over running individual containers. Build a tiny stack with Nginx fronting Redis:
mkdir -p "${COMPOSE_DIR}" && cd "${COMPOSE_DIR}"Create the Compose file:
vi docker-compose.ymlPaste the following service definitions and save:
services:
  web:
    image: nginx:alpine
    ports:
      - "8080:80"
    depends_on:
      - cache
  cache:
    image: redis:alpine
Bring the stack up in detached mode:
docker compose up -dCompose creates the network, builds the dependency order, and starts both containers:
 Network compose-test_default     Created
 Container compose-test-cache-1   Started
 Container compose-test-web-1     Started
Both services should report Up with the published port mapped:
docker compose psThe status table shows both services Up and the host-to-container port mapping on web:
NAME                   IMAGE          COMMAND                  SERVICE   CREATED         STATUS         PORTS
compose-test-cache-1   redis:alpine   "docker-entrypoint.s…"   cache     6 seconds ago   Up 3 seconds   6379/tcp
compose-test-web-1     nginx:alpine   "/docker-entrypoint.…"   web       4 seconds ago   Up 3 seconds   0.0.0.0:8080->80/tcp, [::]:8080->80/tcp
Curl the Nginx default page to prove the network path works end-to-end:
curl -s http://localhost:8080 | head -5The Nginx default page comes back through the published port:
<!DOCTYPE html>
<html>
<head>
<title>Welcome to nginx!</title>
<style>
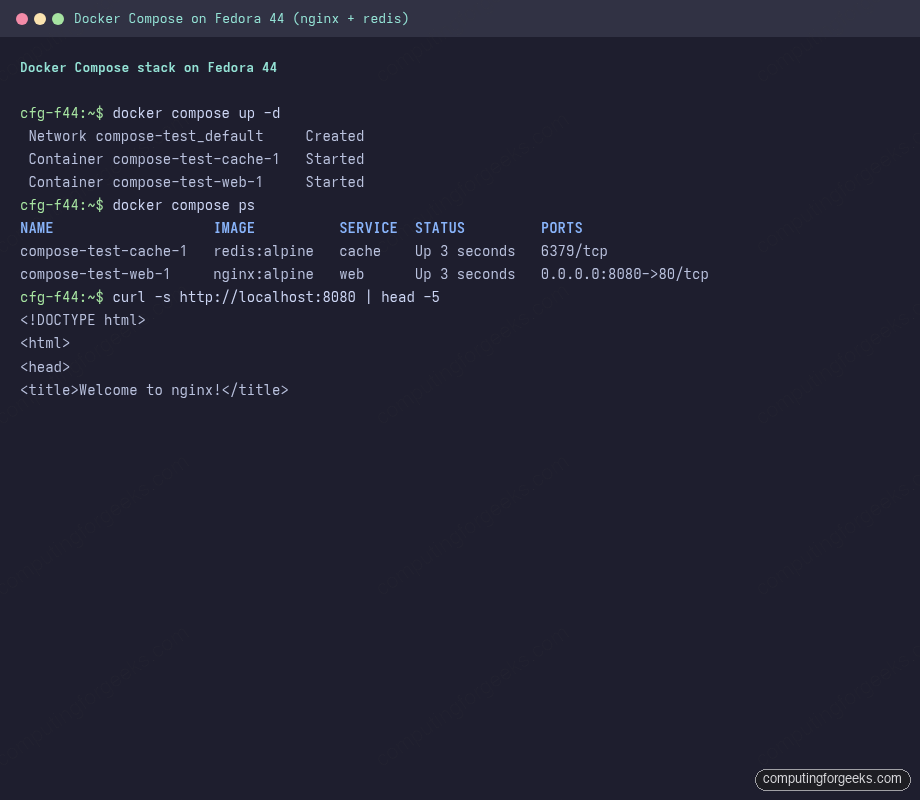
The stack output shows both services starting, the port mapping on web, and the live curl response from the Nginx default page:
Tear the stack down when you are done. The network and containers are removed; named volumes survive unless you add -v:
docker compose downStep 12: Docker networks deep-dive
Every container attaches to a network, and the network type decides how containers reach each other, the host, and the outside world. Docker ships several drivers by default. List what is currently defined:
docker network lsA clean install shows three defaults plus any Compose-generated networks:
NETWORK ID     NAME      DRIVER    SCOPE
3a4b5c6d7e8f   bridge    bridge    local
1a2b3c4d5e6f   host      host      local
9f8e7d6c5b4a   none      null      local
The default bridge network gives every new container an IP on 172.17.0.0/16 with NAT to the host. It works but lacks container-name DNS, so two containers can only find each other by IP. Create a user-defined bridge to get name-based service discovery:
docker network create --driver bridge cfg-netAttach two containers to the new network and prove they can reach each other by name:
docker run -d --network cfg-net --name db redis:alpine
docker run --rm --network cfg-net alpine sh -c 'apk add -q bind-tools && nslookup db'
The DNS lookup resolves db to the Redis container’s IP without any /etc/hosts edits:
Server:         127.0.0.11
Address:        127.0.0.11:53

Non-authoritative answer:
Name:   db
Address: 172.20.0.2
Inspect a network to see its subnet, gateway, and attached containers:
docker network inspect cfg-net --format '{{.IPAM.Config}} {{range .Containers}} {{.Name}}={{.IPv4Address}}{{end}}'Use --network host when a container needs to bind a port on the host without NAT (low-latency network apps, host-level monitoring agents). The container shares the host network stack entirely:
docker run --rm --network host alpine sh -c 'ip -4 addr show eth0'For containers that need to appear as a real device on the LAN with their own MAC address (a self-hosted DNS server you want at 192.168.1.50, for example), use the macvlan driver. Replace eth0 with your physical interface and the subnet with your real LAN range:
docker network create -d macvlan \
  --subnet=192.168.1.0/24 \
  --gateway=192.168.1.1 \
  -o parent=eth0 lan-net
Containers on this network bypass the host firewall entirely (the host cannot reach them on its own loopback, which is a macvlan quirk). For most workloads, stick with user-defined bridges. Clean up the test network when done:
docker rm -f db
docker network rm cfg-net
The driver options compared, so you can pick the right one quickly:
| Driver | Best for | Container-name DNS | Visible on LAN |
|---|---|---|---|
bridge (default) | Quick one-off containers | No | No (NAT) |
| User-defined bridge | Most multi-container apps | Yes | No (NAT) |
host | Latency-sensitive net apps | N/A (host network) | Yes |
macvlan | Containers as real LAN devices | External DNS only | Yes (own MAC/IP) |
none | Air-gapped jobs | No | No |
overlay | Swarm cross-host networking | Yes | Cluster-internal |
Step 13: Docker volumes vs bind mounts
Containers are ephemeral; anything written inside their filesystem dies with them. Persistent data lives in volumes or bind mounts. The two look similar but behave differently in real ops.
Named volumes are managed by Docker, stored under /var/lib/docker/volumes/, and survive container restarts and removals. Create one and use it:
docker volume create pgdata
docker run -d --name pg \
  -e POSTGRES_PASSWORD=ChangeMe2026 \
  -v pgdata:/var/lib/postgresql/data \
  postgres:18-alpine
List volumes and inspect the one you just created. The Mountpoint is the on-disk path Docker manages for you:
docker volume ls
docker volume inspect pgdata --format '{{.Mountpoint}}'
The mountpoint is where Postgres writes its data:
DRIVER    VOLUME NAME
local     pgdata
/var/lib/docker/volumes/pgdata/_data
Stop and remove the container; the volume stays put with all its data intact:
docker rm -f pg
docker volume ls
Start a fresh container against the same volume and the database picks up exactly where it left off. Named volumes are the right answer for any application data: databases, message queues, app caches, anything you would back up.
Bind mounts map a host directory directly into the container. Use them for source code in development, configs you want to edit on the host, or static assets:
mkdir -p ~/site && echo '<h1>Hello from the host</h1>' > ~/site/index.html
docker run --rm -p 8081:80 -v ~/site:/usr/share/nginx/html:ro,Z nginx:alpine
The :ro flag makes the mount read-only inside the container (the container cannot modify your host files). The Z flag is the SELinux private label covered in detail in Step 14. Test the page:
curl -s http://localhost:8081Nginx serves the file you wrote on the host:
<h1>Hello from the host</h1>Back up a named volume by streaming it through tar inside a throwaway helper container. Replace pgdata with your volume name:
docker run --rm \
  -v pgdata:/data:ro \
  -v "$(pwd)":/backup \
  alpine tar czf /backup/pgdata-$(date +%F).tgz -C /data .
Restore goes the other way: a fresh volume + tar extract from the backup tarball into /data:
docker volume create pgdata-restored
docker run --rm \
  -v pgdata-restored:/data \
  -v "$(pwd)":/backup \
  alpine sh -c "cd /data && tar xzf /backup/pgdata-$(date +%F).tgz"
Prune unused volumes to reclaim space. Be careful: this deletes any volume not attached to a running or stopped container:
docker volume pruneWhen to use which:
| Use case | Pick |
|---|---|
| Database data, queue state, app caches | Named volume |
| Source code in dev (live-reload) | Bind mount |
| Config files you edit on the host | Bind mount |
| Sharing data between containers | Named volume |
| Production data on a separate disk | Named volume with --driver-opts or bind mount to /mnt/data |
| One-off ad-hoc data | Anonymous volume (Docker creates and forgets) |
Step 14: SELinux and bind mounts on Fedora
Fedora runs SELinux in enforcing mode by default and Docker CE is shipped with policies that work with that. Confirm SELinux state:
getenforceYou should see Enforcing on every default Fedora install:
EnforcingPlain Docker commands work as-is. The friction shows up with bind mounts: a host directory mounted into a container may not have the right SELinux label for the container process to read or write. Use the :z (shared) or :Z (private) volume flag and Docker relabels the directory on the fly:
mkdir -p ~/selinux-test
echo 'hello from host' > ~/selinux-test/test.txt
docker run --rm -v ~/selinux-test:/data:Z alpine cat /data/test.txt
The container reads the relabelled file without an AVC denial:
hello from hostUse :z (lowercase) when several containers need to share the directory. Use :Z (uppercase) when only this one container should access it. Never disable SELinux to “make Docker work”. If you hit a real AVC denial, check the audit log for what was blocked:
sudo ausearch -m AVC,USER_AVC -ts recent | tailFor deeper SELinux work (custom modules, policy debugging, semanage usage), the dedicated SELinux survival guide for Fedora covers it end-to-end without ever turning enforcing off.
Step 15: Optional – run Docker rootless
The standard Docker setup runs the daemon as root. For desktops and shared hosts, rootless mode runs the daemon under your user account with no privileged group. The docker-ce-rootless-extras package is already installed as part of Step 4:
which dockerd-rootless-setuptool.sh
rpm -q docker-ce-rootless-extras
Both the setup tool and the rootless-extras package are in place:
/usr/bin/dockerd-rootless-setuptool.sh
docker-ce-rootless-extras-29.5.2-1.fc44.x86_64
Stop the system daemon first so the two do not fight over the same socket, then run the rootless setup as the unprivileged user:
sudo systemctl disable --now docker.service docker.socket
dockerd-rootless-setuptool.sh install
The script enables a user-level systemd unit and prints the environment variables to add to your shell rc:
export PATH=/usr/bin:$PATH
export DOCKER_HOST=unix:///run/user/1000/docker.sock
Confirm the rootless daemon is up under your UID:
systemctl --user status docker --no-pager
docker context ls
Rootless mode unlocks the same Docker CLI for unprivileged users, but trades some capabilities for security. The constraint table:
| Capability | Rootful Docker | Rootless Docker |
|---|---|---|
| Bind to ports below 1024 | Yes | Only with CAP_NET_BIND_SERVICE on rootlesskit |
--network host | Yes | No (uses slirp4netns by default) |
| Overlay storage performance | Native | Slower with fuse-overlayfs, native with kernel 6.5+ idmap |
| Privileged containers | Yes | Inside the user namespace only |
| Cgroup v2 controllers | All | Limited to delegated controllers |
For a workstation or a per-user CI runner, the tradeoff is usually worth it. For production servers, rootful Docker with the security hardening from Step 18 below is the more common choice.
Step 16: Tune the Docker daemon
By default, container logs grow without bound. On a long-running dev box, one chatty container can fill /var/lib/docker overnight. Set up log rotation and pick a private address pool that will not clash with your LAN.
Open the daemon config file (creates it if missing):
sudo mkdir -p /etc/docker
sudo vi /etc/docker/daemon.json
Add the following JSON. Adjust the address pool base if 172.20.x is already routed somewhere on your network. The optional registry-mirrors key speeds up repeat pulls when you control a local registry proxy:
{
  "log-driver": "json-file",
  "log-opts": {
    "max-size": "10m",
    "max-file": "3"
  },
  "default-address-pools": [
    {"base": "172.20.0.0/16", "size": 24}
  ],
  "live-restore": true,
  "default-runtime": "runc"
}
The live-restore flag keeps containers running while the daemon restarts, which matters during upgrades. Restart Docker for the changes to load:
sudo systemctl restart dockerConfirm the daemon picked up the new values:
sudo docker info | grep -E 'Logging Driver|Default Address Pools|Live Restore' -A 2The grepped slice reflects the new daemon settings:
 Logging Driver: json-file
 Cgroup Driver: systemd
 Cgroup Version: 2
--
 Default Address Pools:
   Base: 172.20.0.0/16, Size: 24
 Firewall Backend: iptables
--
 Live Restore Enabled: true
Other useful keys (add inside the same JSON object as needed):
| Key | Effect |
|---|---|
"data-root": "/var/data/docker" | Move image and container storage off the root filesystem |
"insecure-registries": ["192.168.1.50:5000"] | Allow plain-HTTP pulls from a private registry |
"registry-mirrors": ["https://mirror.example.com"] | Route public pulls through a caching proxy |
"userns-remap": "default" | Map container UID 0 to a non-root host UID (covered in Step 18) |
"max-concurrent-downloads": 10 | Parallel layer pulls (default 3) |
Step 17: Firewall and published ports
Docker manipulates iptables (or nftables via the iptables compat layer) directly for every published port. A container started with -p 8080:80 reaches the network without any manual firewall rule, because Docker punches the hole itself.
Fedora Cloud Edition ships without firewalld at all. Workstation and Server install it and run it by default. When firewalld is active and you want a non-Docker service on the host to reach a container, allow the port explicitly. For example, to expose port 8080 to other LAN hosts that ignore Docker’s iptables chains:
sudo firewall-cmd --permanent --add-port=8080/tcp
sudo firewall-cmd --reload
The full set of firewalld zone, service, and rich-rule recipes is covered in Configure firewalld on Fedora.
One Fedora gotcha: by default Docker’s iptables rules are inserted ahead of firewalld’s. That means a container published to 0.0.0.0 is reachable from any host that can route to the box, even when firewalld would have blocked it. Bind to 127.0.0.1 explicitly if you only want local access:
docker run -d -p 127.0.0.1:8080:80 nginx:alpineOr set "iptables": false in /etc/docker/daemon.json and manage rules with firewalld directly, but that breaks container-to-container DNS until you wire it back up by hand. The bind-to-localhost approach is simpler for single-host deployments.
Step 18: Security hardening checklist
Docker’s defaults prioritise ease of use over least privilege. A few flags on each docker run or stanzas in docker-compose.yml close the gap. None of these break normal applications; they only block escalation if a container is exploited.
Drop all Linux capabilities and re-add only what the workload actually needs. Most web apps only need NET_BIND_SERVICE if they bind to a low port:
docker run -d --name nginx-hardened \
  --cap-drop=ALL \
  --cap-add=NET_BIND_SERVICE \
  --security-opt=no-new-privileges:true \
  --read-only --tmpfs /var/cache/nginx --tmpfs /var/run \
  -p 8080:80 nginx:alpine
What each flag does:
| Flag | Effect |
|---|---|
--cap-drop=ALL --cap-add=<cap> | Container starts with zero kernel capabilities; whitelist only required ones |
--security-opt=no-new-privileges:true | Blocks setuid binaries from escalating, including sudo inside the container |
--read-only | Root filesystem mounted read-only; pair with --tmpfs for writable scratch paths |
--user 1000:1000 | Run the process as a non-root UID inside the container |
--pids-limit 100 | Limit number of processes the container can spawn (DoS protection) |
--memory 512m --cpus 1.0 | Cap memory and CPU so a runaway container cannot starve the host |
For multi-tenant hosts, enable user namespace remapping at the daemon level. Container UID 0 maps to a non-root host UID, so a root user inside the container is unprivileged on the host. Add to /etc/docker/daemon.json:
{
  "userns-remap": "default"
}
Restart Docker. The daemon creates a dockremap user and a 65,536-UID range mapped into /etc/subuid. Existing images and volumes need to be rebuilt because permissions inside them no longer match container root. Test on a fresh host before enabling in production.
Scan images for known CVEs before running them. Docker Scout ships built in and queries Docker’s vulnerability database:
docker scout quickview nginx:alpineThe summary lists critical / high / medium / low counts plus the base image recommendation:
  ✓ Image stored for indexing
  ✓ Indexed 24 packages

  Target          │  nginx:alpine                  │   0C   0H   0M   1L
    digest        │  d9f7e0c2a1b3                  │
For continuous scanning in CI, plug Scout, Trivy, or Grype into the pipeline so vulnerable layers never reach production. Enable Content Trust to require signed images on pull:
export DOCKER_CONTENT_TRUST=1
docker pull alpine:3.20
If Content Trust is on and an image is not signed, the pull is refused. This is the simplest defence against tag hijacks on public registries.
Last item on the security checklist: keep the daemon and the kernel patched. Docker CVEs are usually fixed within hours of disclosure. The Fedora security hardening guide covers wider system hardening (auditd, kernel sysctls, sudoers, SSH) that pairs well with container hardening.
Step 19: NVIDIA GPU support on Fedora
Running AI or video workloads in containers needs the host’s NVIDIA driver plus the NVIDIA Container Toolkit so the runtime can expose /dev/nvidia* devices into the container. Install the driver first via RPM Fusion’s akmod-nvidia package (the Fedora-native way that survives kernel upgrades). Confirm the driver is loaded:
nvidia-smiYou should see the driver version, CUDA version, and the attached GPU. With the host driver working, add the NVIDIA Container Toolkit repo:
curl -fsSL https://nvidia.github.io/libnvidia-container/stable/rpm/nvidia-container-toolkit.repo | \
  sudo tee /etc/yum.repos.d/nvidia-container-toolkit.repo
Install the toolkit:
sudo dnf install -y nvidia-container-toolkitWire the toolkit into the Docker daemon so the --gpus flag works:
sudo nvidia-ctk runtime configure --runtime=docker
sudo systemctl restart docker
Test by running nvidia-smi from inside a CUDA container:
docker run --rm --gpus all nvidia/cuda:12.6.0-base-ubuntu24.04 nvidia-smiThe container output should match the host’s nvidia-smi, with all attached GPUs visible. From here, any container that ships a CUDA-aware binary can use --gpus all (or --gpus '"device=0,1"' for specific cards). The Ollama on Fedora guide extends this for local LLM inference. For multi-GPU and MIG partitioning, NVIDIA’s container-toolkit docs cover the per-job flags.
For AMD GPUs, the equivalent is the ROCm container runtime; the Docker flags differ (--device=/dev/kfd --device=/dev/dri --group-add video) but the principle is the same: expose host devices into the container.
Step 20: Upgrade Docker CE
Docker ships a new minor every few weeks and a new major a couple of times a year. Stay current to keep CVE fixes and Compose/BuildKit features. The same dnf transaction that handles install also handles upgrade:
sudo dnf upgrade -y docker-ce docker-ce-cli containerd.io \
  docker-buildx-plugin docker-compose-plugin docker-ce-rootless-extras
If live-restore is enabled in daemon.json (Step 16), running containers stay up across the daemon restart. Otherwise the upgrade restarts the service and all containers go down briefly. Verify the new version after the upgrade:
docker --version
docker compose version
For environments where you need to pin a specific Docker version (compliance, validated stack), install dnf-plugin-versionlock and lock the packages:
sudo dnf install -y dnf-plugin-versionlock
sudo dnf versionlock add docker-ce-29.5.2 docker-ce-cli-29.5.2 containerd.io-2.2.3
Drop the lock when you are ready to upgrade:
sudo dnf versionlock delete docker-ce docker-ce-cli containerd.ioStep 21: Uninstall Docker completely
If you want to switch back to Podman or rebuild from scratch, remove the packages, the data directory, and the iptables rules Docker installed. Stop the daemon first:
sudo systemctl stop docker.service docker.socket containerdRemove the packages:
sudo dnf remove -y docker-ce docker-ce-cli containerd.io \
  docker-buildx-plugin docker-compose-plugin docker-ce-rootless-extras
Delete the data directories so all images, containers, volumes, and networks are gone. This is destructive; back up any volume data you care about first:
sudo rm -rf /var/lib/docker /var/lib/containerd /etc/dockerFlush any leftover iptables rules. Docker’s chains are DOCKER, DOCKER-ISOLATION-STAGE-1, DOCKER-ISOLATION-STAGE-2, and DOCKER-USER:
sudo iptables -t nat -F DOCKER 2>/dev/null
sudo iptables -t filter -F DOCKER 2>/dev/null
sudo iptables -t filter -F DOCKER-ISOLATION-STAGE-1 2>/dev/null
sudo iptables -t filter -F DOCKER-ISOLATION-STAGE-2 2>/dev/null
sudo iptables -t filter -F DOCKER-USER 2>/dev/null
sudo iptables -t filter -X DOCKER-USER 2>/dev/null
Remove the user from the docker group and the Docker CE repo file:
sudo gpasswd -d "${DOCKER_USER}" docker 2>/dev/null
sudo rm -f /etc/yum.repos.d/docker-ce.repo
A reboot at this point gives a clean slate. From here you can reinstall Docker fresh, switch to Podman, or hand the box off to another use.
Docker CE vs Moby Engine vs Podman
Three container runtimes can plausibly fill the Docker-shaped slot on a Fedora host. Pick by which constraint matters most:
| Aspect | Docker CE (this guide) | moby-engine (Fedora repo) | Podman (Fedora default) |
|---|---|---|---|
| Upstream | Docker, Inc. | Fedora project, tracks Moby | Red Hat / Fedora |
| Daemon model | Root daemon (rootless optional) | Root daemon | Daemonless, rootless by default |
| CLI | docker | docker | podman (with optional docker alias) |
| Compose | docker compose (v2, polished) | docker compose (older subset) | podman compose or podman-compose |
| Swarm | Yes | Yes (in theory) | No |
| BuildKit | Native | Native | Buildah underneath |
| Quadlet / systemd-native | No | No | Yes |
| SELinux integration | Good | Good | Excellent (RH origin) |
| Best for | Docker API parity, CI pipelines, Compose-heavy workloads | Distro purity (no Docker repo) | Rootless first, systemd integration, multi-tenant servers |
Podman or Docker on Fedora
Fedora’s default container runtime is Podman, and the two coexist without trouble on the same host. Podman runs rootless by default, integrates with systemd via Quadlet, and uses the OCI image format that Docker also speaks. Pick Podman when you want rootless first, no daemon, or want to ship containers as systemd units (see the Podman Quadlet guide).
Docker CE remains the better fit when your team already targets the Docker API, your CI scripts depend on the Docker CLI, you rely on BuildKit-only build features, or you orchestrate with Docker Swarm. For Compose specifically, Podman’s compose support is steadily catching up but Docker Compose v2 is still the more polished experience.
One pattern that works well on a developer workstation: keep Podman as the default for personal experiments and CI containers, and install Docker CE for the day-job stack that targets Docker API. The two never fight; they manage separate image stores and separate sockets.
Troubleshooting
Error: unrecognized arguments: –add-repo
You used the DNF4 syntax on a DNF5 host. Fedora 43 and 44 ship DNF5, which expects addrepo --from-repofile= as a subcommand (no leading dashes). Re-run the Step 3 command exactly as shown.
Error: permission denied while trying to connect to the Docker daemon socket
Your shell session does not have the docker group membership yet. Run groups to confirm. If docker is missing, run sudo usermod -aG docker "${DOCKER_USER}" and start a fresh login session (full logout, not just a new terminal tab). If you cannot log out right now, newgrp docker spawns a sub-shell with the new group active.
Container cannot read files from a bind-mounted host directory
SELinux blocked the access because the host directory has a label that container processes are not allowed to read. Add :z (shared between containers) or :Z (private to this container) to the volume flag. Step 14 shows the exact pattern. Do not disable SELinux as a fix.
Error: Pool overlaps with other one on this address space
The subnet Docker tried to allocate for a new network collides with another network (often a leftover Compose network from a previous run). List networks and remove the conflicting one:
docker network ls
docker network rm <stale-net-id>
If your LAN routes 172.17.0.0/16 or 172.20.0.0/16 elsewhere, set a non-conflicting default-address-pools in /etc/docker/daemon.json per Step 16.
Error: Cannot connect to the Docker daemon at unix:///var/run/docker.sock
The Docker service is not running. Check the unit and start it:
sudo systemctl status docker
sudo systemctl start docker
sudo journalctl -u docker -b --no-pager | tail -50
If the journal shows the service died on startup, the most common cause is a syntax error in /etc/docker/daemon.json. Validate the JSON:
sudo python3 -m json.tool /etc/docker/daemon.jsonDNS resolution fails inside containers
If docker run --rm alpine nslookup google.com times out, the container’s /etc/resolv.conf points at a stale or blocked resolver. The fix is to set dns explicitly in /etc/docker/daemon.json with a working public resolver:
{
  "dns": ["1.1.1.1", "9.9.9.9"]
}
Restart Docker, then re-test. If your host uses systemd-resolved, the loopback address 127.0.0.53 is filtered out for containers automatically, but Cloudflare or Quad9 always work as fallbacks.
Error: no space left on device
Docker fills /var/lib/docker faster than expected because image layers, build cache, and stopped containers all accumulate. Quick check:
docker system dfFree the obvious slack first:
docker system prune -a --volumes
docker builder prune -a
If the disk is still tight, move the data root to a bigger partition by setting "data-root": "/var/data/docker" in daemon.json and migrating the existing tree:
sudo systemctl stop docker
sudo rsync -aP /var/lib/docker/ /var/data/docker/
sudo mv /var/lib/docker /var/lib/docker.old
sudo systemctl start docker
BuildKit: failed to solve: rpc error: code = Unavailable
The BuildKit daemon lost its connection mid-build. Usually triggered by an OOM kill during a heavy RUN step (large compile, big Python wheel build). Check dmesg -T | tail -20 for “Out of memory: Killed process”. Either raise the host memory, add a swap file, or split the heavy step into smaller layers. Restart the build:
docker buildx prune -f
docker build -t myimage .
Container fails with: error mounting “…” to rootfs
Almost always a SELinux label mismatch on a bind mount that did not get :z or :Z. Re-run with the SELinux suffix per Step 14. If the source path does not exist on the host, Docker creates an empty directory automatically; that empty dir often is not what you intended. Always check the source path exists before mounting.
Containers cannot reach the internet after a host network change
Docker’s iptables rules are inserted when the daemon starts and reference the host’s primary interface. If you switched networks (laptop hop, VPN up/down, interface added) the rules can stale. The cleanest fix is to restart the daemon so the rules are rebuilt:
sudo systemctl restart dockerIf that does not help, restart NetworkManager too, then Docker:
sudo systemctl restart NetworkManager
sudo systemctl restart docker
Docker fails to start after a Fedora upgrade
Old Docker packages from the Fedora base repos sometimes survive a system upgrade and conflict with Docker CE. Re-run the Step 2 removal, then reinstall Docker CE from Step 4. Check the failing service with journalctl -u docker -b --no-pager | tail -50 for the specific error. A kernel update that drops the overlayfs module also breaks the storage driver; either reinstall the matching kernel-modules-extra or reboot to bring up the new kernel cleanly.
Compose v2 commands not recognised: docker compose: unknown command
You have Docker CE installed but missed the docker-compose-plugin package, or you are looking for the legacy docker-compose binary (v1, Python, end-of-lifed). Install the v2 plugin:
sudo dnf install -y docker-compose-plugin
docker compose version
Common Docker and Compose commands
A quick reference for the commands you will use day to day once Docker is up:
| Command | What it does |
|---|---|
docker ps | List running containers |
docker ps -a | List all containers, including stopped |
docker images | List local images |
docker pull <image> | Pull an image from the registry |
docker run <image> | Create and start a container |
docker exec -it <ctr> bash | Open an interactive shell in a running container |
docker logs -f <ctr> | Follow container logs |
docker inspect <ctr> | Full JSON state of a container or image |
docker stats | Live CPU / memory / network per container |
docker stop <ctr> | Stop a container gracefully |
docker rm <ctr> | Remove a stopped container |
docker rmi <image> | Remove an image |
docker network ls | List networks |
docker volume ls | List volumes |
docker system df | Disk used by images, containers, volumes, build cache |
docker system prune | Clean up stopped containers, dangling images, networks |
docker scout quickview <image> | Quick CVE summary for an image |
docker compose up -d | Start a Compose stack in the background |
docker compose ps | Show stack containers and ports |
docker compose logs -f | Tail logs across all services |
docker compose down | Stop and remove the stack |
docker compose down -v | Same, and also remove named volumes |
Where to go from here
Docker is now installed, secured, and tuned on Fedora 44 / 43 / 42. The next mile depends on what you are building:
For the full Compose workflow with files, volumes, overrides, and profiles, see Install and Use Docker Compose on Fedora. To run your own container registry on Fedora, follow Install and Use Docker Registry on Fedora. For a web UI to manage containers and stacks, the Portainer setup guide takes you from zero to a working dashboard.
If you want to run containers as first-class systemd services on Fedora, the Podman Quadlet guide shows the rootless, daemonless alternative. For local AI inference on top of the Docker setup above, the Ollama on Fedora guide takes Step 19’s GPU work and runs LLMs through it.
Running on other distros is covered in our companion guides for Ubuntu, Debian, and Rocky Linux and AlmaLinux. The Docker CE install pattern is the same on each, with the same upgrade and uninstall flows.