A vector database stores embeddings derived from your private data: customer messages, product catalogs, internal documents. Leaving Qdrant on its default cleartext port with no authentication is the same risk profile as leaving Postgres open with the postgres user passwordless. Search engines like Shodan find these instances within hours of launch, and Qdrant clusters have been catalogued and exfiltrated in the wild. Pair the steps below with a UFW firewall at the network edge and Fail2ban for brute-force IP banning, and the attack surface drops to roughly that of any other internet-facing service.
This guide locks down a Qdrant 1.18.1 cluster end-to-end. Bind it to localhost so the public network never sees it directly. Front it with Nginx for TLS termination on both REST (HTTPS) and gRPC. Use a strong API key. Add JWT-based per-collection access tokens. Cap request rates with Nginx limit_req. Everything is tested against a real Let’s Encrypt cert on a publicly reachable VM, and every output block in this guide is captured from the live cluster.
Tested May 2026 on Ubuntu 24.04.4 LTS with Qdrant 1.18.1, Nginx 1.24.0, certbot 2.9.0, qdrant-client 1.18.0, and a real Let’s Encrypt certificate issued via HTTP-01.
Threat model: what an open Qdrant looks like
A Qdrant container with default flags exposes two ports on every interface: 6333 (REST, HTTP/1.1, no TLS) and 6334 (gRPC, HTTP/2, no TLS). With no API key, an unauthenticated attacker can list collections, dump points, download snapshots, and create or delete data. The cleartext channel also exposes API keys and JWT tokens to anyone on the network path, which on a cloud VM includes every NAT box between the attacker and your host.
Three concrete bad scenarios show up in real deployments:
- Direct dump via REST. An attacker hits
http://your-host:6333/collections, finds an unprotected collection, scrolls every point with the payload, and pulls embeddings plus raw text out of the catalog in an hour. - Cleartext key leak. You enable an API key but stay on HTTP. Every request travels with
api-key: ...in the header in plaintext. A passive observer on the wire picks it up once and reuses it forever. - Public gRPC. Less obvious than REST because curl does not speak gRPC, but every Qdrant client can connect to
your-host:6334without TLS and read or write at will.
The fix is layered: bind Qdrant to loopback, terminate TLS in front of it, authenticate every call, and rate-limit anonymous traffic. Each layer covers a different class of attacker.
Bind Qdrant to loopback and set a strong API key
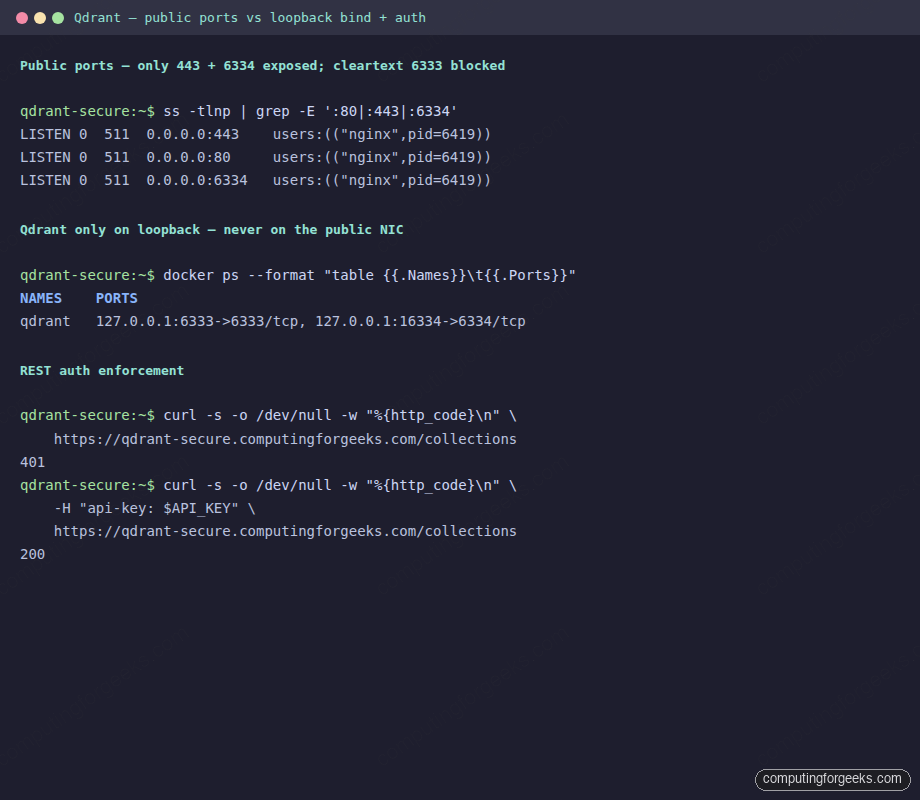
The two foundations of the lock-down: never expose Qdrant ports on the public NIC, and put a real key in front of every request. Generate a 32-byte random key once and store it in a file outside the container:
sudo mkdir -p /etc/qdrant /opt/qdrant/storage /opt/qdrant/snapshots
sudo chown -R 1000:1000 /opt/qdrant

openssl rand -base64 32 | tr -d '=+/' | cut -c1-40 \
  | sudo tee /etc/qdrant/api-key.secret > /dev/null
sudo chmod 600 /etc/qdrant/api-key.secret
Now start Qdrant. The critical bit is the -p 127.0.0.1:PORT:PORT form: Docker only publishes the ports on the loopback interface, so even though the firewall allowed 6333 and 6334, the kernel will not accept traffic on those ports from any other interface. The QDRANT__SERVICE__API_KEY environment variable enforces the key on every endpoint that mutates or reads data:
API_KEY=$(sudo cat /etc/qdrant/api-key.secret)

# Note: port 16334 for gRPC on loopback, Nginx will own external 6334
sudo docker run -d --name qdrant --restart=always \
  -p 127.0.0.1:6333:6333 -p 127.0.0.1:16334:6334 \
  -e QDRANT__SERVICE__API_KEY="$API_KEY" \
  -e QDRANT__SERVICE__JWT_RBAC=true \
  -v /opt/qdrant/storage:/qdrant/storage \
  -v /opt/qdrant/snapshots:/qdrant/snapshots \
  qdrant/qdrant:v1.18.1
Confirm that the loopback works and the public NIC does not:
# Loopback responds with the version banner
curl -sS http://localhost:6333/ -H "api-key: $API_KEY" | jq -c .
# {"title":"qdrant - vector search engine","version":"1.18.1",...}

# Public IP times out, kernel never bound the listener on 0.0.0.0
curl -m 3 -sS -o /dev/null -w 'HTTP=%{http_code}\n' http://YOUR_PUBLIC_IP:6333/
# HTTP=000
The internal gRPC port lives on 16334 because Nginx will bind the public-facing 6334 to terminate TLS. Pick any free loopback port; we use 16334 because the digit prefix makes the relationship to 6334 obvious.
Issue a Let’s Encrypt certificate
The default and simplest path is HTTP-01: certbot opens a temporary file under the Nginx webroot, Let’s Encrypt fetches it over plain HTTP on port 80, the cert lands. This works with any DNS provider as long as your host has a real public IP and port 80 is reachable.
Point a DNS A record at the host (any provider works: Cloudflare, Route 53, Namecheap, your registrar’s own), then install Nginx and certbot:
sudo apt update
sudo apt install -y nginx certbot python3-certbot-nginx
sudo systemctl enable --now nginx
Create a minimal vhost that owns the domain so certbot can stitch its challenge in. Replace the domain and email with your own:
sudo tee /etc/nginx/sites-available/qdrant > /dev/null <<'EOF'
server {
    listen 80;
    server_name qdrant.example.com;
    location / { return 200 'cfg qdrant'; }
}
EOF

sudo ln -sf /etc/nginx/sites-available/qdrant /etc/nginx/sites-enabled/qdrant
sudo rm -f /etc/nginx/sites-enabled/default
sudo nginx -t && sudo systemctl reload nginx
Run certbot. The --nginx plugin rewrites the vhost in-place to add the SSL block, and the --redirect flag adds the HTTP-to-HTTPS redirect for free:
sudo certbot --nginx \
  -d qdrant.example.com \
  --non-interactive --agree-tos --redirect \
  -m [email protected]
Confirm certbot worked:
Successfully received certificate.
Certificate is saved at: /etc/letsencrypt/live/qdrant.example.com/fullchain.pem
Key is saved at:         /etc/letsencrypt/live/qdrant.example.com/privkey.pem
This certificate expires on 2026-08-24.
Certbot has set up a scheduled task to automatically renew this certificate.
Alternative: DNS-01 for hosts without public port 80
If the host is on a private LAN, behind NAT without port-forward, or needs a wildcard cert, use a DNS-01 plugin instead. Certbot ships plugins for every major DNS provider; pick the one for yours:
| Provider | Plugin package |
|---|---|
| Cloudflare | python3-certbot-dns-cloudflare |
| Route 53 | python3-certbot-dns-route53 |
| DigitalOcean | python3-certbot-dns-digitalocean |
| Google Cloud DNS | python3-certbot-dns-google |
| Linode | python3-certbot-dns-linode |
| RFC2136 (BIND) | python3-certbot-dns-rfc2136 |
One worked example using Cloudflare. Substitute the plugin name for your provider:
sudo apt install -y python3-certbot-dns-cloudflare
echo "dns_cloudflare_api_token = YOUR_TOKEN" | sudo tee /etc/letsencrypt/cf.ini
sudo chmod 600 /etc/letsencrypt/cf.ini

sudo certbot certonly --dns-cloudflare \
  --dns-cloudflare-credentials /etc/letsencrypt/cf.ini \
  -d qdrant.example.com \
  --non-interactive --agree-tos -m [email protected]
The output looks the same as HTTP-01. The DNS-01 path takes about 60-90 seconds longer because Let’s Encrypt has to wait for the DNS propagation check.
Nginx reverse proxy for REST and gRPC
The full vhost has three server blocks: one for plain HTTP that redirects to HTTPS, one for REST on 443, and one for gRPC on 6334. The rate-limit zone at the top of the file is shared between the REST and gRPC blocks so a noisy client cannot get around the cap by alternating protocols:
# /etc/nginx/sites-available/qdrant
limit_req_zone $binary_remote_addr zone=qdrant_rl:10m rate=5r/s;

server {
    listen 80;
    server_name qdrant.example.com;
    return 301 https://$host$request_uri;
}

# REST over HTTPS
server {
    listen 443 ssl http2;
    server_name qdrant.example.com;

    ssl_certificate     /etc/letsencrypt/live/qdrant.example.com/fullchain.pem;
    ssl_certificate_key /etc/letsencrypt/live/qdrant.example.com/privkey.pem;
    include /etc/letsencrypt/options-ssl-nginx.conf;
    ssl_dhparam /etc/letsencrypt/ssl-dhparams.pem;

    server_tokens off;
    add_header Strict-Transport-Security "max-age=31536000; includeSubDomains" always;
    add_header X-Content-Type-Options "nosniff" always;
    add_header X-Frame-Options "DENY" always;
    add_header Referrer-Policy "no-referrer" always;

    client_max_body_size 128m;
    proxy_read_timeout 120s;

    location / {
        limit_req zone=qdrant_rl burst=20 nodelay;
        limit_req_status 429;

        proxy_pass http://127.0.0.1:6333;
        proxy_set_header Host $host;
        proxy_set_header X-Real-IP $remote_addr;
        proxy_set_header X-Forwarded-For $proxy_add_x_forwarded_for;
        proxy_set_header X-Forwarded-Proto $scheme;
        proxy_http_version 1.1;
    }
}

# gRPC over HTTPS, separate block because grpc_pass needs end-to-end HTTP/2
server {
    listen 6334 ssl http2;
    server_name qdrant.example.com;

    ssl_certificate     /etc/letsencrypt/live/qdrant.example.com/fullchain.pem;
    ssl_certificate_key /etc/letsencrypt/live/qdrant.example.com/privkey.pem;
    include /etc/letsencrypt/options-ssl-nginx.conf;
    ssl_dhparam /etc/letsencrypt/ssl-dhparams.pem;

    server_tokens off;
    grpc_read_timeout 120s;
    grpc_send_timeout 120s;
    client_max_body_size 128m;

    location / {
        limit_req zone=qdrant_rl burst=50 nodelay;
        limit_req_status 429;

        # Internal Qdrant gRPC on the loopback. Note grpc:// (cleartext to backend).
        grpc_pass grpc://127.0.0.1:16334;
        grpc_set_header X-Real-IP $remote_addr;
    }
}
Three details deserve attention. First, the gRPC block uses grpc_pass, not proxy_pass: gRPC rides HTTP/2 frames that proxy_pass mangles. Second, the loopback Qdrant talks plain gRPC (grpc://, not grpcs://) because it never leaves the host. TLS happens at the Nginx boundary. Third, the burst budgets differ between REST and gRPC: REST gets 20 (interactive use), gRPC gets 50 (services tend to fan out in bursts).
Deploy and reload:
sudo nginx -t
sudo systemctl reload nginx
sudo ss -tlnp | grep -E ':80|:443|:6334'
# nginx listens on 0.0.0.0:80, 0.0.0.0:443, 0.0.0.0:6334
The 6334 listener on 0.0.0.0 only works because Qdrant moved its internal gRPC to 16334. If you forget that step, Nginx fails to bind 6334 with address already in use and the reload leaves the old config running. Always check ss -tlnp after a reload that touches port mappings.
Verify the full chain
Walk through every layer with curl and openssl:
API_KEY=$(sudo cat /etc/qdrant/api-key.secret)

# 1. Plain HTTP redirects to HTTPS
curl -sS -o /dev/null -w '%{http_code} -> %{redirect_url}\n' \
    http://qdrant.example.com/
# 301 -> https://qdrant.example.com/

# 2. HTTPS rejects requests with no api-key
curl -sS -o /dev/null -w 'HTTP=%{http_code}\n' \
    https://qdrant.example.com/collections
# HTTP=401

# 3. HTTPS accepts requests with a valid api-key
curl -sS https://qdrant.example.com/ -H "api-key: $API_KEY" | jq .
# {"title":"qdrant - vector search engine","version":"1.18.1",...}
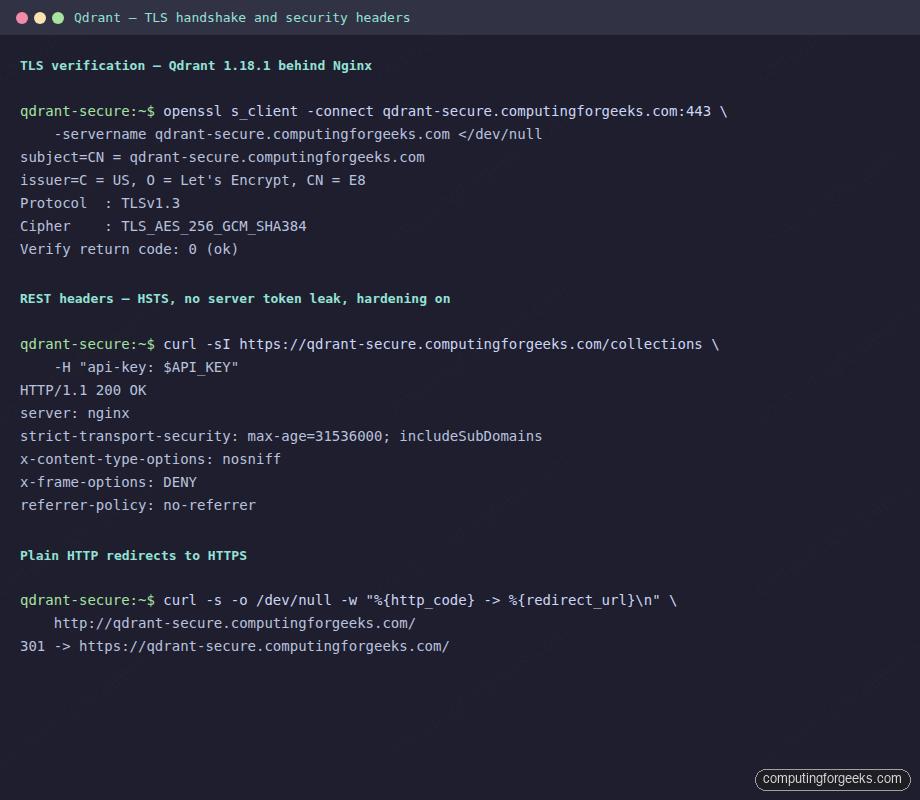
Inspect the TLS chain to confirm the cert is real and the protocol negotiates TLS 1.3:
echo | openssl s_client -connect qdrant.example.com:443 \
    -servername qdrant.example.com 2>/dev/null \
    | grep -E 'Protocol|Cipher|subject=|issuer=|Verify return code'
# subject=CN = qdrant.example.com
# issuer=C = US, O = Let's Encrypt, CN = E8
# Protocol  : TLSv1.3
# Cipher    : TLS_AES_256_GCM_SHA384
# Verify return code: 0 (ok)
The same checks rendered side-by-side in a terminal, including the response headers Nginx adds for hardening:
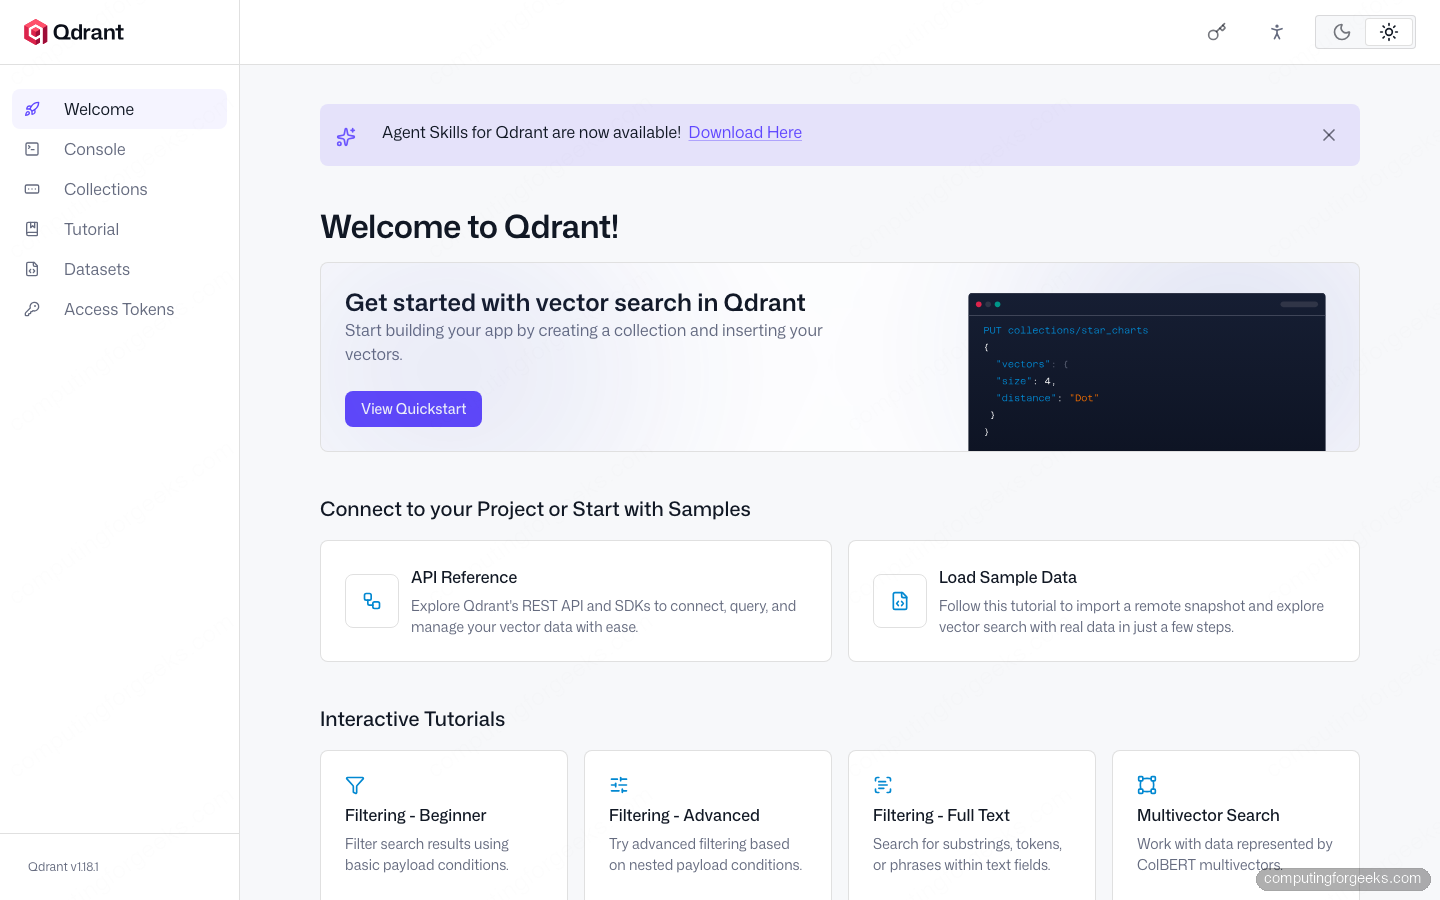
The Web UI works the same way. Point a browser at the HTTPS URL and Qdrant’s dashboard loads with a valid cert and an API key prompt:
For gRPC, the Python client just needs https=True and the public hostname. The api-key travels in HTTP/2 metadata under the same name:
from qdrant_client import QdrantClient

client = QdrantClient(
    host="qdrant.example.com",
    grpc_port=6334,
    prefer_grpc=True,
    https=True,
    api_key=API_KEY,
)
print(client.get_collections())
A query over the gRPC+TLS channel returns in roughly 3 ms from a colocated client (the TLS handshake amortizes across many calls on the same connection, so steady-state stays fast).
JWT for per-collection access tokens
The master API key is for the admin. Application code, build pipelines, and on-call dashboards do not need full cluster access; they need scoped tokens. Qdrant 1.18 implements JWT-RBAC: HMAC-signed tokens with an access claim that says which collections the token may touch and whether it may write.
With QDRANT__SERVICE__JWT_RBAC=true already set on the Qdrant container, any HS256 JWT signed with the master API key is accepted. The plaintext signing material is the master API key string, so keep that key strictly server-side and only mint tokens from it. Generate tokens with any standard JWT library:
pip install pyjwt
python3 <<'PY'
import jwt
api_key = open('/etc/qdrant/api-key.secret').read().strip()

read_only = jwt.encode(
    {"access": [{"collection": "jwt_demo", "access": "r"}]},
    api_key, algorithm="HS256",
)
print("RO:", read_only)

read_write = jwt.encode(
    {"access": [{"collection": "jwt_demo", "access": "rw"}]},
    api_key, algorithm="HS256",
)
print("RW:", read_write)
PY
Use the token in the same api-key header as the master key. Qdrant decodes it, validates the signature, and applies the scope. Verifying enforcement matters more than the token format itself:
# Read with the RO token (must succeed)
curl -sS -o /dev/null -w 'GET (RO)   HTTP=%{http_code}\n' \
    https://qdrant.example.com/collections/jwt_demo \
    -H "api-key: $RO_TOKEN"
# GET (RO)   HTTP=200

# Write with the RO token (must be blocked)
curl -sS -o /dev/null -w 'PUT (RO)   HTTP=%{http_code}\n' \
    -X PUT https://qdrant.example.com/collections/jwt_demo/points \
    -H "api-key: $RO_TOKEN" -H "Content-Type: application/json" \
    -d '{"points":[{"id":1,"vector":[0.1,0.2,0.3,0.4]}]}'
# PUT (RO)   HTTP=403

# Write with the RW token (must succeed)
curl -sS -o /dev/null -w 'PUT (RW)   HTTP=%{http_code}\n' \
    -X PUT https://qdrant.example.com/collections/jwt_demo/points?wait=true \
    -H "api-key: $RW_TOKEN" -H "Content-Type: application/json" \
    -d '{"points":[{"id":1,"vector":[0.1,0.2,0.3,0.4]}]}'
# PUT (RW)   HTTP=200
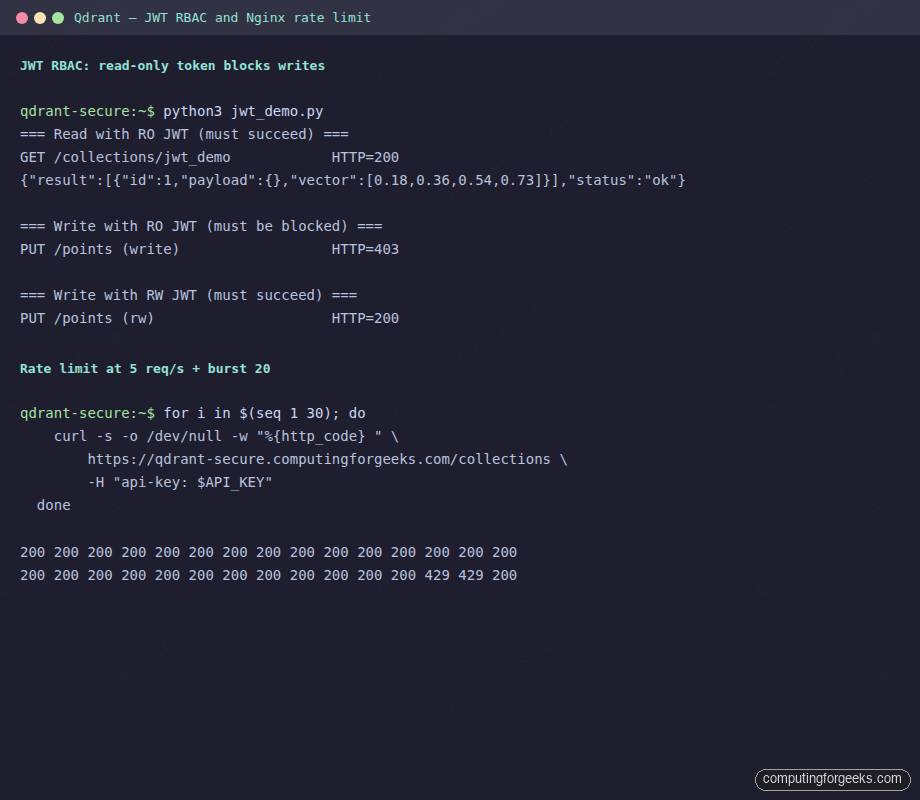
The RO token’s 403 on writes is the proof that JWT-RBAC is actually wired up. Add an exp claim with a Unix timestamp for short-lived tokens (CI jobs, scheduled scrapers), and rotate the master key when a token is compromised, and every outstanding token signed by the old key invalidates immediately.
Rate limiting with limit_req
Nginx’s limit_req_zone applies a leaky-bucket counter per source IP. The config above sets 5 r/s with a burst of 20: a client gets 20 requests instantly, then the bucket refills at 5/s. Once the bucket and burst are both empty, Nginx returns HTTP 429 immediately (because nodelay is set; without it, requests are queued).
Hit it 30 times in a tight loop to see the cap in action:
for i in $(seq 1 30); do
    curl -sS -o /dev/null -w '%{http_code} ' \
        https://qdrant.example.com/collections \
        -H "api-key: $API_KEY"
done
echo
# 200 200 200 200 200 200 200 200 200 200 200 200 200 200 200
# 200 200 200 200 200 200 200 200 200 200 200 200 429 429 200
The first 27 succeed (burst 20 plus 1.4 seconds of refill at 5/s); the 28th and 29th hit 429; the 30th lands after another 200 ms of refill. Tune the rate per environment: 5 r/s is reasonable for a dashboard, 50 r/s for a service mesh, and the burst should be roughly the largest concurrent-request count you expect from a legitimate caller.
Rate limiting is a coarse last line of defense, not a substitute for auth. A patient attacker with one valid API key can still drain the cluster, the cap just throttles them to a noticeable rate that monitoring picks up. Pair the limit with log alerts on 429 spikes from a single IP.
Cloud firewall, not just Nginx
Nginx terminates TLS but the cloud firewall is what stops port scans from ever reaching the host. Configure the inbound rules on the cloud’s network layer (AWS security group, GCP firewall rule, OCI security list) to allow only 22, 80, 443, and 6334 from the world:
# Allow inbound to security group cfg-prod-qdrant-sg
aws ec2 authorize-security-group-ingress \
  --group-id sg-0a1b2c3d4e5f67890 --protocol tcp \
  --port 22   --cidr ADMIN_OFFICE_CIDR     # SSH from admins only

for PORT in 80 443 6334; do
  aws ec2 authorize-security-group-ingress \
    --group-id sg-0a1b2c3d4e5f67890 --protocol tcp \
    --port $PORT --cidr 0.0.0.0/0
done
Restricting SSH to the admin office CIDR (or your VPN’s egress) instantly removes the SSH brute-force noise from your logs. Closing 6333 at the cloud layer makes the loopback-bind double-safe: even if Docker’s port-publish was misconfigured, the firewall would not let traffic reach it.
Gotchas worth remembering
Five real traps showed up during testing. Each one is silent enough to ship with a broken security posture if you skip the verification steps above:
- Docker port-publish on
127.0.0.1only is the actual loopback bind. Writing-p 6333:6333publishes on every interface. The correct form is-p 127.0.0.1:6333:6333. Verify withss -tlnp; the listener must show127.0.0.1:6333, not0.0.0.0:6333. - Nginx and Qdrant cannot both own 6334. The kernel does not distinguish
127.0.0.1:6334from0.0.0.0:6334for the bind check. If Qdrant publishes 6334 on loopback and Nginx tries to listen on the same port on all interfaces, the Nginx reload fails withbind() to 0.0.0.0:6334 failed (98: Address already in use). Move Qdrant’s loopback gRPC to a different port (16334 in this guide). grpc_passneeds HTTP/2 end-to-end,proxy_passdoes not. The gRPC server block must saylisten 6334 ssl http2;AND usegrpc_pass. Mixingproxy_passwith HTTP/2 produces opaqueRST_STREAMerrors that look like the cert chain is broken.- JWT-RBAC needs the env flag plus the JWT. Setting
QDRANT__SERVICE__JWT_RBAC=truewithout minting any tokens leaves the master api-key as the only working credential, which works but defeats the purpose. Mint scoped tokens for every non-admin caller and rotate them. - Certbot’s HTTP-01 needs port 80 open at the cloud firewall. A host that only allows 443 cannot complete the challenge. Either temporarily open 80 for the issuance window or switch to DNS-01 (per the table above). Renewals go through the same path every 90 days; if you closed 80 after the first issuance, renewals fail silently until a monitoring alert catches it.
Renewal and observability
The certbot.timer systemd unit runs the renewal twice daily. Verify it is active and dry-run a renewal to make sure HTTP-01 still reaches your host:
systemctl status certbot.timer | head -4
sudo certbot renew --dry-run
For observability, tail the Nginx access log for 401 and 429 spikes:
sudo tail -F /var/log/nginx/access.log \
    | awk '$9 == 401 || $9 == 429 {print strftime("%H:%M:%S"), $1, $7, $9}'
A spike of 401s from one IP is a brute-force attempt on the api-key. A spike of 429s is a misbehaving client (sometimes your own). Pipe both into your existing log aggregator and alert on a sustained rate above a small threshold.
The stack we built holds up against the realistic attacks on a self-hosted vector database: cleartext snooping, key replay, unauthenticated dumps, scope-creep on credentials, and brute-force abuse. None of those layers is a security panacea by itself, and you should re-verify them every time you change the deployment. Run the curl checks at the top of this section after every release as a regression test for the security posture, not just the functional one. If you also terminate other services with Let’s Encrypt, our Let’s Encrypt walkthrough covers the renewal cron and DNS challenge variants that complement what we did here.