

phpMyAdmin is the de-facto web UI for MySQL and MariaDB. It runs as a stock PHP application served by Apache or Nginx, talks to the database over a normal socket or TCP connection, and gives a clickable surface for everything you would otherwise type at the mariadb prompt: browse tables, edit rows, run SQL queries, export schemas, set up users and grants, watch the server live process list. Fedora packages it directly, including the Apache integration as a drop-in conf, so the install is a one-line affair.
This guide installs phpMyAdmin on Fedora 44, 43, and 42 on top of the standard LAMP stack (Apache, PHP-FPM, MariaDB), walks through the login + dashboard with screenshots, hardens the install against drive-by attackers (limit access by source IP, force HTTPS, disable login from the network if you only need local access), and covers the SELinux booleans and firewalld rules every Fedora install needs.
Prerequisites
You need a Fedora 44, 43, or 42 system with Apache, PHP-FPM, and either MariaDB or MySQL already running. If you do not have that stack yet, the LAMP stack on Fedora guide installs all three in one transaction. Sudo access required. SELinux can stay in enforcing mode (it must, for production); this guide covers the two booleans phpMyAdmin needs.
Step 1: Set reusable shell variables
Pin the database credentials, the allowed admin subnet, and the phpMyAdmin URL path once:
export MARIADB_ROOT_PW="Strong@Pass2026!"
export PMA_PATH="/phpmyadmin"
export ADMIN_CIDR="10.0.1.0/24"
Confirm:
echo "DB root pw set: ${#MARIADB_ROOT_PW} chars"
echo "Mount path:     ${PMA_PATH}"
echo "Admin subnet:   ${ADMIN_CIDR}"
Step 2: Install phpMyAdmin
One dnf line installs phpMyAdmin and pulls the extra PHP extensions it needs (mysqli driver, process functions):
sudo dnf install -y phpMyAdmin php-mysqlndFedora packages phpMyAdmin from upstream tracked closely to the latest stable release:
Installing:
 phpMyAdmin    noarch  0:5.2.3-2.fc44   56.0 MiB
 php-process   x86_64  0:8.5.6-1.fc44

Complete!
Step 3: Inspect the auto-installed Apache config
The package drops an Apache config snippet at /etc/httpd/conf.d/phpMyAdmin.conf which maps the URL path and applies a default access policy:
sudo cat /etc/httpd/conf.d/phpMyAdmin.conf | head -30Out of the install, the bundled config allows access from localhost only. That is exactly the right default for a single-admin server. If you need to access phpMyAdmin from your office subnet, expand the access policy (Step 6 below).
Reload Apache so the new conf is in effect:
sudo systemctl reload httpdConfirm phpMyAdmin responds on localhost:
curl -s -o /dev/null -w 'HTTP %{http_code}\n' http://localhost/phpmyadmin/A working install returns:
HTTP 200Step 4: Set the SELinux boolean
If you followed the LAMP stack guide, the right SELinux booleans are already set. If you are installing phpMyAdmin standalone on a fresh Fedora, allow Apache to talk to the database:
sudo setsebool -P httpd_can_network_connect_db 1Without this boolean, phpMyAdmin loads in the browser but the login form returns “Connection refused” because SELinux blocks Apache’s outgoing socket to mysqld. The -P flag persists the boolean across reboots.
Step 5: Open the firewall
If firewalld is active (default on Workstation and Server) and you want network access to phpMyAdmin, allow HTTP and HTTPS:
sudo firewall-cmd --permanent --add-service=http
sudo firewall-cmd --permanent --add-service=https
sudo firewall-cmd --reload
For richer policies (restrict 80/443 to a specific source subnet via rich rules), see the firewalld zones and rich-rules guide for Fedora.
Step 6: Restrict phpMyAdmin to your admin subnet
If you opened the firewall in Step 5, phpMyAdmin is now exposed to the world. Tighten that with an Apache access policy that only allows your office or VPN subnet. Edit the conf snippet:
sudo vi /etc/httpd/conf.d/phpMyAdmin.confFind the <Directory /usr/share/phpMyAdmin/> block and replace the default Require block so only your admin subnet plus localhost can reach it:
<Directory /usr/share/phpMyAdmin/>
    AddDefaultCharset UTF-8
    <IfModule mod_authz_core.c>
        # require IPv4 source = localhost OR ADMIN_CIDR
        Require ip 127.0.0.1
        Require ip ::1
        Require ip ADMIN_CIDR_PLACEHOLDER
    </IfModule>
</Directory>
Then substitute the placeholder with your real CIDR from the variables block:
sudo sed -i "s|ADMIN_CIDR_PLACEHOLDER|${ADMIN_CIDR}|" /etc/httpd/conf.d/phpMyAdmin.conf
sudo apachectl configtest
sudo systemctl reload httpd
Any request from outside the localhost or admin CIDR now gets a 403 Forbidden before phpMyAdmin even renders the login page.
Step 7: Log in for the first time
Open http://YOUR_HOST/phpmyadmin/ in a browser. phpMyAdmin loads the login page:
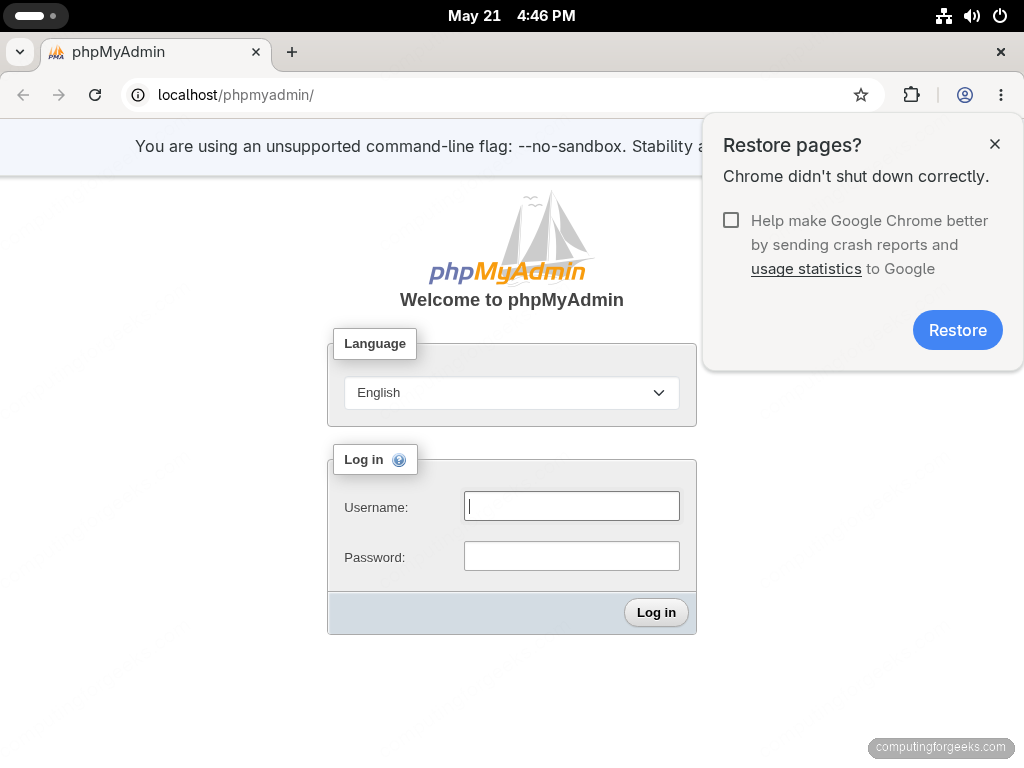
Log in as the MariaDB or MySQL root user with the password from Step 1. After login, the dashboard shows the database tree on the left, general settings in the middle, and a Web server panel on the right with the Apache, PHP, and MariaDB versions:
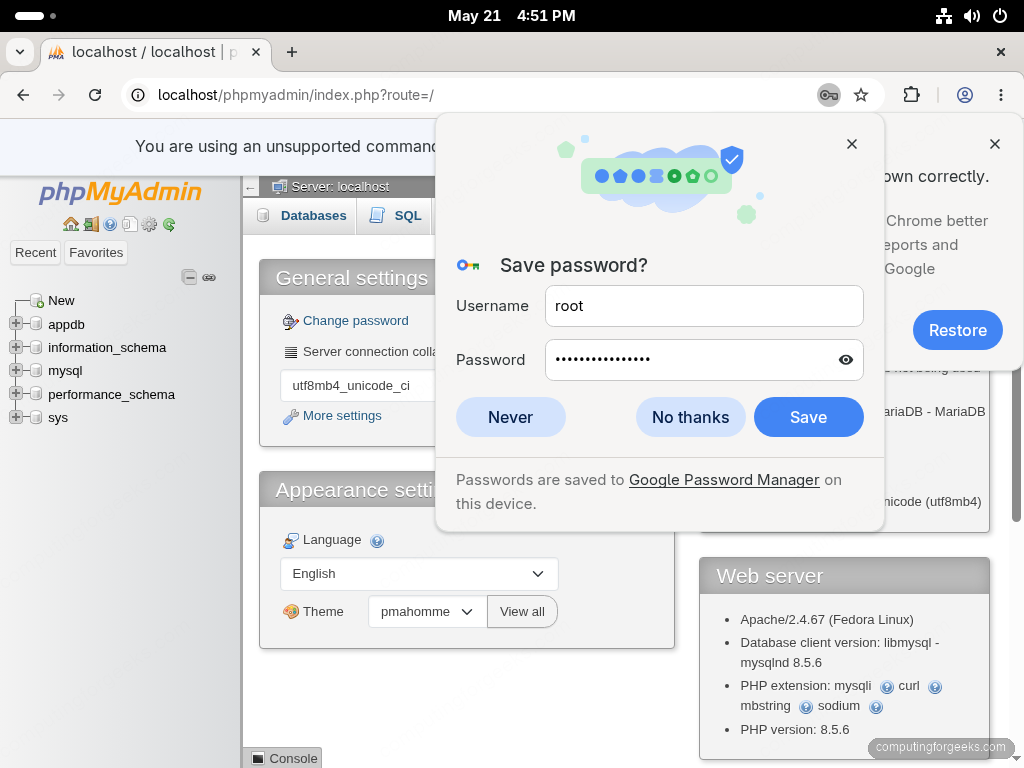
Click any database in the left tree to drill in: see the tables, browse rows, run queries from the SQL tab. The Status tab is your live process list, useful for watching long-running queries chew CPU.
Step 8: Set up HTTPS for phpMyAdmin
Logging into phpMyAdmin over plain HTTP sends your DB credentials in the clear. Set up Let’s Encrypt for the host before exposing this beyond localhost. Install certbot:
sudo dnf install -y certbot python3-certbot-apacheRun certbot against your virtual host. The Apache plugin rewrites your vhost file with the SSL block and sets up the HTTP-to-HTTPS redirect:
sudo certbot --apache -d db.example.com \
  --non-interactive --agree-tos -m [email protected] --redirect
The certificate auto-renews via the certbot systemd timer. Confirm:
sudo certbot renew --dry-runStep 9: Harden the install
A few production knobs that matter once phpMyAdmin is reachable from the network:
Move the URL path to something less obvious. The default /phpmyadmin path is the first thing every drive-by scanner tries. Edit /etc/httpd/conf.d/phpMyAdmin.conf and change the Alias directive to a path of your choice:
Alias /db-admin-7g8k /usr/share/phpMyAdminEnable cookie auth with a long-lived blowfish secret. Generate a 32-char secret:
SECRET=$(openssl rand -hex 16)
sudo sed -i "s|^.*blowfish_secret.*|\$cfg['blowfish_secret'] = '${SECRET}';|" /etc/phpMyAdmin/config.inc.php
Disable root login from network. Even with HTTPS and a tight IP allowlist, the root account is high-value. Create a dedicated phpMyAdmin admin user with the privileges you actually need:
mariadb -uroot -p"${MARIADB_ROOT_PW}" <<SQL
CREATE USER 'pma_admin'@'%' IDENTIFIED BY 'PmaAdminPass2026!';
GRANT ALL PRIVILEGES ON *.* TO 'pma_admin'@'%' WITH GRANT OPTION;
FLUSH PRIVILEGES;
SQL
Then in phpMyAdmin’s config.inc.php, add a config block that blocks root login at the application layer:
sudo vi /etc/phpMyAdmin/config.inc.phpAdd the following line under the existing $cfg['Servers'][$i] block:
$cfg['Servers'][$i]['AllowRoot'] = false;Reload Apache and any root login attempt returns “Access denied” before the DB is even contacted.
Step 10: Keep phpMyAdmin updated
Fedora’s repo tracks the upstream phpMyAdmin release closely. Updates ride along with normal system upgrades:
sudo dnf upgrade -y phpMyAdminConfiguration files on disk are preserved across upgrades (DNF leaves your edits to config.inc.php and the Apache snippet alone, dropping any new defaults as .rpmnew files for you to diff).
Uninstall phpMyAdmin
sudo dnf remove -y phpMyAdmin
sudo rm -f /etc/httpd/conf.d/phpMyAdmin.conf
sudo systemctl reload httpd
Database itself is not touched.
Troubleshooting
Error: mysqli::real_connect(): Connection refused
SELinux is blocking Apache’s outgoing socket to mysqld. Set the boolean from Step 4 and reload Apache. Confirm with getsebool httpd_can_network_connect_db.
Error: Access denied for user ‘root’@’localhost’ (using password: YES)
Either the root password you typed is wrong, or root is set to unix_socket auth (Fedora’s default on a fresh MariaDB install). Confirm by logging in from the CLI: mariadb -uroot -p"${MARIADB_ROOT_PW}". If that fails, set a real password for root (Step 6 of the MariaDB on Fedora guide) or use the pma_admin user from Step 9 above.
phpMyAdmin loads but every page returns HTTP 500
Almost always a PHP extension missing. Check the Apache error log for the specific missing class:
sudo tail -50 /var/log/httpd/error_logIf you see “Class ‘mbstring’ not found”, install it: sudo dnf install -y php-mbstring. Same pattern for php-gd, php-xml, php-zip. After installing, reload Apache.
“Wrong permissions on configuration file, should not be world writable!”
Fix the file mode on config.inc.php:
sudo chmod 0644 /etc/phpMyAdmin/config.inc.php
sudo chown root:apache /etc/phpMyAdmin/config.inc.php
Useful phpMyAdmin paths and tasks
| Path or task | Where it lives |
|---|---|
| Main config | /etc/phpMyAdmin/config.inc.php |
| Apache conf snippet | /etc/httpd/conf.d/phpMyAdmin.conf |
| Application root | /usr/share/phpMyAdmin/ |
| SQL tab | Click any database, then SQL |
| Import dump | Database > Import > upload .sql or .sql.gz |
| Export dump | Database > Export > Custom > SQL format |
| User admin | Server > User accounts |
| Status / process list | Server > Status > Processes |
| Variables (live tuning) | Server > Variables |
| Server logs | Server > Status > Server logs |
For the database itself: MariaDB on Fedora covers the install, tuning, and backup. The same workflow with the Oracle MySQL build is in MySQL on Fedora. For the full LAMP stack including Apache and PHP-FPM tuning, see the LAMP stack on Fedora guide. For containerized phpMyAdmin alongside a containerized DB, the official phpmyadmin image runs cleanly under Docker on Fedora.

If you get the following when you execute step 4:
ERROR 1045 (28000): Access denied for user ‘root’@’localhost’ (using password: YES)
That’s beacause you need to enter a temporary password that mysql has generated. The temporary password can be found issuing the next command:
grep ‘A temporary password is generated’ /var/log/mysqld.log | tail -1
Now you can copy and paste your temporary password to authenticate.