Dropping a spare NVMe stick into a USB enclosure is the cheapest way to turn it into a fast portable drive, and on Windows or macOS it usually just works. On Linux the drive mounts and copies files too, but three things quietly go wrong underneath: TRIM gets switched off so the SSD slowly fills with stale blocks, the fast UASP transfer protocol falls back to the slow legacy one, and SMART health data disappears so you cannot see the drive aging. None of these throw an error. You only notice when performance sags or a drive dies with no warning.
Whether an NVMe enclosure on Linux gets all three right comes down to one component you never see: the USB-to-NVMe bridge chip inside the shell. This guide covers how to check what your enclosure is actually doing, how to force TRIM on when the bridge hides it, how to read SMART through the bridge, and which chipsets to trust. We could not put every enclosure on the bench, so the bridge behavior below is sourced from the current Linux kernel, udev, and smartmontools documentation and each chip’s datasheet as of July 2026; the command output shown is captured from a directly-attached NVMe, which is the reference you compare your enclosure against.
The short version: it comes down to the bridge chipset
Every USB NVMe enclosure is an M.2 slot wired to a bridge chip that translates USB into PCIe/NVMe. That chip decides whether you get UASP, whether TRIM passes through, and whether SMART is readable. Four families cover almost everything on sale, and all of them handle Linux well when the enclosure firmware is current:
| Bridge chip | Interface | UASP | TRIM | smartctl type |
|---|---|---|---|---|
| JMicron JMS583 | USB 3.1 Gen 2, 10 Gbps | Yes | Yes | sntjmicron |
| Realtek RTL9210 / RTL9210B | USB 3.1 Gen 2, 10 Gbps | Yes | Yes | sntrealtek |
| ASMedia ASM2362 | USB 3.1 Gen 2, 10 Gbps | Yes | Yes | sntasmedia |
| ASMedia ASM2364 | USB 3.2 Gen 2×2, 20 Gbps | Yes | Yes | sntasmedia |
| ASMedia ASM2464PD | USB4 / Thunderbolt, 40 Gbps | Yes | Yes | sntasmedia |
The trade-off is not really about the enclosure brand printed on the box. Two enclosures from different vendors can carry the same Realtek chip and behave identically, while a cheap no-name shell with an unlabeled bridge is where the problems start. So the first job on any new enclosure is to find out which chip you actually have and what it negotiated.
How a USB enclosure talks to Linux
A USB storage device speaks one of two protocols. The old one is Bulk-Only Transport (BOT), driven by the kernel’s usb-storage module. It handles one command at a time, which is fine for a flash drive and a bottleneck for an NVMe SSD. The modern one is USB Attached SCSI (UAS), driven by the uas module, which queues commands and passes SCSI semantics through cleanly. UAS is what lets a fast bridge get near the interface’s rated speed, and it is also what carries the TRIM and SMART commands you want.
Which driver bound to your enclosure is the single most useful thing to check first. List the USB tree and look at the driver name on the storage device:
lsusb -tA line ending in Driver=uas means UASP negotiated and you are on the fast path. Driver=usb-storage means the enclosure fell back to legacy BOT, either because the bridge does not support UAS or because the kernel blacklisted that specific chip for reliability. If you want to confirm the enclosure advertises UAS at all, lsusb -v shows it as an interface with bInterfaceProtocol 98 next to the Bulk-Only bInterfaceProtocol 80.
Get TRIM working over USB
This is the one that bites people quietly. TRIM (the SCSI name is UNMAP) tells the SSD which blocks are free so it can garbage-collect them. Without it, a busy SSD in an enclosure gets slower over months and wears faster. The catch is that many bridge chips do not report discard support to the kernel, so Linux plays safe and turns TRIM off for that device even when the SSD itself supports it.
Check discard support at the block layer. On a directly-attached NVMe, the DISC-MAX column is non-zero, which is what a TRIM-capable device looks like:
lsblk -Do NAME,TRAN,TYPE,DISC-GRAN,DISC-MAX /dev/nvme0n1The DISC-GRAN and DISC-MAX columns confirm the kernel sees discard support:
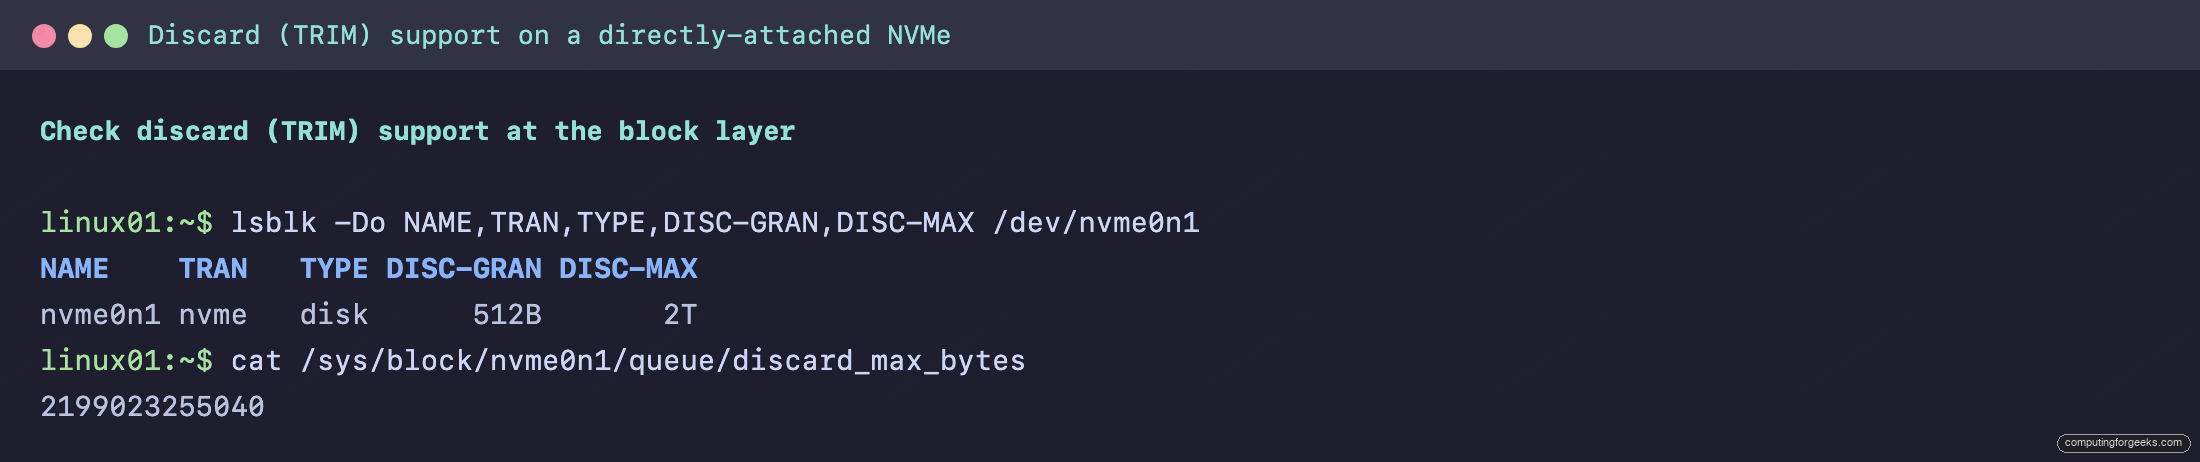
Run the same command against your enclosure’s device (for example /dev/sda). If DISC-MAX is 0 and cat /sys/block/sda/queue/discard_max_bytes returns 0, TRIM is off. You can force it back on by telling the kernel to treat the device’s provisioning mode as unmap. First find the enclosure’s USB vendor and product ID:
lsusbNote the idVendor:idProduct pair for your enclosure, for example 152d:0583. Then create a udev rule so the fix survives reboots and re-plugs:
sudo vim /etc/udev/rules.d/90-usb-discard.rulesAdd one rule, substituting your own vendor and product IDs:
ACTION=="add|change", ATTRS{idVendor}=="152d", ATTRS{idProduct}=="0583", SUBSYSTEM=="scsi_disk", ATTR{provisioning_mode}="unmap"Reload the udev rules and re-trigger the device so the change applies without a reboot:
sudo udevadm control --reload-rules
sudo udevadm trigger
Re-plug the enclosure, then confirm the kernel now reports discard support with a non-zero DISC-MAX:
lsblk -Do NAME,TRAN,DISC-GRAN,DISC-MAX /dev/sdaOnce that column reads non-zero, run a trim to prove the whole path works end to end:
sudo fstrim -v /mnt/ssdThe fstrim line prints how many bytes it trimmed, which is your confirmation the whole path works. In practice this means you set the udev rule once per enclosure model and never think about it again. If fstrim only trims a small amount on a large partition, the bridge is reporting a low discard cap. That value lives at /sys/block/sdX/queue/discard_max_bytes and cannot be raised above what the hardware itself reports, so a low cap is a limit of the bridge chip rather than something a rule can fix.
Read SMART health through the bridge
SMART is how you catch a failing drive before it takes your data with it, and it is worth wiring up on any drive you keep data on. Over USB, smartctl has to know how to translate its query for the bridge in front of the SSD. For a SATA M.2 drive behind a bridge, use the generic SCSI-to-ATA translation:
sudo smartctl -d sat -a /dev/sdaFor an NVMe drive behind a bridge, the device type matches the chip vendor. This is where knowing your chipset pays off:
| Bridge | smartctl command |
|---|---|
| JMicron (JMS583) | smartctl -d sntjmicron -a /dev/sda |
| Realtek (RTL9210/B) | smartctl -d sntrealtek -a /dev/sda |
| ASMedia (ASM2362/2364/2464PD) | smartctl -d sntasmedia -a /dev/sda |
Recent smartmontools releases auto-detect many of these bridges, so a plain smartctl -a sometimes works and you only reach for -d when it prints “Unknown USB bridge”. Directly attached, the same drive returns the full health page you are looking for:
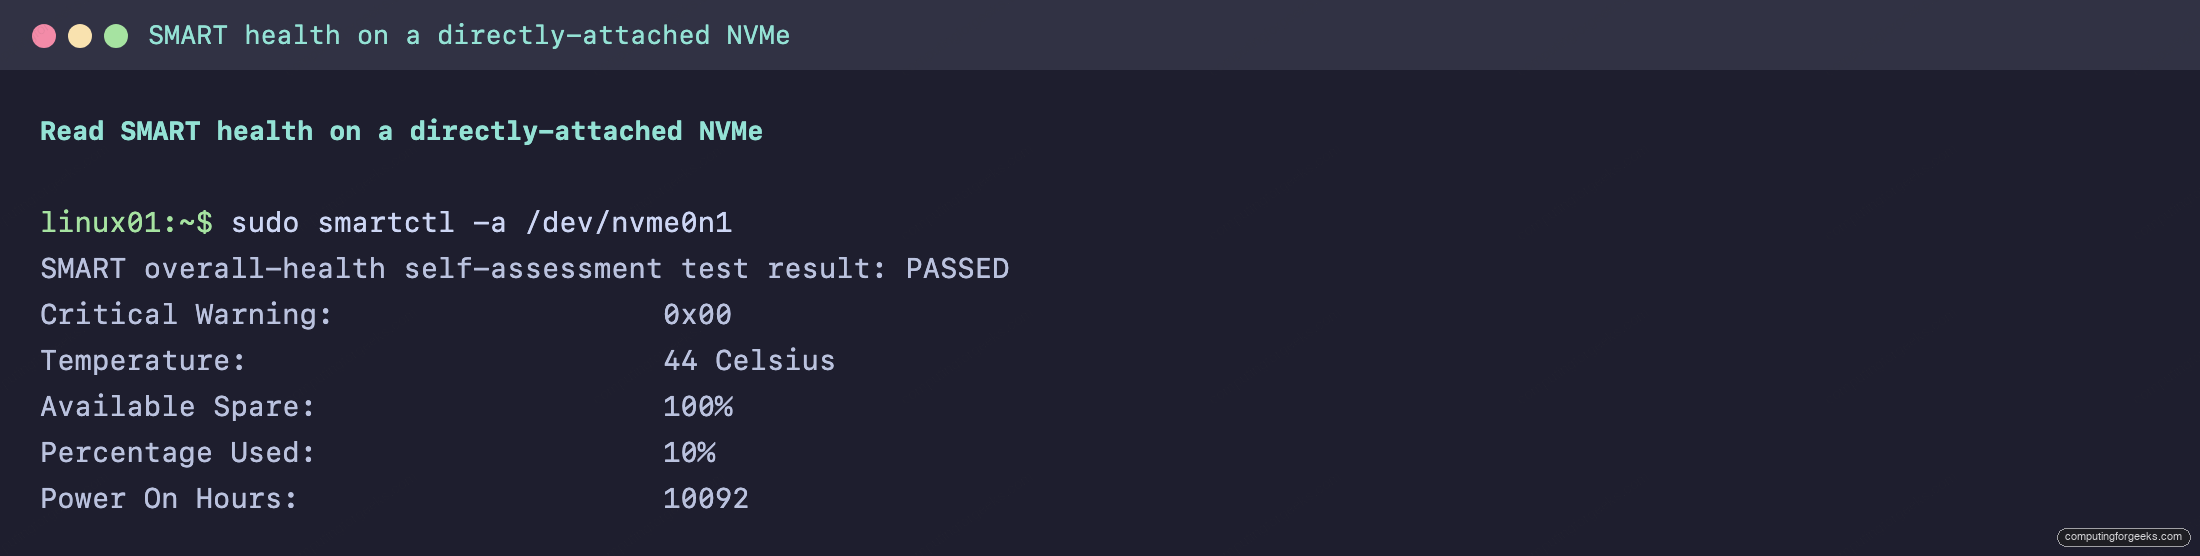
The values that matter for a drive living in an enclosure are Percentage Used (wear), Available Spare, and Temperature, because a poorly ventilated shell running hot during a long copy is exactly what shortens an SSD’s life.
When the enclosure keeps dropping: disable UAS
Some bridges, a handful of JMicron revisions in particular, negotiate UAS but then misbehave under load: the device resets, the copy stalls, and dmesg fills with reset messages. The kernel already blacklists the worst offenders, but if yours slips through, the fix is to force it onto the slower but rock-solid usb-storage driver. Test it live first by loading the module with a quirk for your device ID, where u means “ignore UAS”:
sudo modprobe usb-storage quirks=152d:0583:uIf the drops stop, make it persistent with a modprobe drop-in:
sudo vim /etc/modprobe.d/disable-uas.confAdd the quirk line for your enclosure, comma-separating more than one device if you have several:
options usb-storage quirks=152d:0583:uRebuild the initramfs so the option applies at boot, then re-plug. The trade-off is real: you give up UAS queueing and cap throughput, so only do this on a bridge that genuinely misbehaves, not as a default.
Do not put ZFS on a USB enclosure
A USB NVMe enclosure is excellent for a portable drive, a backup target, or moving data between machines. It is a bad foundation for a ZFS pool, and both the TrueNAS and OpenZFS projects say so plainly. The reasons are structural, not fixable with a better cable:
- Bridge chips are built to a price and carry firmware quirks that a high-throughput filesystem like ZFS exposes under scrub and resilver load.
- Many bridges expose duplicate or generic serial numbers, which confuses software that tracks disks by identity.
- Plenty of bridges do not pass SMART through, so you lose the early-warning signal ZFS relies on.
- A brief USB dropout often reconnects before the kernel finishes handling the disconnect, so the disk reappears as a new device (say
/dev/sdabecomes/dev/sdb) and the pool degrades.
If you must run a pool on USB anyway, import it with /dev/disk/by-id/ names so a device rename does not break it, and expect to babysit it. For anything you care about, put the drives on real SATA or PCIe. If a small always-on box is what you are after, a proper NAS build on a mini PC with internal drives is the right tool, and a USB enclosure is better kept as the thing you plug in to run backups to it.
Enclosures that behave well on Linux
Rather than chase brands, we pick by chipset, because that is what determines everything above. Both of our 10 Gbps picks use the Realtek RTL9210B, and that is deliberate: it is one of the best-supported 10 Gbps bridges on Linux, handling UASP, TRIM and SMART without drama. The USB4 pick moves to the ASMedia ASM2464PD, the chip behind nearly every 40 Gbps enclosure worth buying. For the wider field of shells and sizes, our roundup of M.2 NVMe and SATA enclosures covers more options, and the NVMe drive that goes inside matters just as much as the shell. Prices drift, so treat the figures below as bands and check the live price before buying.
Sabrent EC-SNVE: the versatile all-rounder
The EC-SNVE is a tool-free 10 Gbps enclosure built on the Realtek RTL9210B, and its trick is that it takes both NVMe/PCIe and SATA M.2 drives, so one shell covers whatever stick you have spare. That RTL9210B is the reason it is an easy Linux recommendation: UASP negotiates, TRIM works with the udev rule above if it is not already on, and SMART reads back with -d sntrealtek.
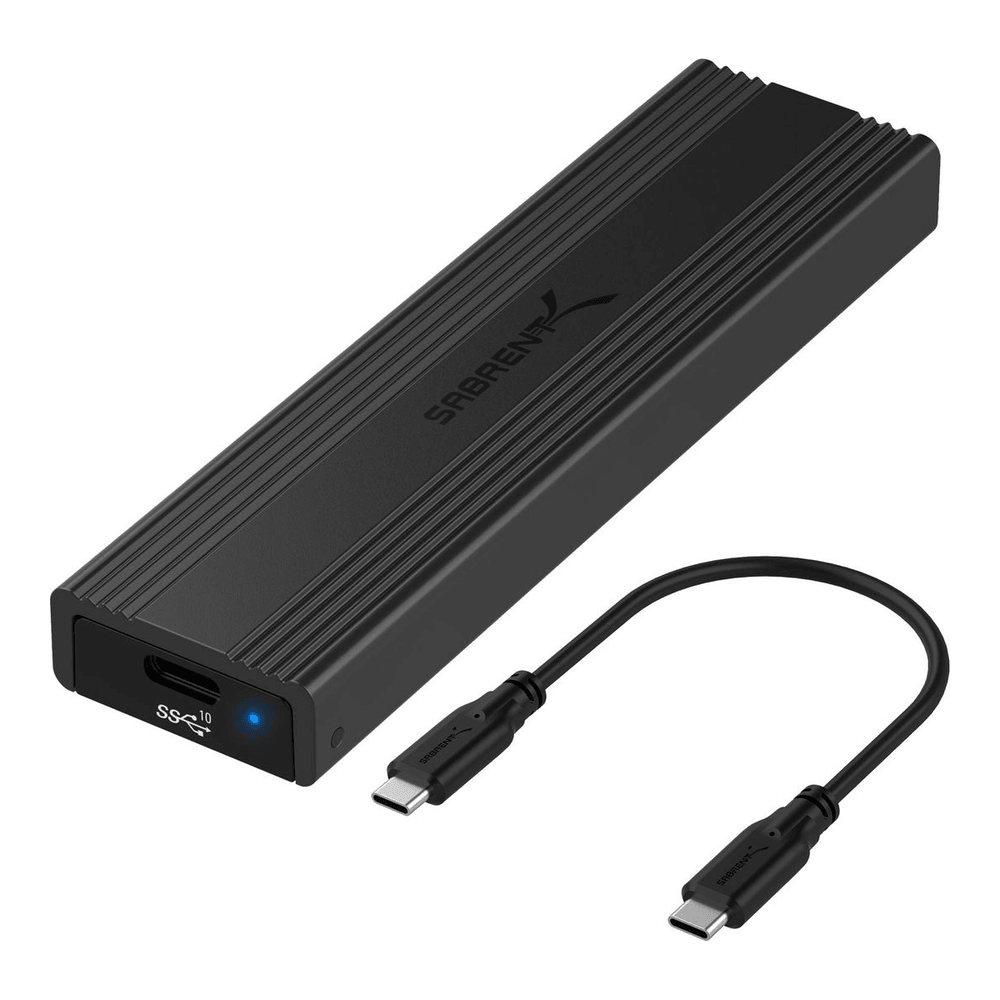
Who it is for: anyone who wants one enclosure that handles both drive types and does not want to think about the chipset. Skip it if you have a Gen 4 drive and want its full speed, because 10 Gbps caps you around 1000 MB/s. Expect a price in the low-to-mid $30s; check the current price on Amazon.
UGREEN M.2 NVMe and SATA 10Gbps: the value pick
UGREEN’s 10 Gbps enclosure runs the same RTL9210B bridge, adds a silicone bumper and ships both USB-C and USB-A cables, which makes it the practical choice if you plug into older machines too. Same Linux story as the Sabrent: UASP, TRIM and SMART all work, and it also accepts NVMe or SATA M.2.
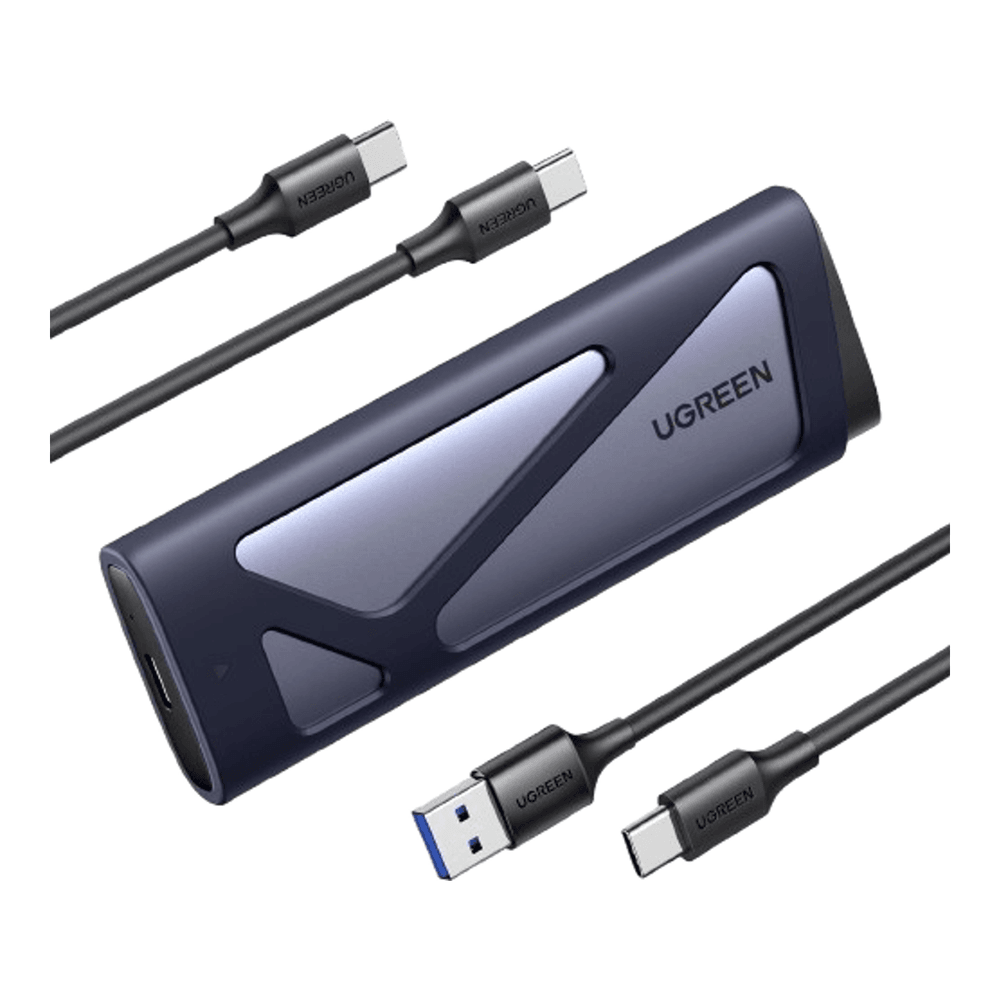
Who it is for: the value buyer who wants a rugged shell and the two cables in the box. Skip it if you want the smallest possible enclosure, because the bumper adds bulk. Expect a price in the $25 to $35 band; check the current price on Amazon.
UGREEN 40Gbps USB4: when you need the speed
If your machine has a USB4 or Thunderbolt port, a 10 Gbps enclosure leaves most of a Gen 4 drive’s speed on the table. This UGREEN enclosure uses the ASMedia ASM2464PD, wires the drive at PCIe Gen 4 x4, and has an active fan because sustained 40 Gbps transfers generate real heat. It stays backward compatible with plain USB 3.2, just at that port’s lower speed. On a USB4 or Thunderbolt host the drive often enumerates as a native /dev/nvme0n1, so plain smartctl -a and native TRIM just work with no bridge type; the -d sntasmedia path is for when it falls back to USB 3.2 mass-storage mode.
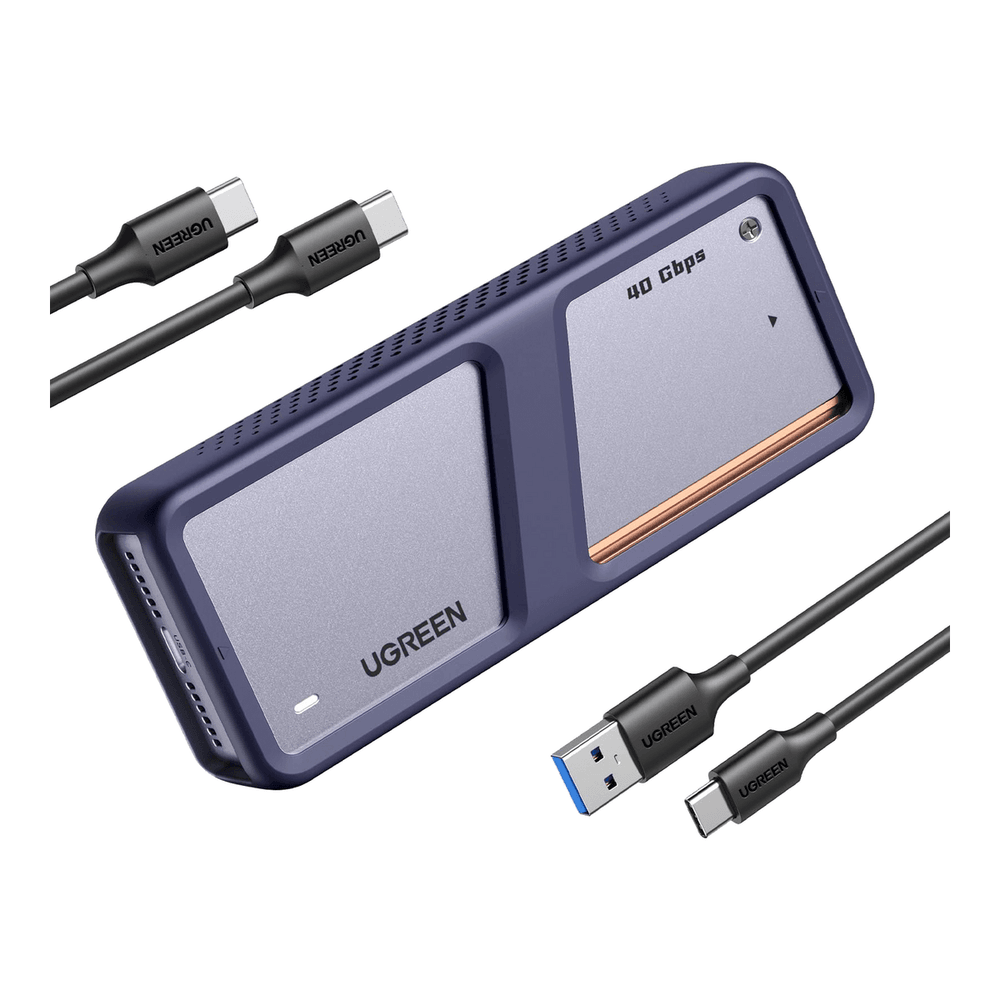
Who it is for: anyone on a USB4 or Thunderbolt machine who wants near-internal NVMe speed from an external drive. Skip it if your host only has USB 3.2, because you pay for 40 Gbps you cannot use, and the fan is a small extra noise source. Expect a price in the $60 to $80 band; check the current price on Amazon. When a single 40 Gbps drive starts to feel like your bottleneck for moving data between machines, that is usually the point where a 10GbE network link becomes the better investment.
What to check before you trust an enclosure with data
Before an enclosure earns a place in your backup rotation or your Linux backup setup, run four quick checks and you will know exactly what you are dealing with. Confirm UASP negotiated with lsusb -t (look for Driver=uas). Confirm TRIM with lsblk -D, and add the udev rule if DISC-MAX is zero. Confirm SMART reads back with the right smartctl -d type for your chipset. And keep ZFS off it. Five minutes on a new enclosure tells you whether it is a solid portable drive or a slow, blind one that will quietly age your SSD, and the difference is almost always the chip inside, not the label on the box.