SerenityOS is one of the most interesting projects in open source: a complete graphical operating system, kernel and all, written from scratch with no third-party code. There is no Linux underneath, no BSD, no GNU coreutils. The team built the kernel, the C library, the shell, the GUI toolkit, the web browser, and an entire suite of applications themselves. The result is a system that looks like a polished late-1990s desktop but runs on a modern 64-bit kernel with preemptive multitasking.
This guide shows how to install SerenityOS the only way the project supports it: by building it from source on a Linux host and running it in QEMU. There are no ISO images and no installer. We build the cross-compiler toolchain, compile the OS, and boot the resulting disk image in a virtual machine. After that, we walk through the desktop, the built-in apps, and how to add third-party software through the Ports system, with real commands and real output from a working build.
What you get when you install SerenityOS
SerenityOS is not a distro and it does not behave like one. The FAQ is blunt about it: there are no ISO images, and the project does not cater to non-technical users. You do not download a release and click through a setup wizard. You clone the git repository, build everything, and run it inside QEMU. That is the supported path, and for the vast majority of people it is the only path you should take.
A few things worth knowing before you spend an hour compiling:
- There is no package manager in the Linux sense. Third-party software is added by compiling Ports from source, which we cover later.
- The ABI is explicitly unstable. Library symbols and syscall interfaces can change at any commit, so SerenityOS is a system to explore and hack on, not to daily-drive.
- Everything is built in-house on purpose. The project maximizes hackability by avoiding external dependencies entirely.
- It targets x86_64, AArch64, and RISC-V. This guide uses the default x86_64 target.
One point of confusion worth clearing up: the Ladybird browser started life inside SerenityOS. In mid-2024 it was forked into a separate, standalone project and the original author stepped down as SerenityOS lead to focus on it. SerenityOS still ships its own in-tree browser, but Ladybird is now developed independently for Linux and macOS. If you came here looking for the browser, see our guide to installing the Ladybird browser instead.
Prerequisites
You build SerenityOS on a host machine and run it in a VM, so the requirements are about your build host, not about SerenityOS itself:
- A Linux, macOS, or WSL2 host. This guide uses Ubuntu 24.04 LTS.
- A host compiler with C++26 support: GCC 14 or Clang 17 or newer. Ubuntu 24.04 ships GCC 13 by default, so we install GCC 14 explicitly.
- CMake 3.25 or later and QEMU 6.2 or later. SerenityOS bootstraps its own newer CMake during the build if your system version is too old.
- Around 40 GB of free disk for the toolchain, build tree, and ccache.
- At least 8 GB of RAM. Keep your free RAM in gigabytes at or above your CPU core count, or the toolchain build can exhaust memory.
- A regular user account. Do not build as root (the build script refuses, for good reason).
Step 1: Install the build dependencies
On Ubuntu or Debian, install the toolchain prerequisites and QEMU in one go:
sudo apt update
sudo apt install build-essential cmake curl libmpfr-dev libmpc-dev libgmp-dev \
  e2fsprogs ninja-build qemu-system-gui qemu-system-x86 qemu-utils ccache \
  rsync unzip texinfo libssl-dev zlib1g-dev
Ubuntu 24.04 installs GCC 13 as the default compiler, but the SerenityOS host tools need a compiler that understands C++26. Add GCC 14 alongside it:
sudo apt install gcc-14 g++-14Confirm the versions meet the minimums. GCC should report 14, CMake 3.25 or newer, and QEMU 6.2 or newer:
gcc-14 --version
cmake --version
qemu-system-x86_64 --version
On our Ubuntu 24.04 test machine that prints:
gcc-14 (Ubuntu 14.2.0-4ubuntu2~24.04.1) 14.2.0
cmake version 3.28.3
QEMU emulator version 8.2.2 (Debian 1:8.2.2+ds-0ubuntu1.16)
On Arch or Manjaro the equivalent package set is:
base-devel cmake curl mpfr libmpc gmp e2fsprogs ninja qemu-desktop qemu-system-aarch64 ccache rsync unzipOn macOS, install the Xcode Command Line Tools and use Homebrew:
brew install coreutils e2fsprogs qemu bash imagemagick ninja cmake ccache rsync zstd, plus genext2fsfor the disk image step. The rest of the build flow is identical.
Step 2: Clone the SerenityOS source
Clone the repository and move into it:
git clone https://github.com/SerenityOS/serenity.git
cd serenity
Everything from here runs through one script, Meta/serenity.sh, which wraps the toolchain build, the OS compile, disk-image creation, and the QEMU launch. Run it with no arguments to list every subcommand:
Meta/serenity.shThe output explains what each command does:
Usage: serenity.sh COMMAND [TARGET] [TOOLCHAIN] [ARGS...]
  Supported TARGETs: aarch64, x86_64, riscv64, lagom. Defaults to host architecture.
  Supported TOOLCHAINs: GNU, Clang. Defaults to GNU.
  Supported COMMANDs:
    build:      Compiles the target binaries
    install:    Installs the target binary
    image:      Creates a disk image with the installed binaries
    run:        Runs the built image in QEMU
    gdb:        Same as run, but also starts a gdb remote session
    test:       Runs the built image in QEMU in self-test mode
    delete:     Removes the build environment for TARGET
    rebuild:    Deletes and re-creates the build environment, and compiles for TARGET
We only need two of these to start: build to compile everything, and run to boot the result.
Step 3: Build SerenityOS
This is the step that takes a while. Set GCC 14 as the host compiler and kick off the build. Run this as your normal user, never with sudo:
export CC=gcc-14 CXX=g++-14
Meta/serenity.sh build
On the first run the script does three things in order: it downloads and builds a recent CMake if your system one is too old, compiles the SerenityOS GNU cross-compiler toolchain (binutils and GCC for the target), then builds the kernel and the full userland. The toolchain stage alone takes the better part of an hour on a typical quad-core machine; subsequent builds skip it entirely and finish in minutes because the toolchain and ccache are reused.
If your machine has more CPU cores than free gigabytes of RAM, cap the parallelism to avoid an out-of-memory stall:
export MAKEJOBS=4
Meta/serenity.sh build
When the compile finishes, the binaries sit under Build/x86_64, ready to be packed into a bootable disk image.
Step 4: Boot SerenityOS in QEMU
With the build complete, one command creates the disk image and launches the system in QEMU:
Meta/serenity.sh runA QEMU window opens and SerenityOS boots straight to the desktop. The default user is anon with the password foo. The whole thing comes up in a few seconds when KVM acceleration is available on the host.
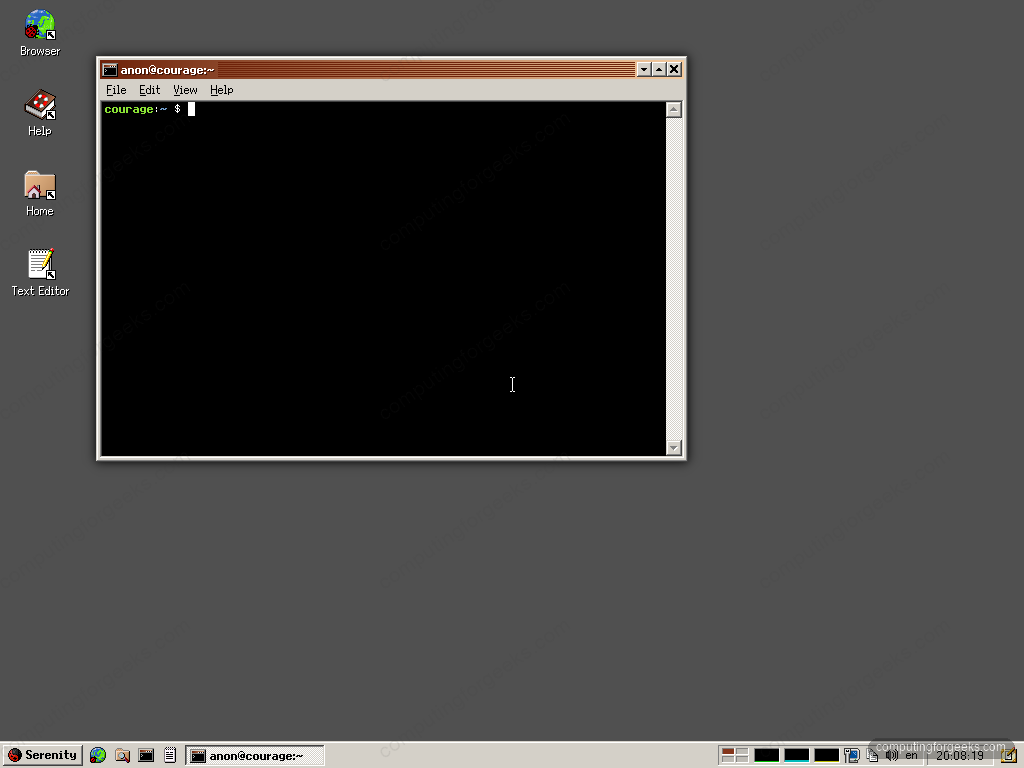
That retro desktop is fully live. The taskbar sits at the bottom, the System Menu is top-left, and everything responds the way you would expect from a late-90s workstation, only faster.
Getting around the desktop
SerenityOS leans heavily on keyboard shortcuts, and they are consistent across the system. A few you will reach for immediately:
| Shortcut | Action |
|---|---|
Super | Open the System Menu |
Super+Space | Open Assistant (search and app launcher) |
Super+D | Show and hide the desktop |
Super+Up / Super+Down | Maximize / minimize the active window |
Super+Left / Super+Right | Snap window to half the screen |
Alt+Tab | Switch applications (hold Shift to reverse) |
Ctrl+Alt+Arrows | Move between workspaces |
Ctrl+Shift+A | Open the command palette inside an app |
F1 | Open the current app’s manual |
The fastest way to launch anything is Assistant: tap Super+Space, start typing an app name or a calculation, and hit Enter. It doubles as a calculator and a unit converter.
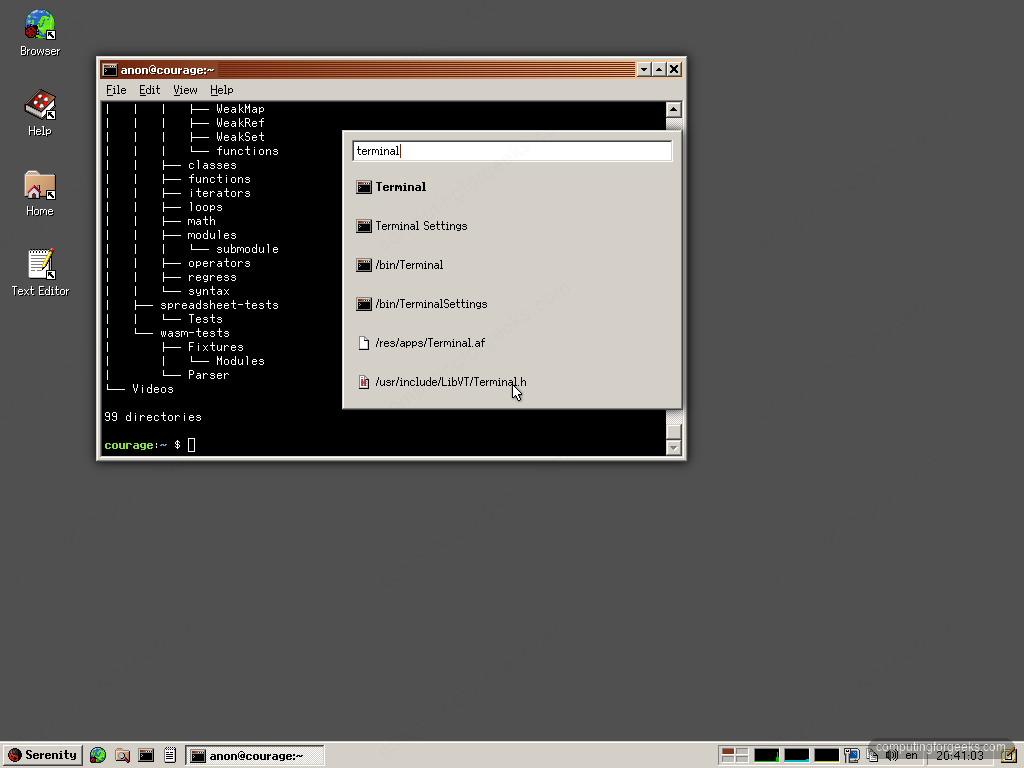
The launcher is only useful because there is plenty to launch. SerenityOS ships a surprisingly complete application set.
Exploring the built-in apps
SerenityOS ships a genuinely large application set, all written for the system. The ones worth opening first:
Terminal. A proper terminal running the system’s own shell, with the standard Unix utilities and the full man-page set. Run uname -a to see the kernel string or ls / to explore the layout:
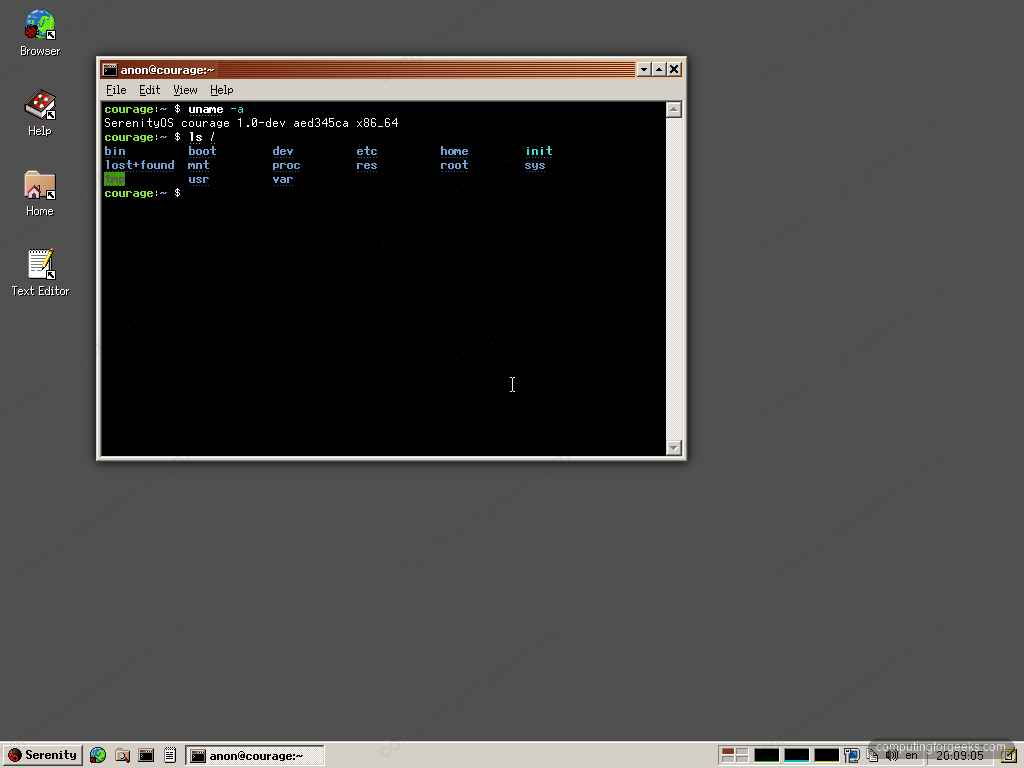
The kernel string names the system and the exact commit you built, which is the first thing to quote when you report a bug upstream.
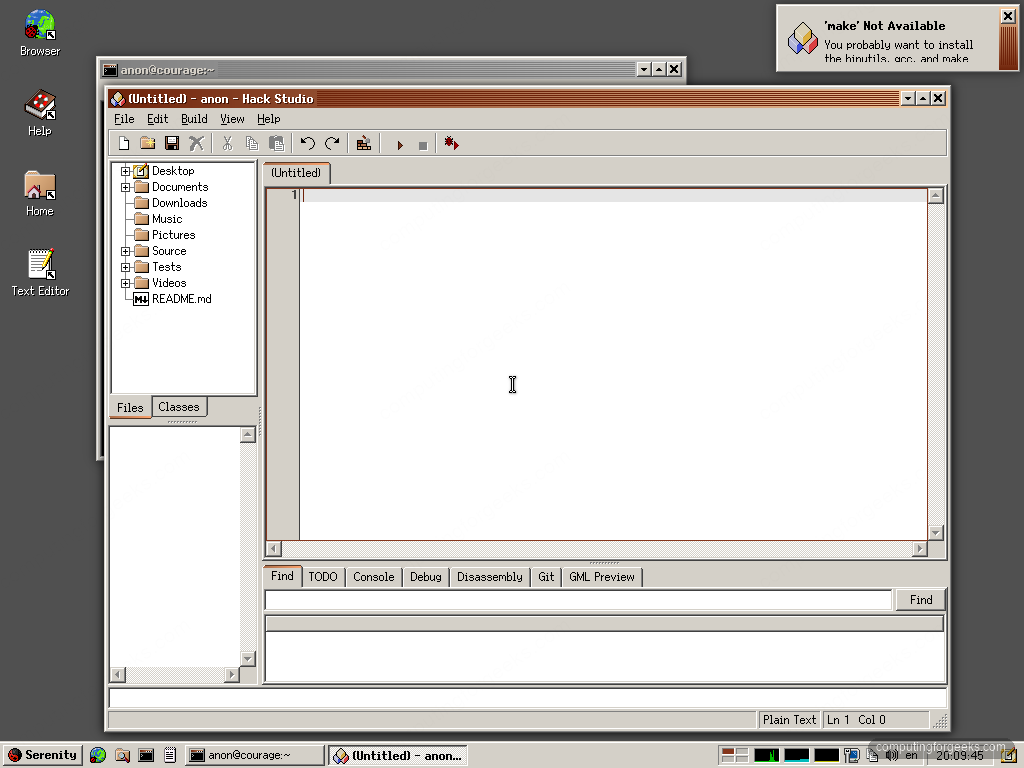
HackStudio. The native C++ IDE, with a project browser, editor, integrated debugger, and a GUI form designer. This is the tool the project builds and debugs itself with. One thing to expect on a fresh build: HackStudio warns that make is not available until you install the build tools. To compile inside SerenityOS, build the binutils, gcc, and make ports first, which brings us to the Ports system.
Browser. SerenityOS ships its own web browser built on the in-house LibWeb and LibJS engines, handling HTML, CSS, JavaScript, and WebAssembly. It will not render the modern web flawlessly, but watching a hand-written engine load a page is the whole point.
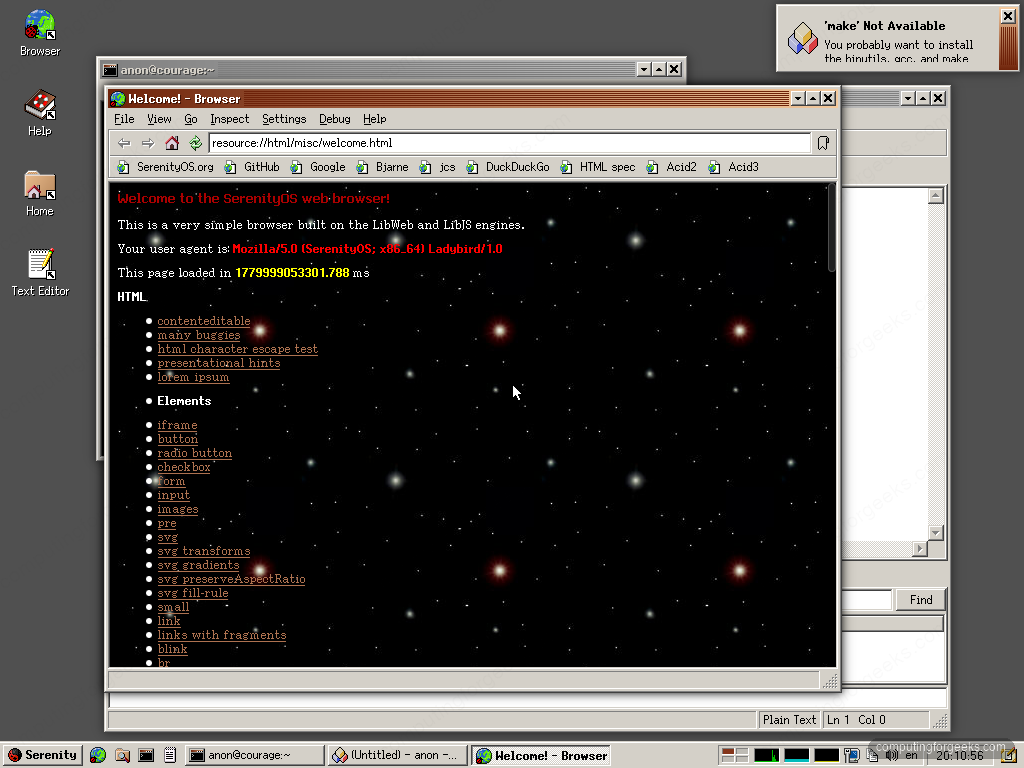
The rest. PixelPaint for raster editing, a Spreadsheet that uses JavaScript as its formula language, Calculator, TextEditor, a Mail client, and a stack of games including Solitaire, Minesweeper, 2048, and chess. System Monitor gives you a live view of processes, memory, and network, the same way you would expect on any Unix.
Installing third-party software with Ports
On a normal Ubuntu desktop you reach for apt, Snap, or Flatpak to add software. SerenityOS has none of those. Third-party software arrives through the Ports system instead. A port is a small script that fetches an upstream project’s source, patches it for SerenityOS, builds it against the cross-toolchain, and installs it into the disk image. There are more than 350 ports in the tree, from libraries to editors to games.
To install one, change into its directory under Ports/ and run its build script. As a quick worked example, here is the tree command-line utility:
cd Ports/tree
./package.sh
Running ./package.sh with no arguments performs every stage in sequence: installdepends, fetch, patch, configure, build, and install. Dependencies listed by the port are built first automatically. The installed files land in the build root at Build/x86_64/Root, and a record is written to Build/x86_64/Root/usr/Ports/installed.db, so they are present the next time you boot.
The build compiles the upstream source with the SerenityOS cross-compiler and finishes by registering the port:
=> Building tree...
+ make CC=x86_64-serenity-gcc all
x86_64-serenity-gcc -O3 -std=c11 -Wall -c -o tree.o tree.c
x86_64-serenity-gcc -O3 -std=c11 -Wall -c -o list.o list.c
x86_64-serenity-gcc -O3 -std=c11 -Wall -c -o color.o color.c
x86_64-serenity-gcc  -o tree tree.o list.o hash.o color.o file.o filter.o info.o unix.o xml.o json.o html.o strverscmp.o
=> Installing tree...
+ make install PREFIX=Build/x86_64/Root/usr/local
=> Adding tree 2.1.3 to database of installed ports...
Successfully installed tree 2.1.3.
After installing a port, rebuild the image and boot again to pick it up:
Meta/serenity.sh runBack on the desktop, open a Terminal and the tree command is now on the path:
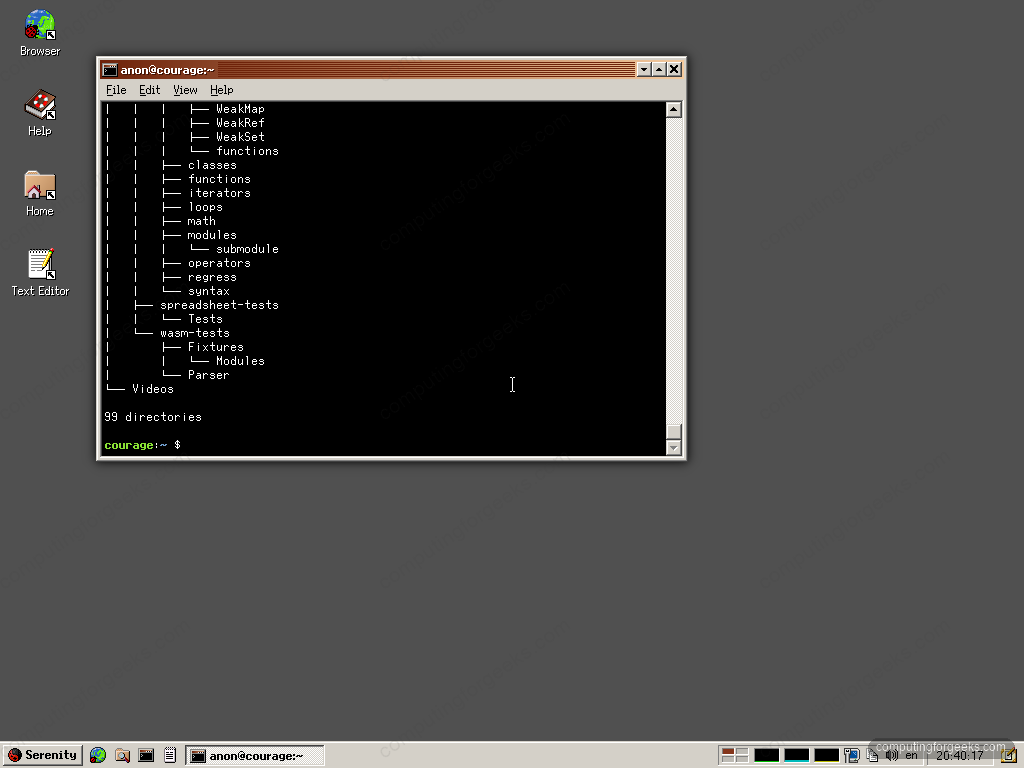
To build every available port at once, run ./build_all.sh from inside the Ports/ directory. The community also maintains a browsable catalog at ports.serenityos.net if you want to see what is available before committing to a build.
Tips for working with SerenityOS
A handful of things make day-to-day hacking smoother once the first build is behind you:
- Never build as root. The script refuses outright, because a root-owned build directory will break later runs. Always use a normal user account.
- Updating is a git pull plus a rebuild. Run
git pullin the repo, thenMeta/serenity.sh buildagain. Thanks to ccache and the cached toolchain, an update build is fast. - ccache earns its keep. It was in the dependency list for a reason. Repeated builds reuse cached object files and finish in a fraction of the first build’s time.
- Know where things live. The compiled system root is
Build/x86_64/Root. That directory is what gets packed into the QEMU disk image, which you can inspect or convert with the standard qemu-img and qemu-nbd tools if you ever need to. - Resetting the build. If a build gets into a bad state,
Meta/serenity.sh rebuilddeletes and recreates the build environment from scratch. - Treat it as a lab, not a daily driver. With no ABI stability guarantee, the value is in exploring and contributing, not in storing real work inside the VM.
Troubleshooting
The errors below are the ones you are most likely to hit on a first build.
die: Do not run serenity.sh as root
The build script stops immediately if you run it as root, to avoid creating a root-owned build tree that later steps cannot write to. Switch to a normal user account and run the build from there. The disk-image step still calls sudo internally when it needs to, so your user only needs sudo access, not a root shell.
Host compiler does not support C++26
If the host-tools build fails with errors about unknown C++ features, your default compiler is too old. On Ubuntu 24.04 that is GCC 13. Install GCC 14 and point the build at it before compiling:
sudo apt install gcc-14 g++-14
export CC=gcc-14 CXX=g++-14
Meta/serenity.sh build
With GCC 14 selected as the host compiler, the host tools compile cleanly.
QEMU version is too old
SerenityOS needs QEMU 6.2 or newer. On older distributions the packaged QEMU may predate that. Check with qemu-system-x86_64 --version and, if it is behind, install a newer build from your distribution’s backports or upgrade the host. Running SerenityOS in QEMU is the supported way to use it, so this one is not optional.
The build exhausts memory and the machine stalls
The toolchain compile is memory-hungry under high parallelism. If your core count exceeds your free RAM in gigabytes, the build can lock the machine up. Cap the parallel jobs with export MAKEJOBS=4 (or any number at or below your free-RAM gigabytes) and start the build again.
Once SerenityOS is running, the best next move is to open HackStudio, read through how a GUI app is structured, and try building a port of your own. The whole system is small enough to understand end to end, which is exactly what makes it worth running.