DSpace is the open-source repository platform that powers thousands of academic, scientific, and cultural collections worldwide, from MIT and the World Bank to small research libraries. Version 9.x moves the platform onto Solr 9, Angular 20, and the modern Spring Boot 6 backend, which means every guide that targeted DSpace 7 or 8 needs a fresh look before you commit to a production install.
This guide walks through a complete DSpace 9.2 install on Rocky Linux 10 or AlmaLinux 10. You get PostgreSQL 16 as the database, Apache Solr 9.10 for search and indexing, Apache Tomcat 10.1 hosting the REST API, and the Angular 20 frontend served by Node 22 LTS behind an Nginx reverse proxy with Let’s Encrypt SSL. Every command was executed on a fresh Rocky 10.1 VM with SELinux enforcing.
Last verified: May 2026 | Tested on Rocky Linux 10.1 with DSpace 9.2, Java 21.0.11, PostgreSQL 16.13, Solr 9.10.1, Tomcat 10.1.55, Node 22.22.3, Maven 3.9.9, Ant 1.10.15
Prerequisites
- A clean Rocky Linux 10 or AlmaLinux 10 server with at least 4 vCPU and 12 GB RAM. Walk through the Rocky Linux 10 post-install checklist first if this is a fresh install. The Maven backend build needs 2 GB and the Angular SSR build peaks at ~8 GB while PostgreSQL, Solr, and Tomcat are already running. An 8 GB VM OOM-killed the SSR build during testing, so size up before kicking off Step 11
- 50 GB free disk under
/optfor source, build artefacts, the assetstore, the Solr indexes, and the PostgreSQL data directory - A non-root user with
sudoprivileges - A domain or subdomain with an A record pointing at the server’s public IP for the SSL step (any DNS provider works because the article uses certbot’s HTTP-01 challenge)
- Tested on: Rocky Linux 10.1, AlmaLinux 10.0, kernel 6.12, DSpace 9.2, Solr 9.10.1, PostgreSQL 16.13
Step 1: Set reusable shell variables
Every command below uses shell variables so you change one block at the top and paste the rest as-is. Export them at the start of your SSH session:
export DSPACE_DOMAIN="dspace.example.com"
export DSPACE_ADMIN_EMAIL="[email protected]"
export DSPACE_DB_NAME="dspace"
export DSPACE_DB_USER="dspace"
export DSPACE_DB_PASS="ChangeMe#Strong2026"
export DSPACE_INSTALL="/opt/dspace"
export DSPACE_SRC="/opt/dspace/src"
export DSPACE_UI="/opt/dspace-ui"

export DSPACE_VERSION="9.2" #https://github.com/DSpace/DSpace/releases
export SOLR_VERSION="9.10.1" #https://solr.apache.org/downloads.html
export TOMCAT_VERSION="10.1.55" #https://tomcat.apache.org/download-10.cgi
Swap the placeholder values for your real domain, admin email, and a strong database password, then confirm they are set before running anything else:
echo "Domain:   ${DSPACE_DOMAIN}"
echo "Admin:    ${DSPACE_ADMIN_EMAIL}"
echo "DB:       ${DSPACE_DB_NAME} / ${DSPACE_DB_USER}"
echo "Install:  ${DSPACE_INSTALL}"
echo "Versions: DSpace ${DSPACE_VERSION}, Solr ${SOLR_VERSION}, Tomcat ${TOMCAT_VERSION}"
Variables hold only for the current shell. If you reconnect, re-run the export block. For long-running installs you can also append the same lines to ~/.bashrc on a dedicated install user.
Step 2: Update the system and create the dspace user
Bring the box current and add a dedicated unprivileged user to own the DSpace install. Running services as the system root is the wrong default for a long-lived public repository.
sudo dnf -y upgrade --refresh
sudo useradd -m -s /bin/bash dspace
echo "dspace:ChangeMe#Strong2026" | sudo chpasswd
sudo mkdir -p "${DSPACE_INSTALL}" /opt/downloads
sudo chown -R dspace:dspace "${DSPACE_INSTALL}"
sudo chown -R "${USER}:${USER}" /opt/downloads
The /opt/downloads directory keeps the Solr and Tomcat tarballs out of /tmp, which gets cleaned on every reboot.
Step 3: Install Java 21, Maven, Ant, and base packages
Rocky Linux 10 ships OpenJDK 21 LTS in the default AppStream repo. DSpace 9 officially supports both JDK 17 and JDK 21, and 21 is the easier path here because 17 is not in the Rocky 10 base. If you need a different JDK build (Corretto, Temurin, Zulu) see the broader Java install guide for Rocky and AlmaLinux. Maven 3.9 and Ant 1.10 both clear the DSpace 9 minimum.
sudo dnf -y install java-21-openjdk-devel maven ant git wget curl unzip tar \
  nginx firewalld bind-utils policycoreutils-python-utils lsof procps-ng
Set JAVA_HOME system-wide so Tomcat, Solr, Maven, and Ant all use the same runtime:
sudo tee /etc/profile.d/java-home.sh >/dev/null <<'EOF'
export JAVA_HOME=/usr/lib/jvm/java-21-openjdk
export PATH=$JAVA_HOME/bin:$PATH
EOF
sudo chmod +x /etc/profile.d/java-home.sh
source /etc/profile.d/java-home.sh
Verify all four tools resolve and report the right versions:
java -version
mvn -v | head -3
ant -version
echo "JAVA_HOME=${JAVA_HOME}"
Expected output (versions may differ on subsequent point releases):
openjdk version "21.0.11" 2026-04-21 LTS
OpenJDK Runtime Environment (Red_Hat-21.0.11.0.10-1) (build 21.0.11+10-LTS)
OpenJDK 64-Bit Server VM (Red_Hat-21.0.11.0.10-1) (build 21.0.11+10-LTS, mixed mode, sharing)
Apache Maven 3.9.9 (Red Hat 3.9.9-3)
Maven home: /usr/share/maven
Java version: 21.0.11, vendor: Red Hat, Inc., runtime: /usr/lib/jvm/java-21-openjdk
Apache Ant(TM) version 1.10.15 compiled on December 18 2024
JAVA_HOME=/usr/lib/jvm/java-21-openjdk
Rocky 10 raises a benign warning about /etc/java/maven.conf and /etc/java/ant.conf the first time you run mvn -v or ant -version. Both binaries still execute correctly because JAVA_HOME is exported in the profile script above.
Step 4: Install and configure PostgreSQL 16
DSpace 9 supports PostgreSQL 14 through 17. Rocky 10’s default stream ships 16.13, which is well inside the supported range and the same major version most institutions are standardising on. DSpace 9 no longer needs the pgcrypto extension because PostgreSQL 13 and later support native UUID generation.
sudo dnf -y install postgresql-server postgresql-contrib
sudo postgresql-setup --initdb
sudo systemctl enable --now postgresql
The postgresql-setup --initdb step runs the one-time data directory initialisation; systemctl enable --now starts the daemon and arms it for boot.
Create the DSpace database and user
The DSpace install assistant expects a database owner with full CRUD on a database of the same name. Create both as the postgres superuser:
sudo -u postgres psql -c "CREATE USER ${DSPACE_DB_USER} WITH PASSWORD '${DSPACE_DB_PASS}';"
sudo -u postgres createdb --owner="${DSPACE_DB_USER}" --encoding=UNICODE "${DSPACE_DB_NAME}"
sudo -u postgres psql -c "\l ${DSPACE_DB_NAME}"
The third command lists the new database with its owner and encoding, which is the fastest sanity check that the user has the privileges DSpace needs.
Switch host auth to scram-sha-256
Out of the box Rocky 10’s PostgreSQL uses ident auth on local TCP, which blocks the JDBC driver from connecting with a password. Switch the IPv4 and IPv6 loopback lines to scram-sha-256:
PGHBA=/var/lib/pgsql/data/pg_hba.conf
sudo cp "${PGHBA}" "${PGHBA}.bak"
sudo sed -i 's|^host\s\+all\s\+all\s\+127.0.0.1/32\s\+ident|host    all             all             127.0.0.1/32            scram-sha-256|' "${PGHBA}"
sudo sed -i 's|^host\s\+all\s\+all\s\+::1/128\s\+ident|host    all             all             ::1/128                 scram-sha-256|' "${PGHBA}"
sudo systemctl restart postgresql
Confirm the new auth method works by logging in as the dspace user:
PGPASSWORD="${DSPACE_DB_PASS}" psql -h 127.0.0.1 -U "${DSPACE_DB_USER}" -d "${DSPACE_DB_NAME}" -c '\conninfo'You should see a successful connection line confirming the database, user, host, and port:
You are connected to database "dspace" as user "dspace" on host "127.0.0.1" at port "5432".If the connection fails with FATAL: Peer authentication failed, re-check the pg_hba.conf edit above and reload PostgreSQL.
Step 5: Install Apache Solr 9
DSpace 9 requires Solr 9.x. Solr 8.x is end of life and is no longer supported. There is no Solr 9 package in the Rocky 10 default repos, so download the official tarball from the Apache mirror. Use the full solr-9.10.1.tgz (~363 MB), NOT the slim variant: DSpace’s search, qaevent, and suggestion cores all depend on the analysis-extras module (specifically ICUFoldingFilterFactory), which is only included in the full distribution.
cd /opt/downloads
curl -fsSLO "https://dlcdn.apache.org/solr/solr/${SOLR_VERSION}/solr-${SOLR_VERSION}.tgz"
sudo tar xzf "solr-${SOLR_VERSION}.tgz" -C /opt/
sudo ln -sfn "/opt/solr-${SOLR_VERSION}" /opt/solr
sudo useradd -r -d /var/solr -s /sbin/nologin solr
sudo mkdir -p /var/solr
sudo chown -R solr:solr "/opt/solr-${SOLR_VERSION}-slim" /var/solr
Run Solr’s own install script. On Rocky 10 it complains about chkconfig not existing because Rocky 10 has dropped SysV init, but it still writes /etc/default/solr.in.sh which is the only piece we need:
sudo bash "/opt/solr/bin/install_solr_service.sh" \
  "/opt/downloads/solr-${SOLR_VERSION}.tgz" \
  -d /var/solr -s solr -u solr -p 8983 -n
sudo chmod 644 /etc/default/solr.in.sh
Solr 9.8 and later require the solr.config.lib.enabled flag to load DSpace’s custom Solr config sets. Also bind Solr to localhost only because Nginx never proxies to Solr; only the DSpace backend talks to it:
sudo tee -a /etc/default/solr.in.sh >/dev/null <<'EOF'
SOLR_OPTS="-Dsolr.config.lib.enabled=true"
SOLR_JETTY_HOST=127.0.0.1
EOF
Raise the file descriptor and process limits for the solr user. The defaults of 1024 / 30000 trigger warnings and become hard limits under load:
sudo tee /etc/security/limits.d/95-solr.conf >/dev/null <<'EOF'
solr  soft  nofile  65535
solr  hard  nofile  65535
solr  soft  nproc   65535
solr  hard  nproc   65535
EOF
Solr’s bundled install script wrote a SysV init that does not work on Rocky 10. Replace it with a proper systemd unit that runs Solr in the foreground:
sudo tee /etc/systemd/system/solr.service >/dev/null <<'EOF'
[Unit]
Description=Apache Solr
After=network.target

[Service]
Type=simple
User=solr
Group=solr
Environment=JAVA_HOME=/usr/lib/jvm/java-21-openjdk
EnvironmentFile=/etc/default/solr.in.sh
ExecStart=/opt/solr/bin/solr start -f
ExecStop=/opt/solr/bin/solr stop
LimitNOFILE=65535
LimitNPROC=65535
TimeoutStartSec=180
Restart=on-failure
SuccessExitStatus=143

[Install]
WantedBy=multi-user.target
EOF

sudo systemctl daemon-reload
sudo systemctl enable --now solr
Confirm Solr is up and is serving on port 8983:
sudo systemctl is-active solr
curl -fsS 'http://127.0.0.1:8983/solr/admin/info/system?wt=json' | head -c 250
The response should include "solr-spec-version":"9.10.1" and "mode":"std", confirming Solr is running in standalone (user-managed) mode rather than SolrCloud, which is what DSpace expects.
Step 6: Install Apache Tomcat 10.1
DSpace 9 requires a Jakarta EE 9+ servlet container. Tomcat 10.1.x is the reference choice. Rocky 10 doesn’t package Tomcat 10, so install from the Apache binary tarball. If you want the Tomcat install isolated as its own bare-metal service for other apps too, see the standalone Tomcat 10 install guide.
cd /opt/downloads
curl -fsSLO "https://dlcdn.apache.org/tomcat/tomcat-10/v${TOMCAT_VERSION}/bin/apache-tomcat-${TOMCAT_VERSION}.tar.gz"
sudo tar xzf "apache-tomcat-${TOMCAT_VERSION}.tar.gz" -C /opt/
sudo mv "/opt/apache-tomcat-${TOMCAT_VERSION}" "/opt/tomcat-${TOMCAT_VERSION}"
sudo ln -sfn "/opt/tomcat-${TOMCAT_VERSION}" /opt/tomcat
sudo useradd -r -d /opt/tomcat -s /sbin/nologin tomcat
sudo chown -R tomcat:tomcat "/opt/tomcat-${TOMCAT_VERSION}"
Point Tomcat’s app base at the DSpace webapps directory instead of the default $CATALINA_HOME/webapps, and bind only to localhost since Nginx is in front:
sudo cp /opt/tomcat/conf/server.xml /opt/tomcat/conf/server.xml.bak
sudo sed -i 's|appBase="webapps"|appBase="/opt/dspace/webapps"|' /opt/tomcat/conf/server.xml
sudo sed -i 's|<Connector port="8080" protocol="HTTP/1.1"|<Connector port="8080" protocol="HTTP/1.1" address="127.0.0.1"|' /opt/tomcat/conf/server.xml
Do NOT pre-create /opt/dspace/webapps with tomcat ownership. The Ant install in Step 7 needs to write there as the dspace user; if the directory exists with the wrong ownership, the install completes silently with an empty webapps directory and Tomcat serves no DSpace REST API. Step 7’s ant fresh_install creates the directory with the right ownership for you.
Create a systemd unit for Tomcat with the DSpace-recommended JVM tuning:
sudo tee /etc/systemd/system/tomcat.service >/dev/null <<'EOF'
[Unit]
Description=Apache Tomcat 10.1 for DSpace 9
After=network.target postgresql.service solr.service

[Service]
Type=forking
User=tomcat
Group=tomcat
Environment=JAVA_HOME=/usr/lib/jvm/java-21-openjdk
Environment=CATALINA_PID=/opt/tomcat/temp/tomcat.pid
Environment=CATALINA_HOME=/opt/tomcat
Environment=CATALINA_BASE=/opt/tomcat
Environment=CATALINA_OPTS=-Xmx1024m -Xms512m -server -XX:+UseParallelGC
Environment=JAVA_OPTS=-Djava.awt.headless=true -Dfile.encoding=UTF-8
ExecStart=/opt/tomcat/bin/startup.sh
ExecStop=/opt/tomcat/bin/shutdown.sh
Restart=on-failure
RestartSec=10

[Install]
WantedBy=multi-user.target
EOF

sudo systemctl daemon-reload
sudo systemctl enable tomcat
Tomcat will start after the DSpace backend webapp is deployed in Step 9. Leave it disabled-but-enabled for now.
Step 7: Download and build the DSpace 9.2 backend
DSpace ships the backend as a Maven multi-module project. Clone the 9.2 tag straight from GitHub and put the source under ${DSPACE_SRC} owned by the dspace user:
sudo -u dspace git clone --depth 1 --branch "dspace-${DSPACE_VERSION}" \
  https://github.com/DSpace/DSpace.git "${DSPACE_SRC}"
cd "${DSPACE_SRC}"
sudo -u dspace cp dspace/config/local.cfg.EXAMPLE dspace/config/local.cfg
The example config gives you commented templates for every DSpace setting. You only need to override a handful before building.
Edit local.cfg with your install settings
The dspace/config/local.cfg file controls every runtime path, DB credential, Solr URL, and base URL. Open it and replace the placeholders with your real values:
sudo -u dspace tee "${DSPACE_SRC}/dspace/config/local.cfg" >/dev/null <<EOF
dspace.dir = ${DSPACE_INSTALL}
dspace.server.url = https://${DSPACE_DOMAIN}/server
dspace.ui.url = https://${DSPACE_DOMAIN}
dspace.name = My DSpace 9 Repository

solr.server = http://127.0.0.1:8983/solr

db.url = jdbc:postgresql://localhost:5432/${DSPACE_DB_NAME}
db.driver = org.postgresql.Driver
db.dialect = org.hibernate.dialect.PostgreSQLDialect
db.username = ${DSPACE_DB_USER}
db.password = ${DSPACE_DB_PASS}

mail.server = localhost
mail.from.address = dspace-noreply@${DSPACE_DOMAIN}
feedback.recipient = ${DSPACE_ADMIN_EMAIL}
mail.admin = ${DSPACE_ADMIN_EMAIL}

rest.cors.allowed-origins = https://${DSPACE_DOMAIN}
EOF
The rest.cors.allowed-origins entry is non-negotiable in production: without it, the Angular frontend’s REST calls hit a CORS wall and the UI silently fails to load any data. Add every public origin that should be allowed to call the backend.
Build the backend with Maven
The Maven package phase compiles every module and produces the deployable webapp WAR plus a deployment bundle. Expect 20 to 30 minutes on 4 cores because Maven has to download a few hundred MB of dependencies on first run:
cd "${DSPACE_SRC}"
sudo -u dspace bash -c 'JAVA_HOME=/usr/lib/jvm/java-21-openjdk MAVEN_OPTS="-Xmx2048m" mvn -B -DskipTests -Denforcer.skip=true package'
The build succeeds when the final lines show BUILD SUCCESS. The deployable bundle lands at ${DSPACE_SRC}/dspace/target/dspace-installer/.
Install with Ant
DSpace ships an Ant target that copies the runtime artefacts into ${DSPACE_INSTALL}:
cd "${DSPACE_SRC}/dspace/target/dspace-installer"
sudo -u dspace ant fresh_install
After the Ant target finishes, the install directory should contain bin, config, lib, solr, and webapps subdirectories.
Step 8: Deploy Solr cores and run database migrations
DSpace ships its own Solr config sets for the search, statistics, authority, and OAI cores. Copy them into Solr’s home directory and restart Solr so it picks them up:
sudo cp -r "${DSPACE_INSTALL}/solr/"* /var/solr/data/
sudo chown -R solr:solr /var/solr/data
sudo systemctl restart solr
sleep 8
curl -fsS 'http://127.0.0.1:8983/solr/admin/cores?wt=json' | python3 -m json.tool | head -40
You should see four cores listed: search, statistics, authority, and oai.
Now run the DSpace database migration. This creates the schema, sequences, and seeds the default groups and metadata schemas:
sudo -u dspace "${DSPACE_INSTALL}/bin/dspace" database migrate
sudo -u dspace "${DSPACE_INSTALL}/bin/dspace" database info | tail -10
Confirm the command completed without errors before continuing.
Step 9: Create the administrator account
Create the first administrator interactively. The script prompts for email, first/last name, and a password:
sudo -u dspace "${DSPACE_INSTALL}/bin/dspace" create-administratorFor an unattended install, pass the values on the command line:
sudo -u dspace "${DSPACE_INSTALL}/bin/dspace" create-administrator \
  -e "${DSPACE_ADMIN_EMAIL}" -f Admin -l User -p 'ChangeMe#Strong2026' -c en
Confirm the command completed without errors before continuing.
Step 10: Deploy the backend webapp to Tomcat
The Ant install in Step 7 wrote the Spring Boot webapp into /opt/dspace/webapps/server. Hand ownership over to the tomcat user so the servlet container can read it, then start Tomcat:
sudo chown -R tomcat:tomcat /opt/dspace/webapps
sudo systemctl restart tomcat
sleep 25
sudo systemctl is-active tomcat
curl -fsS http://127.0.0.1:8080/server/api | head -c 300
A 200 response with a JSON body describing the DSpace REST API tells you the backend is live and talking to PostgreSQL and Solr.
Step 11: Install Node.js 22 and build the Angular frontend
DSpace 9.2 ships the user interface as a separate Angular 20 application maintained at DSpace/dspace-angular. The frontend needs Node 20.19+, 22.x, or 24.x and is pinned to npm 10.9 (not yarn). For a deeper look at Node version managers on this distro, see install Node.js on Rocky Linux and AlmaLinux. The shortest path for DSpace is the NodeSource RPM:
curl -fsSL https://rpm.nodesource.com/setup_22.x | sudo bash -
sudo dnf -y install nodejs
sudo npm install -g pm2
node -v && npm -v && pm2 -v
Clone the dspace-angular 9.2 tag and install the dependencies with npm ci so the install honours the committed package-lock.json. The install runs against a lockfile and takes 5 to 10 minutes:
sudo mkdir -p "${DSPACE_UI}"
sudo chown -R dspace:dspace "${DSPACE_UI}"
sudo -u dspace git clone --depth 1 --branch "dspace-${DSPACE_VERSION}" \
  https://github.com/DSpace/dspace-angular.git "${DSPACE_UI}"
cd "${DSPACE_UI}"
sudo -u dspace npm ci --no-audit --no-fund
The clone places ~580 MB of source and assets under ${DSPACE_UI}. The npm install then pulls another ~1 GB of node_modules under the same path.
Configure the frontend to point at your backend
Create a production config that tells Angular where the REST API lives and what hostname to bind:
sudo -u dspace tee "${DSPACE_UI}/config/config.prod.yml" >/dev/null <<EOF
ui:
  ssl: false
  host: localhost
  port: 4000
  nameSpace: /
rest:
  ssl: true
  host: ${DSPACE_DOMAIN}
  port: 443
  nameSpace: /server
production: true
cache:
  msToLive:
    default: 900000
EOF
Build the production bundle. The SSR compile peaks at ~6 to 8 GB of RAM and takes 8 to 15 minutes on 4 cores. Stop Solr and Tomcat first if your VM has less than 12 GB to free heap room:
cd "${DSPACE_UI}"
sudo -u dspace bash -c 'NODE_OPTIONS=--max_old_space_size=8192 DSPACE_REST_NAMESPACE=/server npm run build:ssr'
The compiled bundle lands under ${DSPACE_UI}/dist/browser (client bundles) and ${DSPACE_UI}/dist/server (SSR entry point).
Run the frontend with PM2
DSpace 9 does not ship a PM2 ecosystem file, so write one. The Angular SSR entry point lives at dist/server/main after a production build:
sudo -u dspace tee "${DSPACE_UI}/ecosystem.config.js" >/dev/null <<'EOF'
module.exports = {
  apps: [{
    name: "dspace-ui",
    cwd: "/opt/dspace-ui",
    script: "dist/server/main",
    instances: 1,
    autorestart: true,
    watch: false,
    max_memory_restart: "1G",
    env: {
      NODE_ENV: "production",
      DSPACE_REST_NAMESPACE: "/server"
    }
  }]
}
EOF
Start it under PM2, save the process list, and register the systemd boot script:
cd "${DSPACE_UI}"
sudo -u dspace pm2 start ecosystem.config.js
sudo -u dspace pm2 save
sudo env PATH=$PATH:/usr/bin pm2 startup systemd -u dspace --hp /home/dspace
sudo -u dspace pm2 status
The PM2 process list should show dspace-ui in the online state. Confirm the frontend serves locally:
curl -fsS http://127.0.0.1:4000/ | head -c 200Confirm the command completed without errors before continuing.
Step 12: Configure Nginx as a reverse proxy
Nginx fronts both the Angular UI on port 4000 and the REST backend on port 8080 under a single hostname. The REST API lives at /server and everything else routes to the UI.
sudo tee "/etc/nginx/conf.d/${DSPACE_DOMAIN}.conf" >/dev/null <<EOF
server {
    listen 80;
    server_name ${DSPACE_DOMAIN};
    return 301 https://\$host\$request_uri;
}

server {
    listen 443 ssl http2;
    server_name ${DSPACE_DOMAIN};

    # certbot fills these in
    ssl_certificate /etc/letsencrypt/live/${DSPACE_DOMAIN}/fullchain.pem;
    ssl_certificate_key /etc/letsencrypt/live/${DSPACE_DOMAIN}/privkey.pem;

    client_max_body_size 512M;

    location /server/ {
        proxy_pass http://127.0.0.1:8080/server/;
        proxy_http_version 1.1;
        proxy_set_header Host \$host;
        proxy_set_header X-Real-IP \$remote_addr;
        proxy_set_header X-Forwarded-For \$proxy_add_x_forwarded_for;
        proxy_set_header X-Forwarded-Proto \$scheme;
        proxy_read_timeout 180;
    }

    location / {
        proxy_pass http://127.0.0.1:4000/;
        proxy_http_version 1.1;
        proxy_set_header Upgrade \$http_upgrade;
        proxy_set_header Connection 'upgrade';
        proxy_set_header Host \$host;
        proxy_set_header X-Real-IP \$remote_addr;
        proxy_set_header X-Forwarded-For \$proxy_add_x_forwarded_for;
        proxy_set_header X-Forwarded-Proto \$scheme;
        proxy_cache_bypass \$http_upgrade;
        proxy_read_timeout 180;
    }
}
EOF
Allow Nginx to make outbound HTTP connections through SELinux, otherwise the proxy returns 502 even though Tomcat and Node are both listening:
sudo setsebool -P httpd_can_network_connect on
sudo nginx -t
sudo systemctl enable --now nginx
Confirm the command completed without errors before continuing.
Step 13: Issue a Let’s Encrypt certificate
Use certbot with its Nginx plugin and the HTTP-01 challenge. This works with any DNS provider because the validation happens over port 80:
sudo dnf -y install certbot python3-certbot-nginx
sudo certbot --nginx -d "${DSPACE_DOMAIN}" \
  --non-interactive --agree-tos -m "${DSPACE_ADMIN_EMAIL}" --redirect
Certbot auto-rewrites the Nginx vhost to enable SSL and adds a systemd timer that renews the certificate twice daily. Verify renewal works as a dry run:
sudo certbot renew --dry-runIf your DSpace server is on a private network with no public port 80, swap HTTP-01 for a DNS-01 challenge instead. The certbot DNS plugins for Cloudflare, Route 53, DigitalOcean, Google Cloud DNS, Linode, OVH, and RFC2136 all work the same way. The Nginx + Let’s Encrypt walkthrough covers the broader reverse-proxy pattern in more depth. Cloudflare example:
sudo dnf -y install python3-certbot-dns-cloudflare
sudo tee /etc/letsencrypt/cloudflare.ini >/dev/null <<EOF
dns_cloudflare_api_token = YOUR_CLOUDFLARE_API_TOKEN
EOF
sudo chmod 600 /etc/letsencrypt/cloudflare.ini
sudo certbot certonly --dns-cloudflare \
  --dns-cloudflare-credentials /etc/letsencrypt/cloudflare.ini \
  -d "${DSPACE_DOMAIN}" --non-interactive --agree-tos -m "${DSPACE_ADMIN_EMAIL}"
Confirm the command completed without errors before continuing.
Step 14: Open the firewall
Rocky 10 ships firewalld. Allow HTTP for certbot’s renewal challenges and HTTPS for the live site:
sudo systemctl enable --now firewalld
sudo firewall-cmd --permanent --add-service=http
sudo firewall-cmd --permanent --add-service=https
sudo firewall-cmd --reload
sudo firewall-cmd --list-services
Confirm the command completed without errors before continuing.
Step 15: Verify the running stack
Before jumping into the UI, run a quick stack health check on the box. All five services should be active and the REST API should report DSpace 9.2:
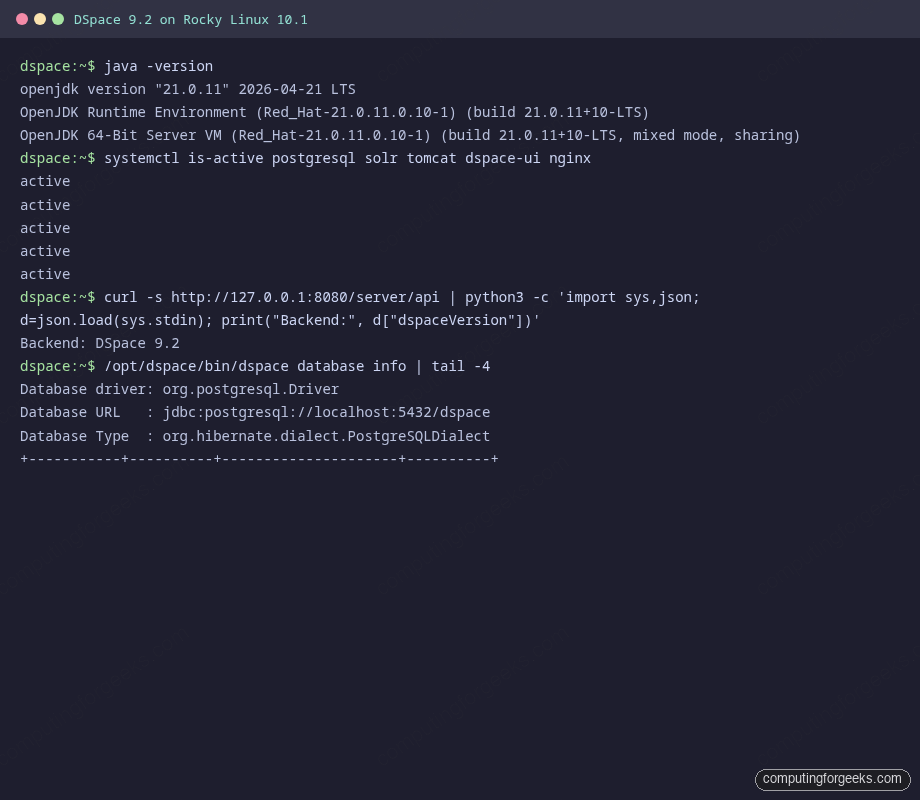
If any service prints inactive or failed, jump back to the matching step before opening the browser, otherwise the UI will throw 502 or empty-page errors that look more confusing than the underlying problem.
Step 16: Access DSpace and create your first community
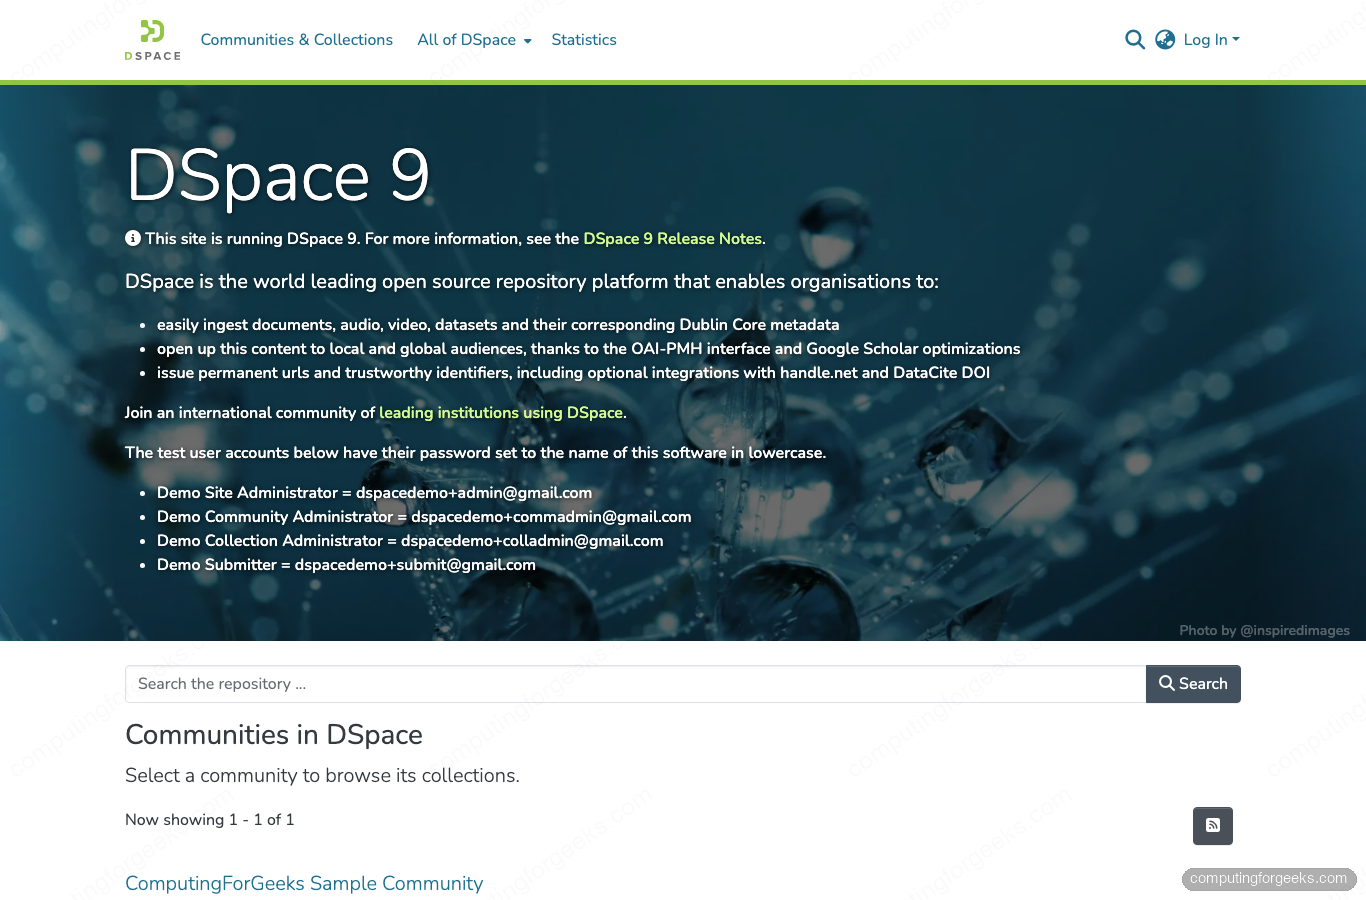
Open https://${DSPACE_DOMAIN} in a browser. DSpace 9 lands on a clean repository home page with a search bar, the top-level communities panel, and the configured site administrators listed in the intro:
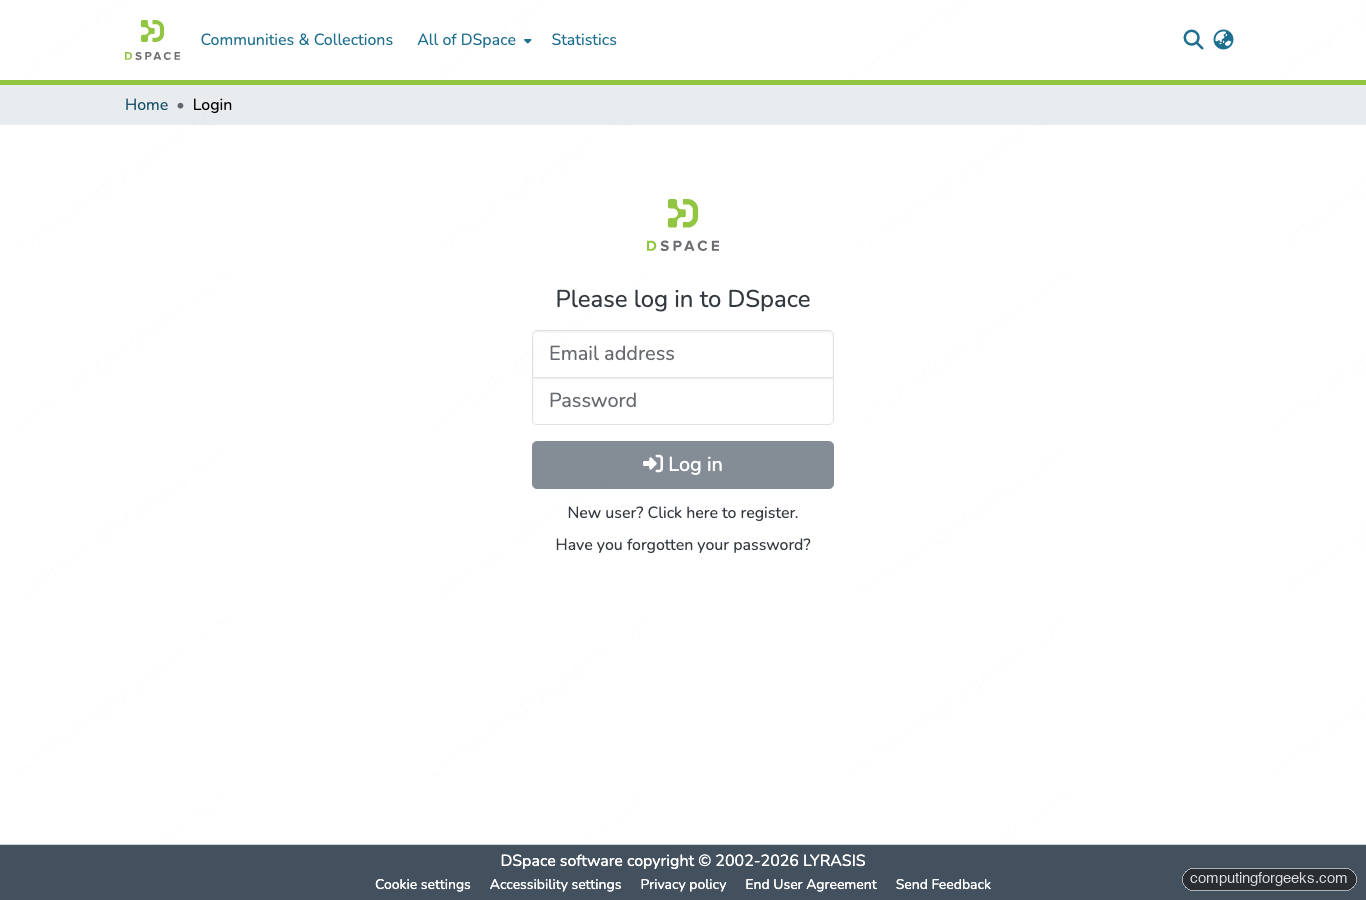
Click Log In in the top right to sign in with the administrator email and password you set in Step 9:
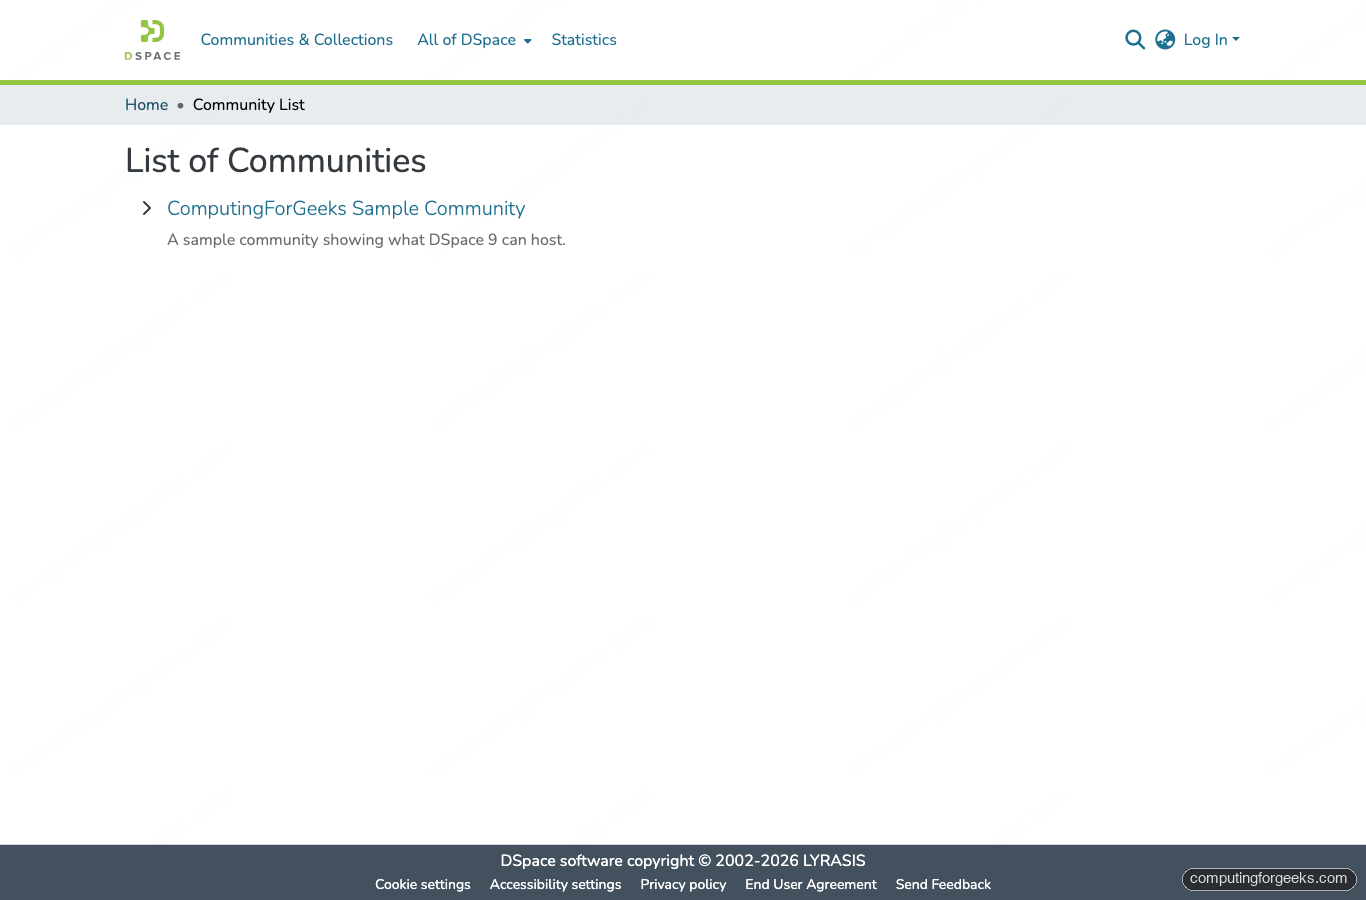
Once signed in, the + New > Community action appears in the user menu. Communities own collections, collections own items. The browse navigation under Communities & Collections shows everything that exists in the repository:
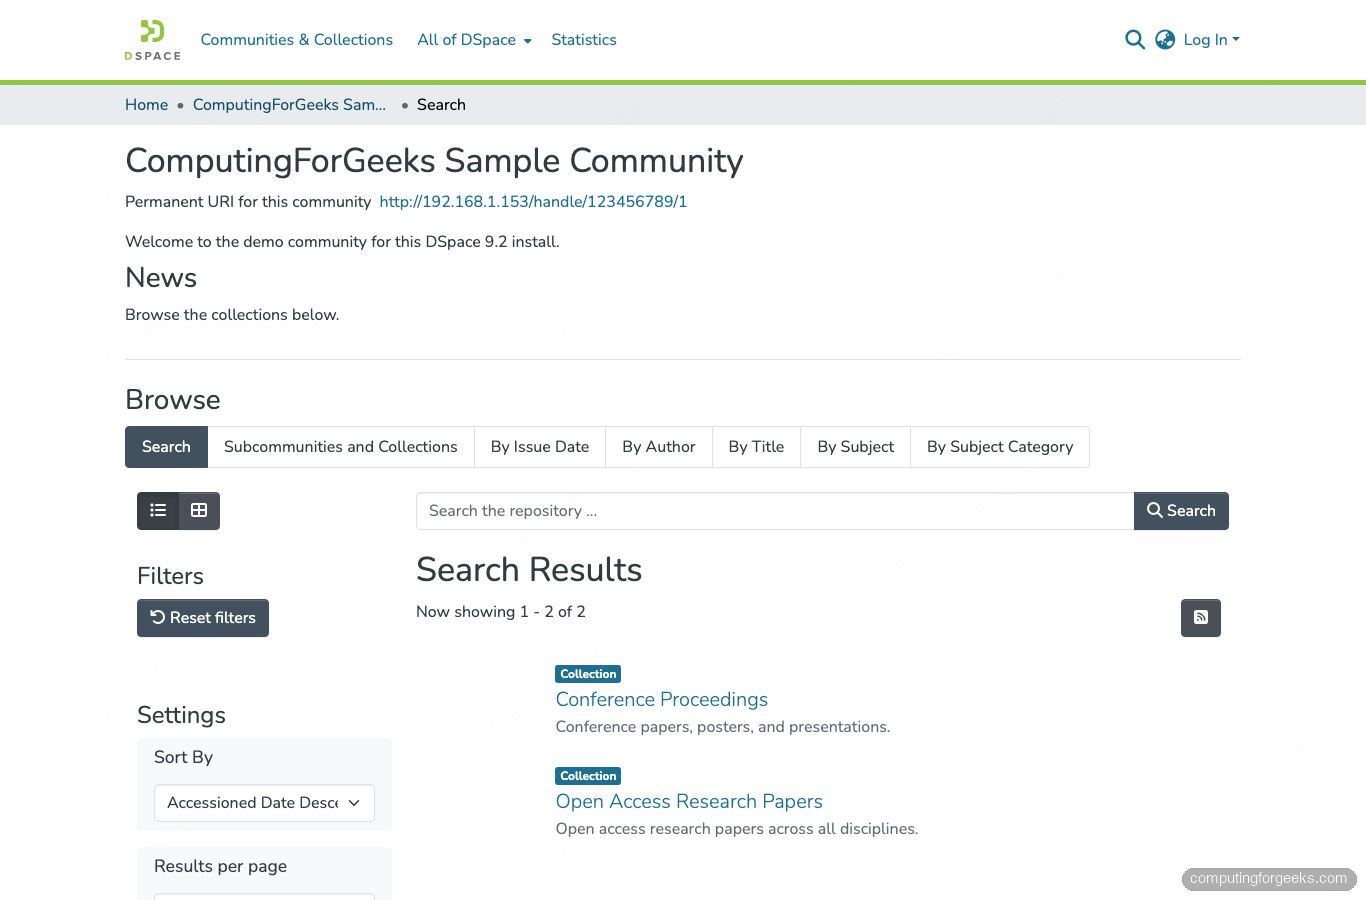
Open the community to land on its detail page. The permanent URI under the title is a Handle that survives URL changes, which is the point of using a repository instead of a flat web server:
Inside the community, click + New > Collection to add a sub-container that actually holds items. A collection lets you set the metadata schema, submission workflow, and access policies independently of its parent. To submit an item, open the collection page and click New submission. The submission wizard walks through metadata, file upload, license, and review. Dublin Core fields are the default metadata schema.
Site-wide search runs over every community, collection, and item once Solr finishes indexing:
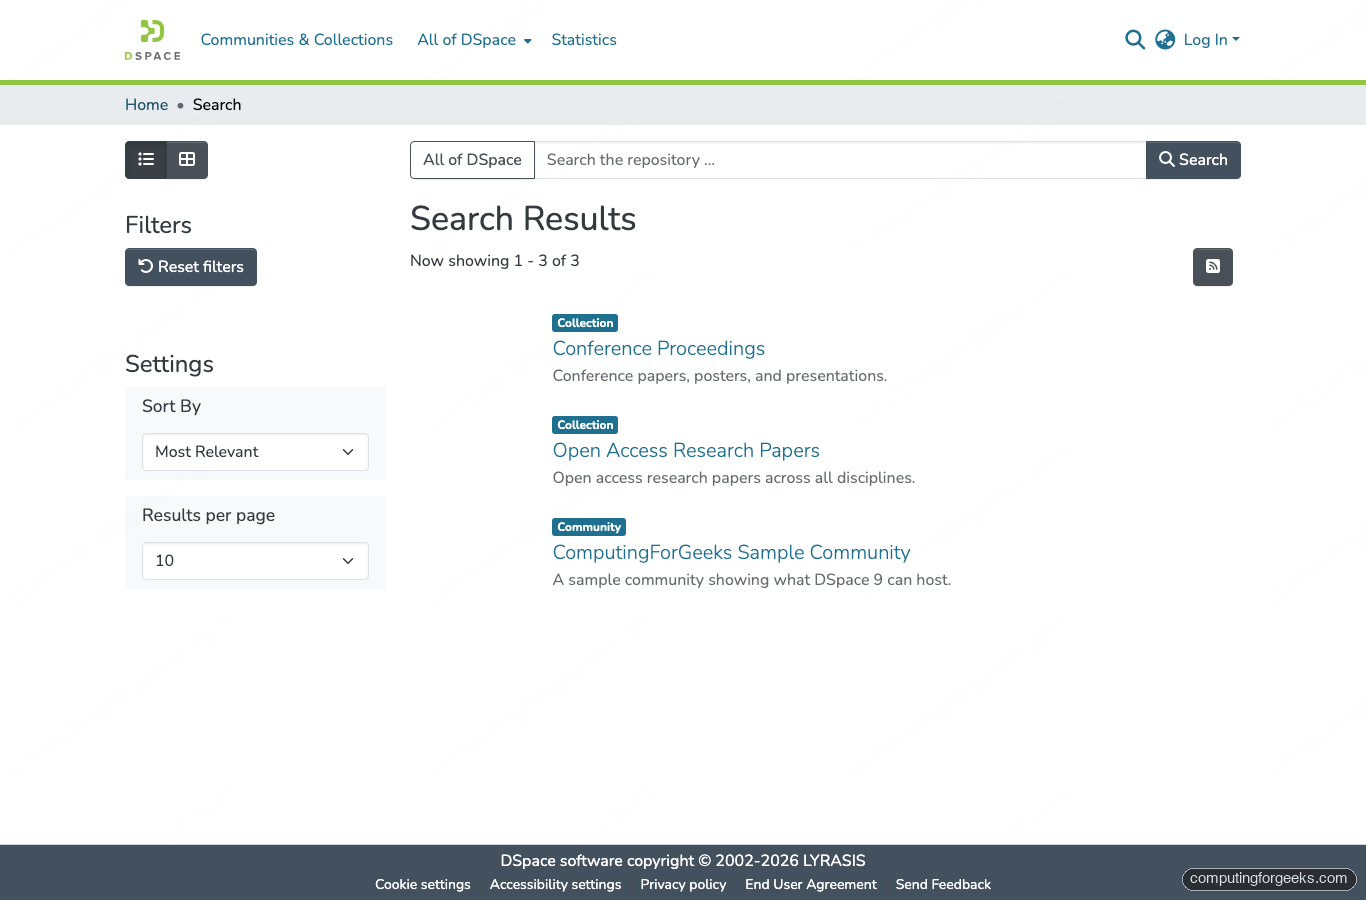
If Solr 9 was loaded fresh, the first submission takes ~10 to 15 seconds to appear in search. Subsequent updates land in under a second on the default discover.indexing.batch.size setting.
Step 17: Back up DSpace
A DSpace install has three things to back up: the PostgreSQL database, the assetstore (the actual uploaded files), and the Solr indexes. The first two are mandatory because they hold the canonical data. Solr indexes can be rebuilt from the database, but a backup speeds disaster recovery from hours to minutes.
Database backup
A single pg_dump in the custom format gives you a compressed, restorable snapshot. Schedule it during off-peak hours since it acquires a brief read lock on busy tables:
sudo -u postgres pg_dump -Fc "${DSPACE_DB_NAME}" \
  -f "/var/backups/dspace-db-$(date +%Y%m%d-%H%M%S).dump"
Restore with pg_restore -d ${DSPACE_DB_NAME} /var/backups/dspace-db-STAMP.dump after stopping Tomcat.
Assetstore backup
The assetstore lives under ${DSPACE_INSTALL}/assetstore. Rsync is the cheapest incremental option:
sudo rsync -a --delete "${DSPACE_INSTALL}/assetstore/" /var/backups/dspace-assetstore/Point the destination at a remote NFS mount or push it off-box with rclone if you want true disaster-recovery isolation.
Automate with cron
Combine both into a nightly cron entry:
sudo tee /etc/cron.daily/dspace-backup >/dev/null <<'EOF'
#!/bin/bash
set -euo pipefail
STAMP=$(date +%Y%m%d-%H%M%S)
sudo -u postgres pg_dump -Fc dspace -f "/var/backups/dspace-db-${STAMP}.dump"
rsync -a --delete /opt/dspace/assetstore/ /var/backups/dspace-assetstore/
find /var/backups -name 'dspace-db-*.dump' -mtime +14 -delete
EOF
sudo chmod +x /etc/cron.daily/dspace-backup
Confirm the command completed without errors before continuing.
Troubleshooting
Error: “FATAL: Peer authentication failed for user dspace”
PostgreSQL’s pg_hba.conf still has ident auth on the loopback line. Re-run the sed commands in Step 4 and restart PostgreSQL. Verify with sudo grep '^host' /var/lib/pgsql/data/pg_hba.conf that both 127.0.0.1 and ::1 lines show scram-sha-256.
Error: “Could not find or load main class $SOLR_OPTS”
The /etc/default/solr.in.sh file has a line like SOLR_OPTS="$SOLR_OPTS ...". Systemd’s EnvironmentFile does not expand $SOLR_OPTS, so it passes the literal string to Java. Rewrite the line to use only literal values, drop the $SOLR_OPTS reference, and restart Solr.
Nginx returns 502 Bad Gateway after SELinux is enforcing
SELinux blocks Nginx from making outbound TCP connections by default. Run sudo setsebool -P httpd_can_network_connect on. Confirm with sudo getsebool httpd_can_network_connect, which should report on.
Tomcat takes 30+ seconds to serve the first request
The DSpace Spring Boot webapp lazy-loads many beans on first hit. Warm it up after every restart with a single curl -fsS http://127.0.0.1:8080/server/api from the server itself. For a production site, point a small uptime check at /server/actuator/health on a 30-second interval.
Angular SSR build runs out of memory and the SSH session drops
The Angular 20 SSR compile peaks at ~6 to 8 GB. On a VM with 8 GB total RAM plus running Tomcat and Solr, the kernel OOM-kills the build and often the sshd process with it. Either size the VM at 12 GB or stop Solr and Tomcat for the duration of the build with sudo systemctl stop solr tomcat, then re-run the build with NODE_OPTIONS=--max_old_space_size=8192 npm run build:ssr. The runtime needs only ~512 MB once built, so you can size back down after the first deploy.
Now that DSpace 9.2 is up and serving traffic, the next steps depend on your collection. Most institutions wire OAI-PMH harvesters, configure SAML or Shibboleth login, set up Handle.net persistent identifiers, and integrate ORCID. The DSpace 9 documentation at wiki.lyrasis.org/spaces/DSDOC9x covers each of those in depth.