Before you reach for a hosted Git service, the real question is what you give up by self-hosting. For a long time the honest answer was “your CI”, because running your own forge meant bolting on a separate pipeline tool. Forgejo closes that gap. It is a community-governed fork of Gitea, it runs as a single Go binary, and it ships Forgejo Actions, a CI engine whose workflow syntax is deliberately familiar to anyone coming from GitHub Actions. So you get a self-hosted GitHub alternative and a pipeline that runs workflows close to the ones you already write, on hardware you control.
This guide installs Forgejo from the binary, puts it behind Nginx with a real TLS certificate, then registers a runner and pushes a workflow until a pipeline goes green. Everything here was built on Ubuntu 26.04 in July 2026 with Forgejo 16 and the current runner, so the versions and output are real. The commands work unchanged on Ubuntu 24.04.
How Forgejo and Forgejo Actions fit together
Forgejo itself is two roles in one binary: the web forge (repositories, issues, pull requests, users) and the coordinator that hands out CI jobs. It keeps its data in an embedded database and on disk, so a small instance needs nothing external.
Actions add a second component, the runner. The Forgejo server never executes your build itself; it queues jobs, and a separately-installed forgejo-runner picks them up and runs each one inside a Docker container. The runner advertises labels, a workflow says runs-on: docker, and the runner maps that label to a container image. In practice this means the forge stays lightweight while the heavy lifting happens in disposable containers, and you can add more runners on other hosts without touching the server.
The trade-off worth knowing up front: Forgejo Actions is designed to feel familiar to GitHub Actions users, not to be a drop-in clone. The workflow syntax and the common actions (checkout, setup-node, cache) match, so most build, test, and lint pipelines port over with only minor tweaks. But it is not GitHub, so marketplace actions that call GitHub’s own API will need changes, and Forgejo’s own docs are upfront that some adjustment is usually necessary.
Prerequisites and how to size it
Sizing is driven by how many users and repositories you host and how much CI you run, not by a fixed spec. The forge process is light; a one-to-ten-developer instance is comfortable on 2 vCPU and 4 GB of RAM, with disk sized to your repositories plus room for CI logs and artifacts. The database is the other lever: SQLite is fine for a small team and is what this guide uses, but a busy instance with many concurrent users should run PostgreSQL, which changes only the database step below. The runner’s cost lands on whichever host runs the containers, so keep CPU and RAM headroom there if your builds are heavy. The test VM here was 2 vCPU / 4 GB, a floor for following along rather than a production recommendation.
You will need a host running Ubuntu with sudo access, a domain name with an A record pointing at the server and port 80 reachable so Let’s Encrypt can validate over HTTP, and Docker installed for the runner. If Docker is not there yet, the Docker Engine install guide covers it.
Set the values you will reuse
The domain and admin email appear in several later commands, so export them once at the top of your session and paste the rest as-is:
export FORGEJO_DOMAIN="git.example.com"
export ADMIN_EMAIL="[email protected]"
Swap in your real domain and email, then confirm they are set before continuing:
echo "Domain: ${FORGEJO_DOMAIN} Email: ${ADMIN_EMAIL}"These hold only for the current shell. If you reconnect over SSH, export them again.
Install Forgejo from the binary
Install Git and the LFS extension first, since Forgejo shells out to them:
sudo apt update
sudo apt install -y git git-lfs
Rather than hard-code a release, detect the latest version and download that binary. This keeps the guide working when the next Forgejo ships:
FORGEJO_VERSION=$(curl -fsSL https://code.forgejo.org/api/v1/repos/forgejo/forgejo/releases/latest \
  | grep -oE '"tag_name":"v[0-9.]+"' | head -1 | grep -oE '[0-9.]+')
echo "Installing Forgejo ${FORGEJO_VERSION}"
curl -fsSL -o /tmp/forgejo \
  "https://codeberg.org/forgejo/forgejo/releases/download/v${FORGEJO_VERSION}/forgejo-${FORGEJO_VERSION}-linux-amd64"
sudo cp /tmp/forgejo /usr/local/bin/forgejo
sudo chmod 755 /usr/local/bin/forgejo
Forgejo runs as a dedicated unprivileged user that owns the repositories. Create it, then lay out the data and config directories with the ownership the service expects:
sudo adduser --system --shell /bin/bash --gecos 'Git Version Control' \
  --group --disabled-password --home /home/git git

sudo mkdir /var/lib/forgejo
sudo chown git:git /var/lib/forgejo && sudo chmod 750 /var/lib/forgejo

sudo mkdir /etc/forgejo
sudo chown root:git /etc/forgejo && sudo chmod 770 /etc/forgejo
Forgejo publishes a ready-made systemd unit that runs the binary as the git user with the paths above. Pull it in, then enable and start the service:
sudo wget -O /etc/systemd/system/forgejo.service \
  https://codeberg.org/forgejo/forgejo/raw/branch/forgejo/contrib/systemd/forgejo.service
sudo systemctl daemon-reload
sudo systemctl enable --now forgejo
Confirm the binary, the service state, and that it is answering on its default port 3000:
forgejo --version
systemctl is-active forgejo
curl -s -o /dev/null -w "%{http_code}\n" http://localhost:3000/
You should see the version string, active, and an HTTP 200:
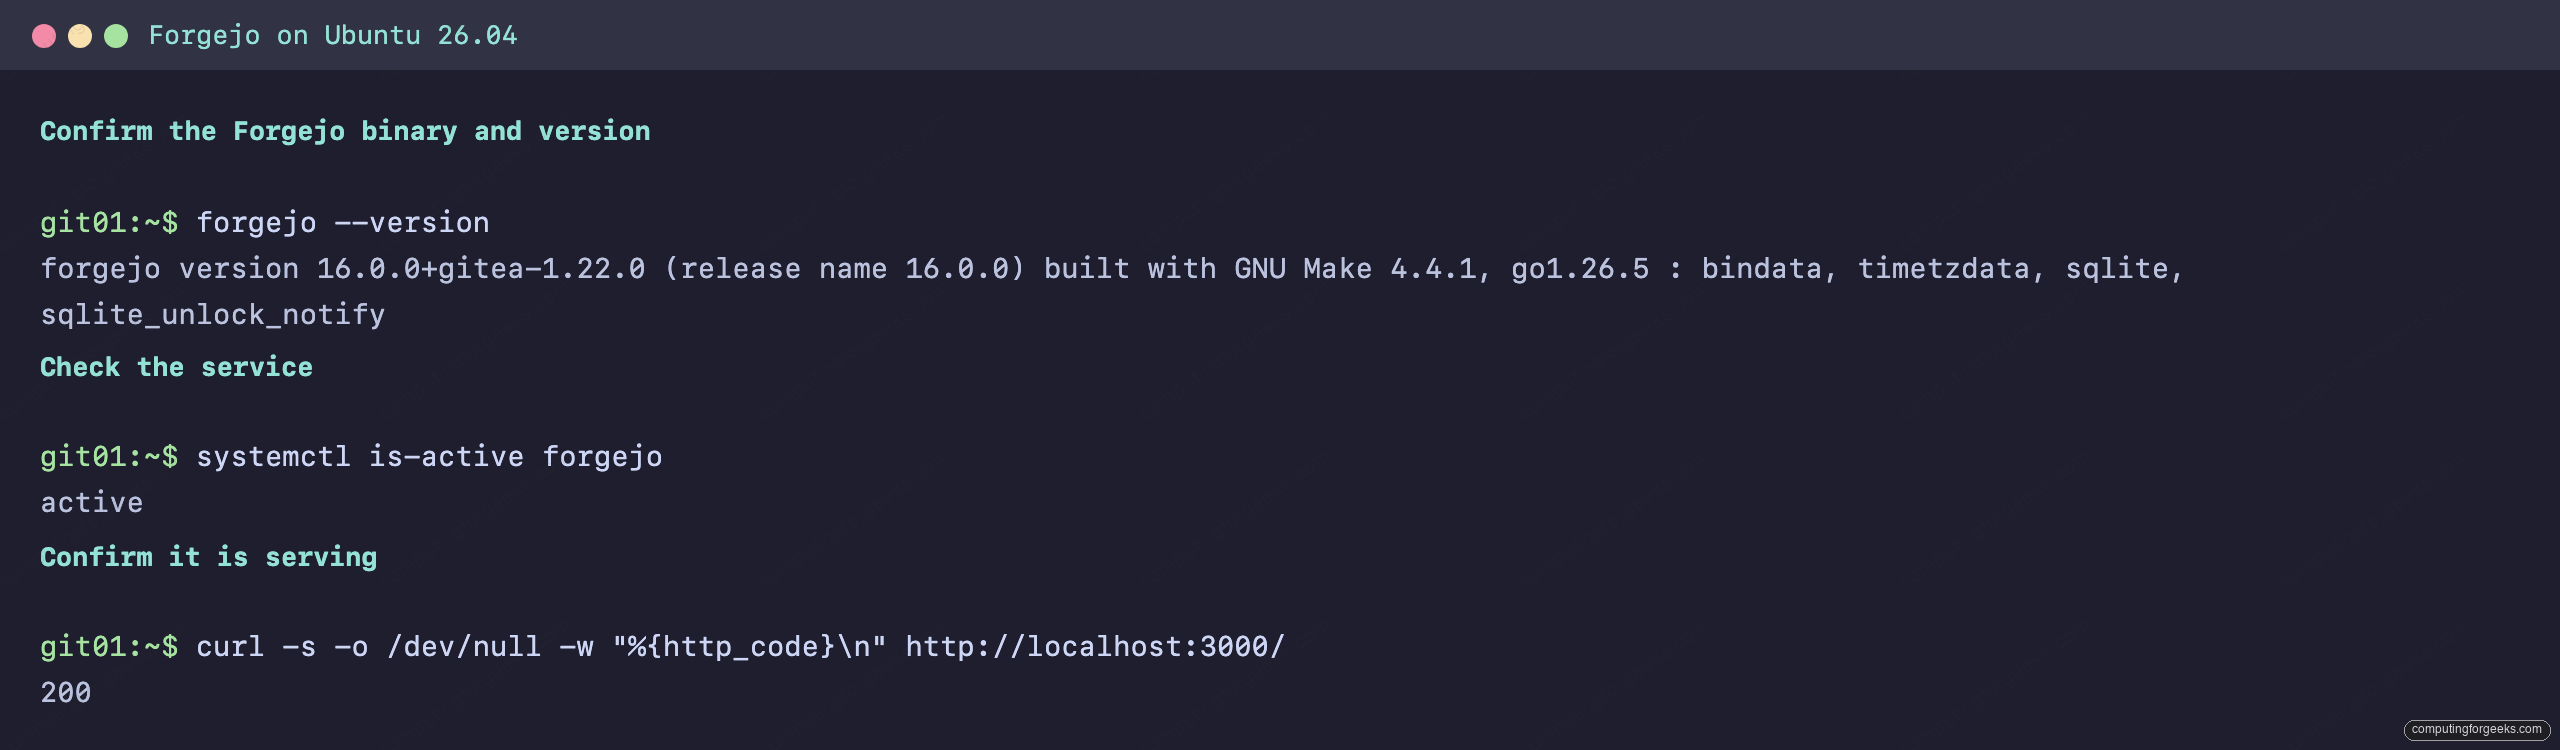
Forgejo is running, but only on localhost over plain HTTP. The next step puts it on your domain with TLS.
Put Forgejo behind Nginx with HTTPS
Forgejo listens on plain HTTP on port 3000. In front of it goes Nginx, terminating TLS and proxying to the app, so every clone URL and login is encrypted. Install Nginx and Certbot:
sudo apt install -y nginx certbot python3-certbot-nginxCreate the site file. Because Nginx does not read your shell variables, the config uses a placeholder that you substitute in the next step:
sudo vim /etc/nginx/sites-available/forgejoAdd a proxy server block. The larger body size matters because Git pushes and LFS uploads can be big:
server {
    listen 80;
    server_name FORGEJO_DOMAIN_HERE;

    client_max_body_size 512M;

    location / {
        proxy_pass http://127.0.0.1:3000;
        proxy_set_header Host $host;
        proxy_set_header X-Real-IP $remote_addr;
        proxy_set_header X-Forwarded-For $proxy_add_x_forwarded_for;
        proxy_set_header X-Forwarded-Proto $scheme;
    }
}
Swap the placeholder for your real domain, enable the site, drop the default, and reload:
sudo sed -i "s/FORGEJO_DOMAIN_HERE/${FORGEJO_DOMAIN}/g" /etc/nginx/sites-available/forgejo
sudo ln -sf /etc/nginx/sites-available/forgejo /etc/nginx/sites-enabled/forgejo
sudo rm -f /etc/nginx/sites-enabled/default
sudo nginx -t && sudo systemctl reload nginx
Now issue the certificate. The default path is the HTTP-01 challenge, which works with any DNS provider as long as port 80 reaches the box. Certbot rewrites the Nginx vhost for TLS and sets up the redirect:
sudo certbot --nginx -d "${FORGEJO_DOMAIN}" --non-interactive --agree-tos --redirect -m "${ADMIN_EMAIL}"Reload the browser and the site now answers over HTTPS with a valid certificate. If your server is not publicly reachable, the section below covers the alternative.
If the server has no public port 80
On a private LAN or behind NAT, HTTP-01 cannot reach the box. Use the DNS-01 challenge instead, which proves ownership through a DNS TXT record and needs no inbound port. Install the plugin for your provider (Cloudflare, Route 53, DigitalOcean, Google Cloud DNS, Linode, OVH, RFC2136 all have one) and pass its credentials. With Cloudflare it looks like this, and you substitute your provider’s plugin if you are on something else:
sudo apt install -y python3-certbot-dns-cloudflare
echo "dns_cloudflare_api_token = YOUR_TOKEN_HERE" | sudo tee /etc/letsencrypt/cloudflare.ini
sudo chmod 600 /etc/letsencrypt/cloudflare.ini
sudo certbot certonly --dns-cloudflare \
  --dns-cloudflare-credentials /etc/letsencrypt/cloudflare.ini \
  -d "${FORGEJO_DOMAIN}" --non-interactive --agree-tos -m "${ADMIN_EMAIL}"
Unlike the --nginx path, certonly just writes the certificate to disk; it does not edit Nginx. So on this path you wire the TLS block in yourself. Open the site file again:
sudo vim /etc/nginx/sites-available/forgejoReplace its contents so port 80 redirects to HTTPS and the server block serves the certificate you just obtained:
server {
    listen 80;
    server_name FORGEJO_DOMAIN_HERE;
    return 301 https://$host$request_uri;
}
server {
    listen 443 ssl http2;
    server_name FORGEJO_DOMAIN_HERE;

    ssl_certificate /etc/letsencrypt/live/FORGEJO_DOMAIN_HERE/fullchain.pem;
    ssl_certificate_key /etc/letsencrypt/live/FORGEJO_DOMAIN_HERE/privkey.pem;

    client_max_body_size 512M;

    location / {
        proxy_pass http://127.0.0.1:3000;
        proxy_set_header Host $host;
        proxy_set_header X-Real-IP $remote_addr;
        proxy_set_header X-Forwarded-For $proxy_add_x_forwarded_for;
        proxy_set_header X-Forwarded-Proto $scheme;
    }
}
Substitute your domain into the placeholders, test the config, and reload:
sudo sed -i "s/FORGEJO_DOMAIN_HERE/${FORGEJO_DOMAIN}/g" /etc/nginx/sites-available/forgejo
sudo nginx -t && sudo systemctl reload nginx
Both paths leave the certificate under /etc/letsencrypt/live/ with automatic renewal. With HTTPS answering, finish the setup in the browser.
Run the web installer and create the admin
Open https://git.example.com in a browser. Forgejo shows its initial configuration screen. Most fields are already sensible; the ones that matter are the database and the URL. Set the database type to SQLite3 (or fill in your PostgreSQL details), and confirm the server domain and base URL show your HTTPS address, which Forgejo detects from the request.
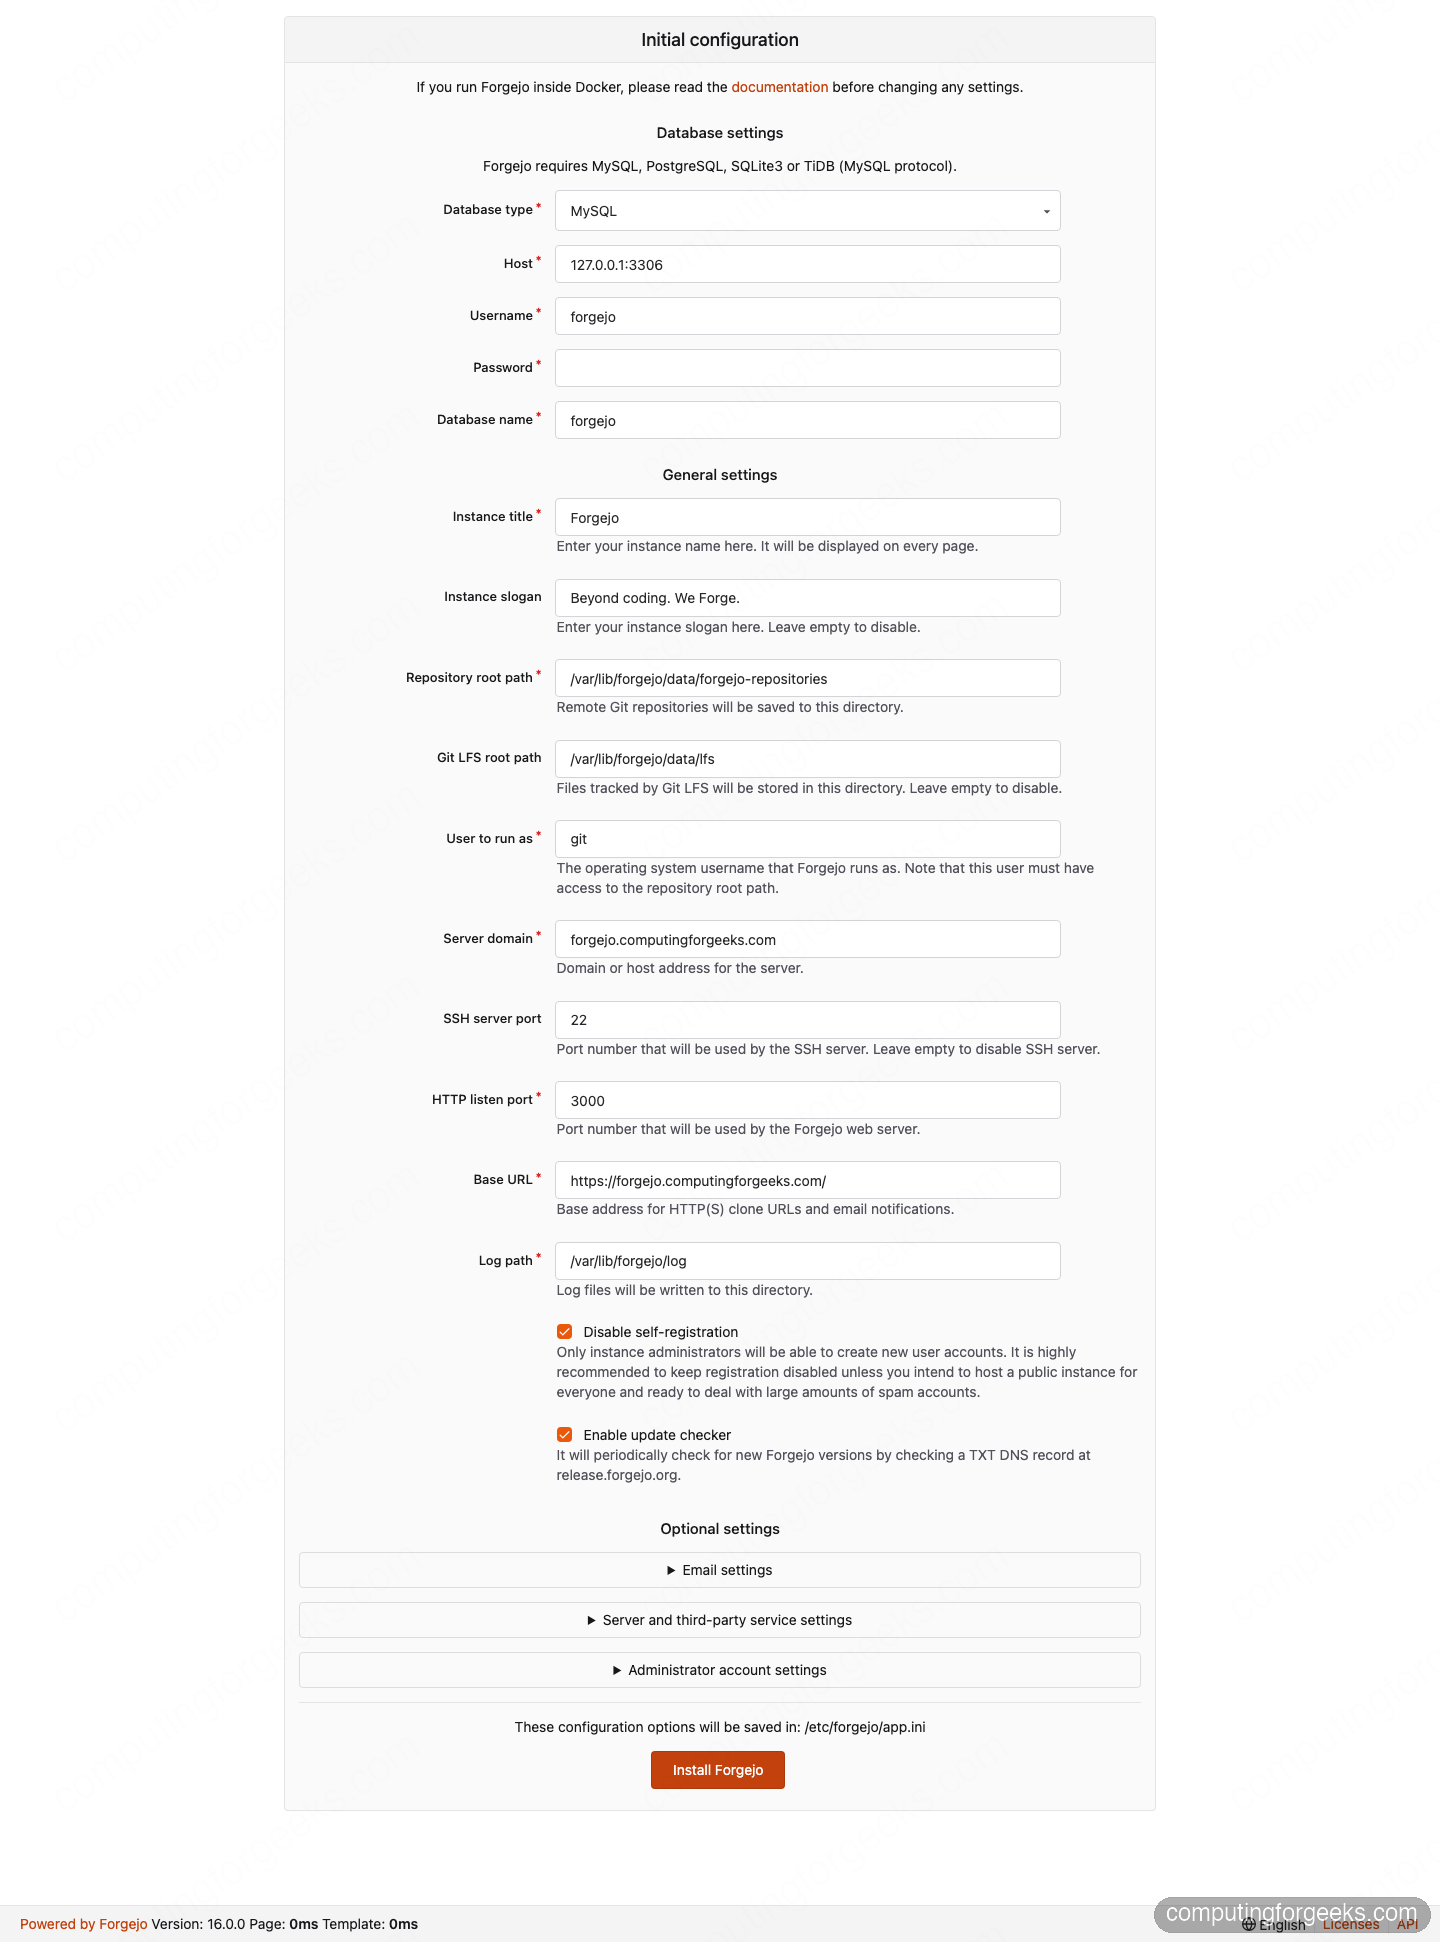
Expand the administrator account section at the bottom, create your admin login, and submit. Forgejo writes /etc/forgejo/app.ini, restarts, and drops you on the dashboard. Leave “Disable self-registration” checked unless you are running a public instance, because an open forge collects spam accounts fast.
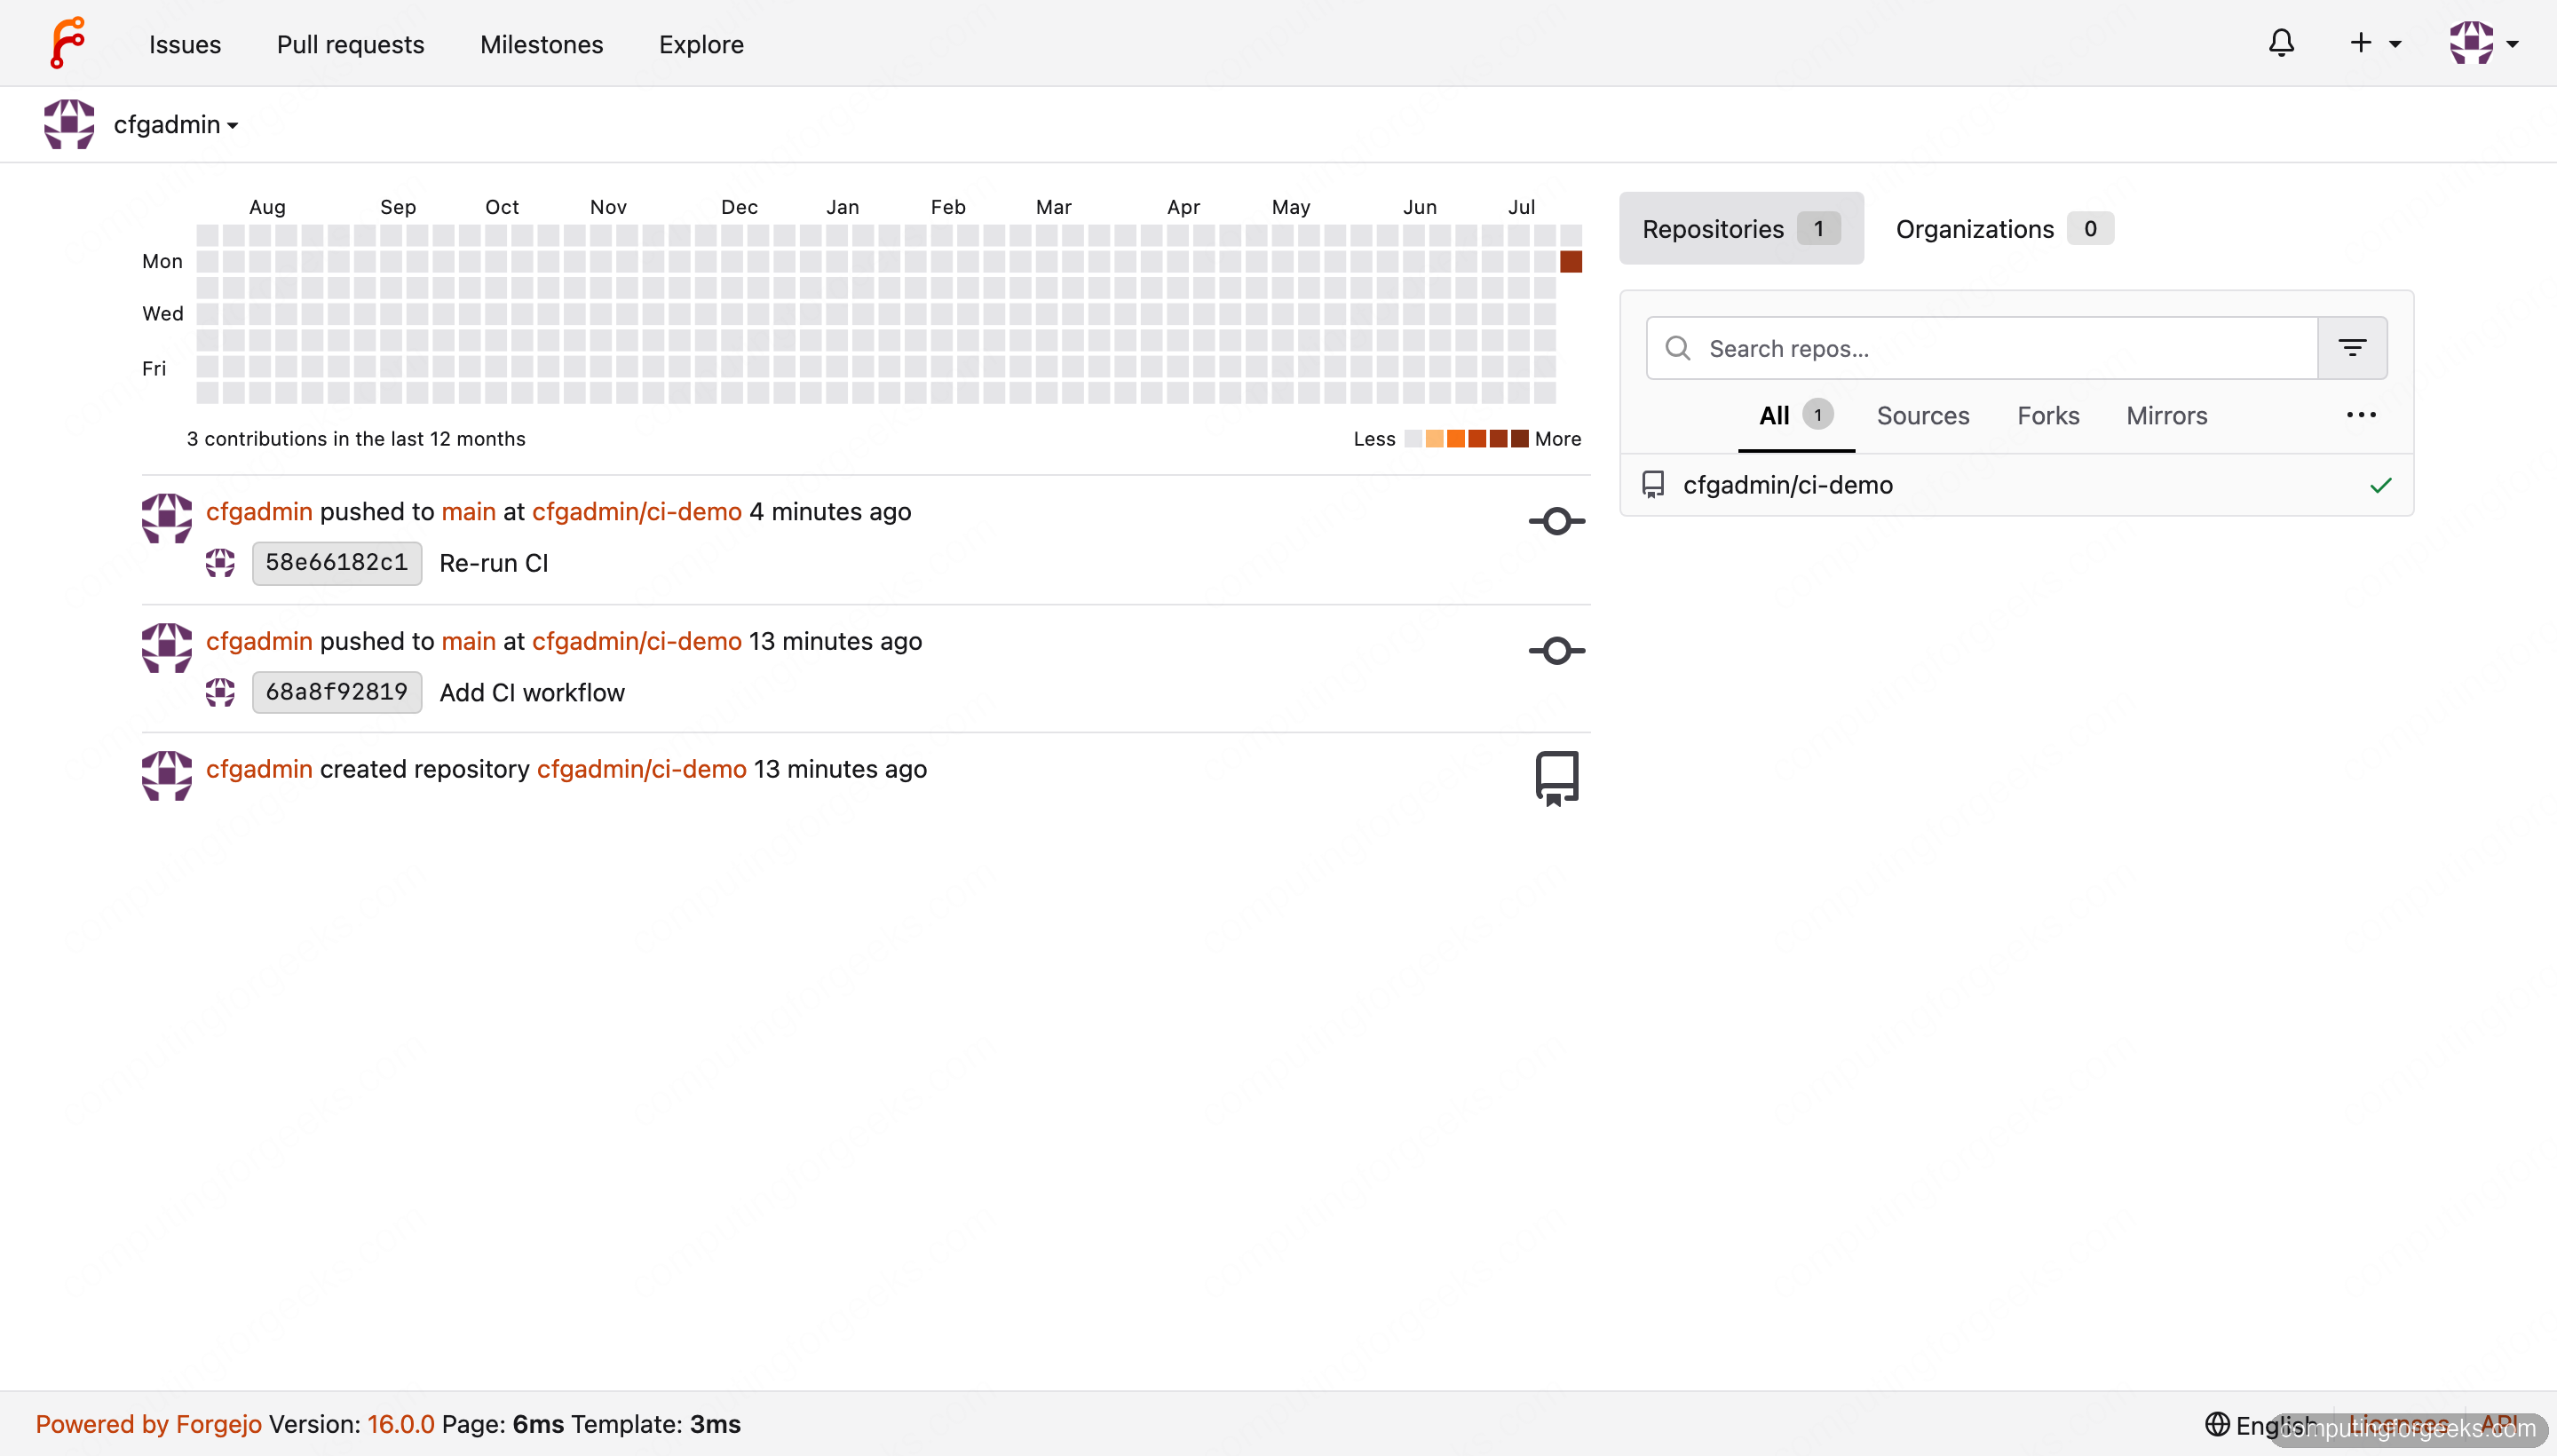
Actions is enabled by default in recent Forgejo, so there is nothing to toggle on the server side. What is missing is a runner to execute the jobs.
Install and register the Forgejo Actions runner
The runner needs Docker to launch job containers. With Docker present, download the current runner binary, again detecting the latest release:
RUNNER_VERSION=$(curl -fsSL https://code.forgejo.org/api/v1/repos/forgejo/runner/releases/latest \
  | grep -oE '"tag_name":"v[0-9.]+"' | head -1 | grep -oE '[0-9.]+')
echo "Installing forgejo-runner ${RUNNER_VERSION}"
sudo curl -fsSL -o /usr/local/bin/forgejo-runner \
  "https://code.forgejo.org/forgejo/runner/releases/download/v${RUNNER_VERSION}/forgejo-runner-${RUNNER_VERSION}-linux-amd64"
sudo chmod 755 /usr/local/bin/forgejo-runner
A runner authenticates to the forge with a registration token. Generate one from the Forgejo CLI on the server (you can also copy it from Site Administration, then Actions, then Runners in the web UI):
RUNNER_TOKEN=$(sudo -u git forgejo --config /etc/forgejo/app.ini \
  --work-path /var/lib/forgejo forgejo-cli actions generate-runner-token)
echo "${RUNNER_TOKEN}"
Register the runner against your instance. The label is the important part: it maps the runs-on value your workflows use to a container image, so a job that says runs-on: docker runs inside node:22-bookworm, which carries the Node.js that most actions need:
sudo mkdir -p /etc/forgejo-runner
cd /etc/forgejo-runner
sudo forgejo-runner register --no-interactive \
  --instance "https://${FORGEJO_DOMAIN}" \
  --token "${RUNNER_TOKEN}" --name lab-runner \
  --labels 'docker:docker://node:22-bookworm'
Registration writes a .runner file in that directory. On current runners the register subcommand prints a notice that it is deprecated in favour of declaring connections in the runner configuration; it still works, and the equivalent newer path is the Create Runner button under Site Administration, then Actions, then Runners. Run the runner as a service so it survives reboots. Create the unit:
sudo vim /etc/systemd/system/forgejo-runner.servicePoint it at the working directory that holds the .runner file:
[Unit]
Description=Forgejo Runner
After=network-online.target docker.service
Wants=network-online.target

[Service]
WorkingDirectory=/etc/forgejo-runner
ExecStart=/usr/local/bin/forgejo-runner daemon
Restart=on-failure
RestartSec=5

[Install]
WantedBy=multi-user.target
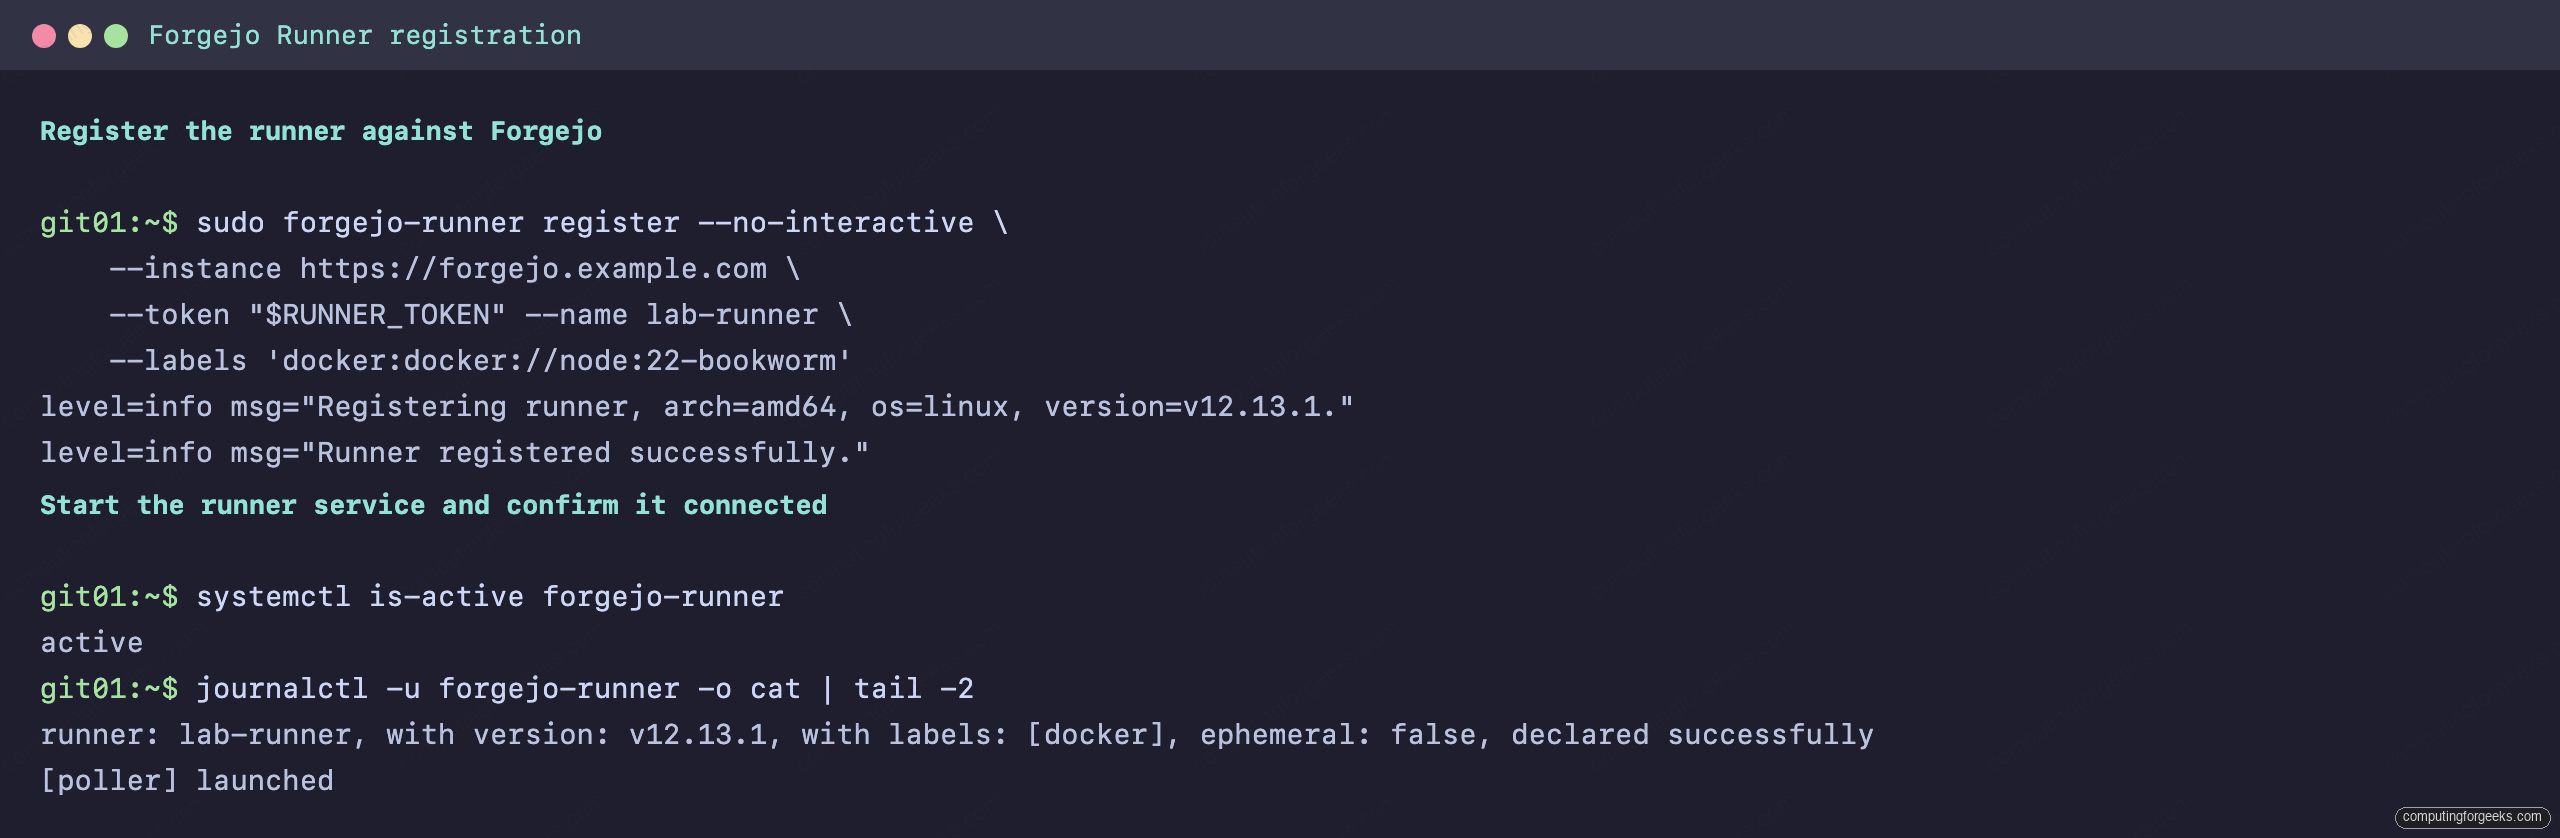
Enable it and confirm it connected. The log line to look for is the runner declaring itself and the poller launching:
sudo systemctl daemon-reload
sudo systemctl enable --now forgejo-runner
systemctl is-active forgejo-runner
journalctl -u forgejo-runner -o cat | tail -2
A declared successfully line followed by the poller launching means the runner is online and waiting for jobs:
With the forge, TLS, and a runner all in place, the last step is to prove the pipeline end to end.
Push a workflow and watch it run
Create a repository in the web UI, initialised with a README so it has a default branch. Then add a workflow file at .forgejo/workflows/ci.yml. Forgejo reads workflows from that path (it also accepts .github/workflows for drop-in compatibility with repositories moved off GitHub):
name: CI
on: [push]
jobs:
  build:
    runs-on: docker
    steps:
      - uses: https://code.forgejo.org/actions/checkout@v4
      - name: Show environment
        run: |
          node --version
          echo "Repository: $GITHUB_REPOSITORY"
          echo "Commit: $GITHUB_SHA"
      - name: Run a quick test
        run: |
          echo "2 + 2 = $((2 + 2))"
          test $((2 + 2)) -eq 4 && echo "PASS: math works"
Committing that file is a push, which triggers the workflow. The repository’s Actions tab shows the run, and the file browser marks the commit with a status icon once it finishes.
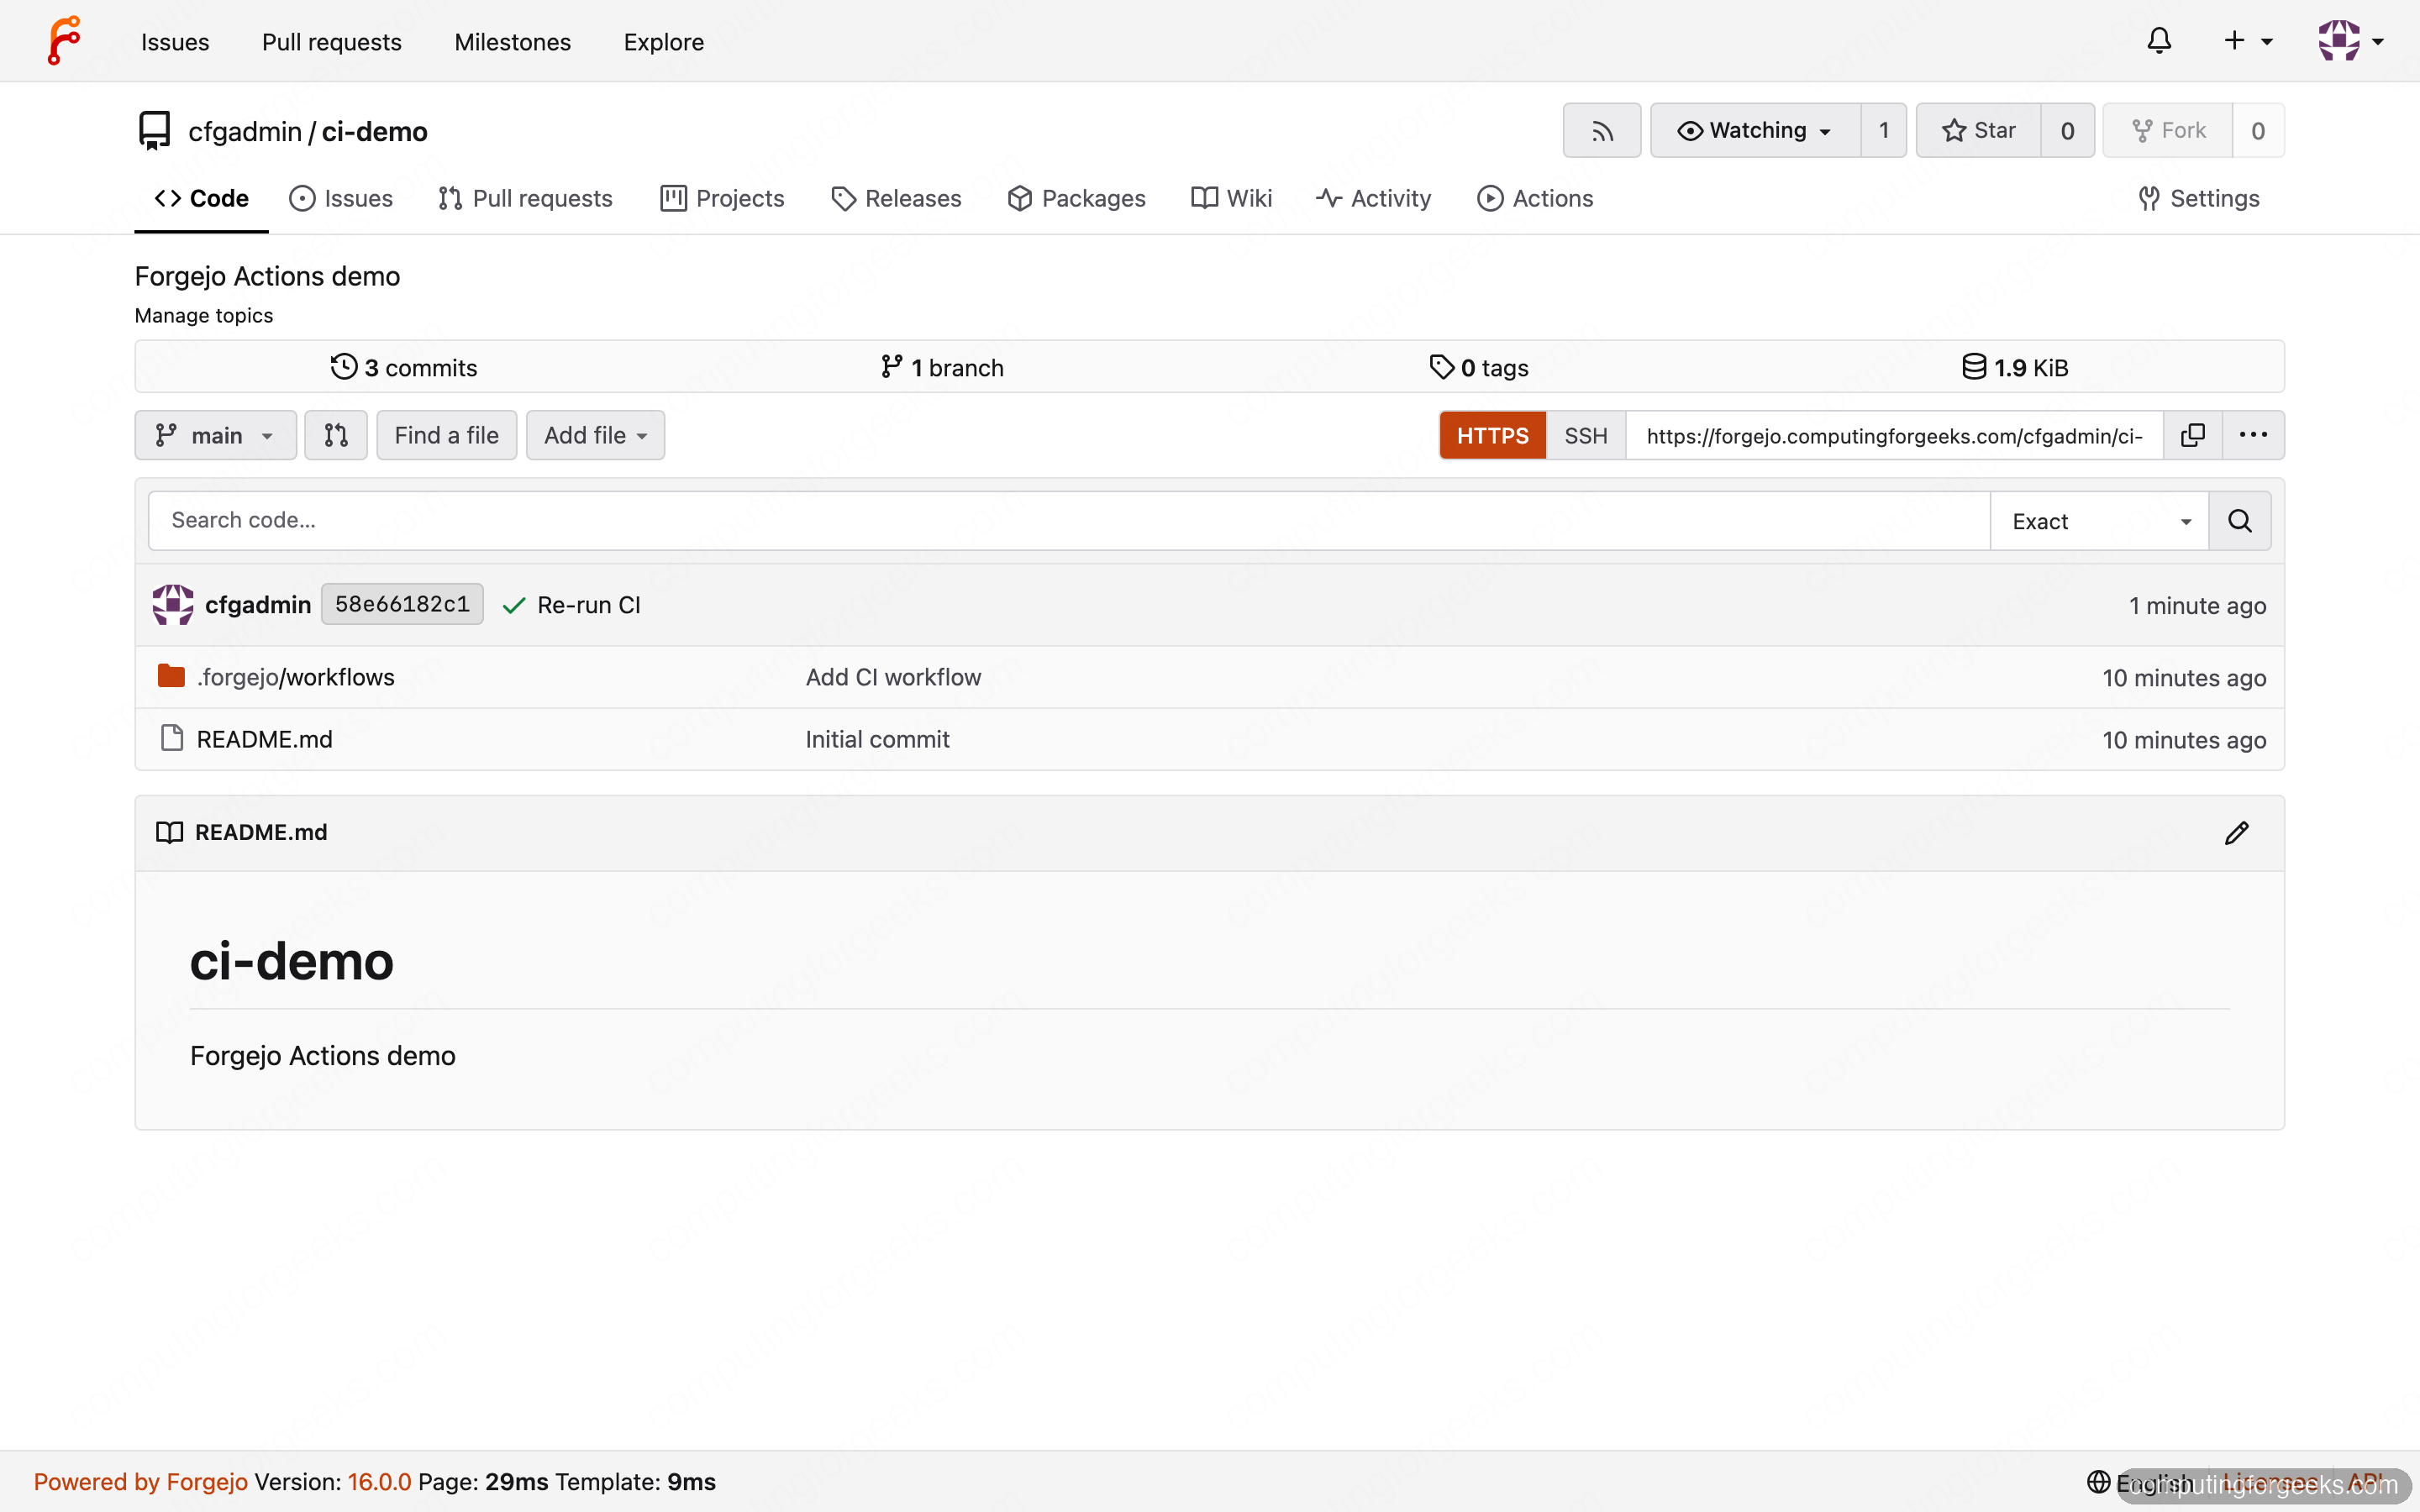
Open the run to watch each step. The first execution is slower because the runner pulls the container image; later runs reuse it. When it finishes, every step carries a green check and the job reads Success, with the real command output inline.
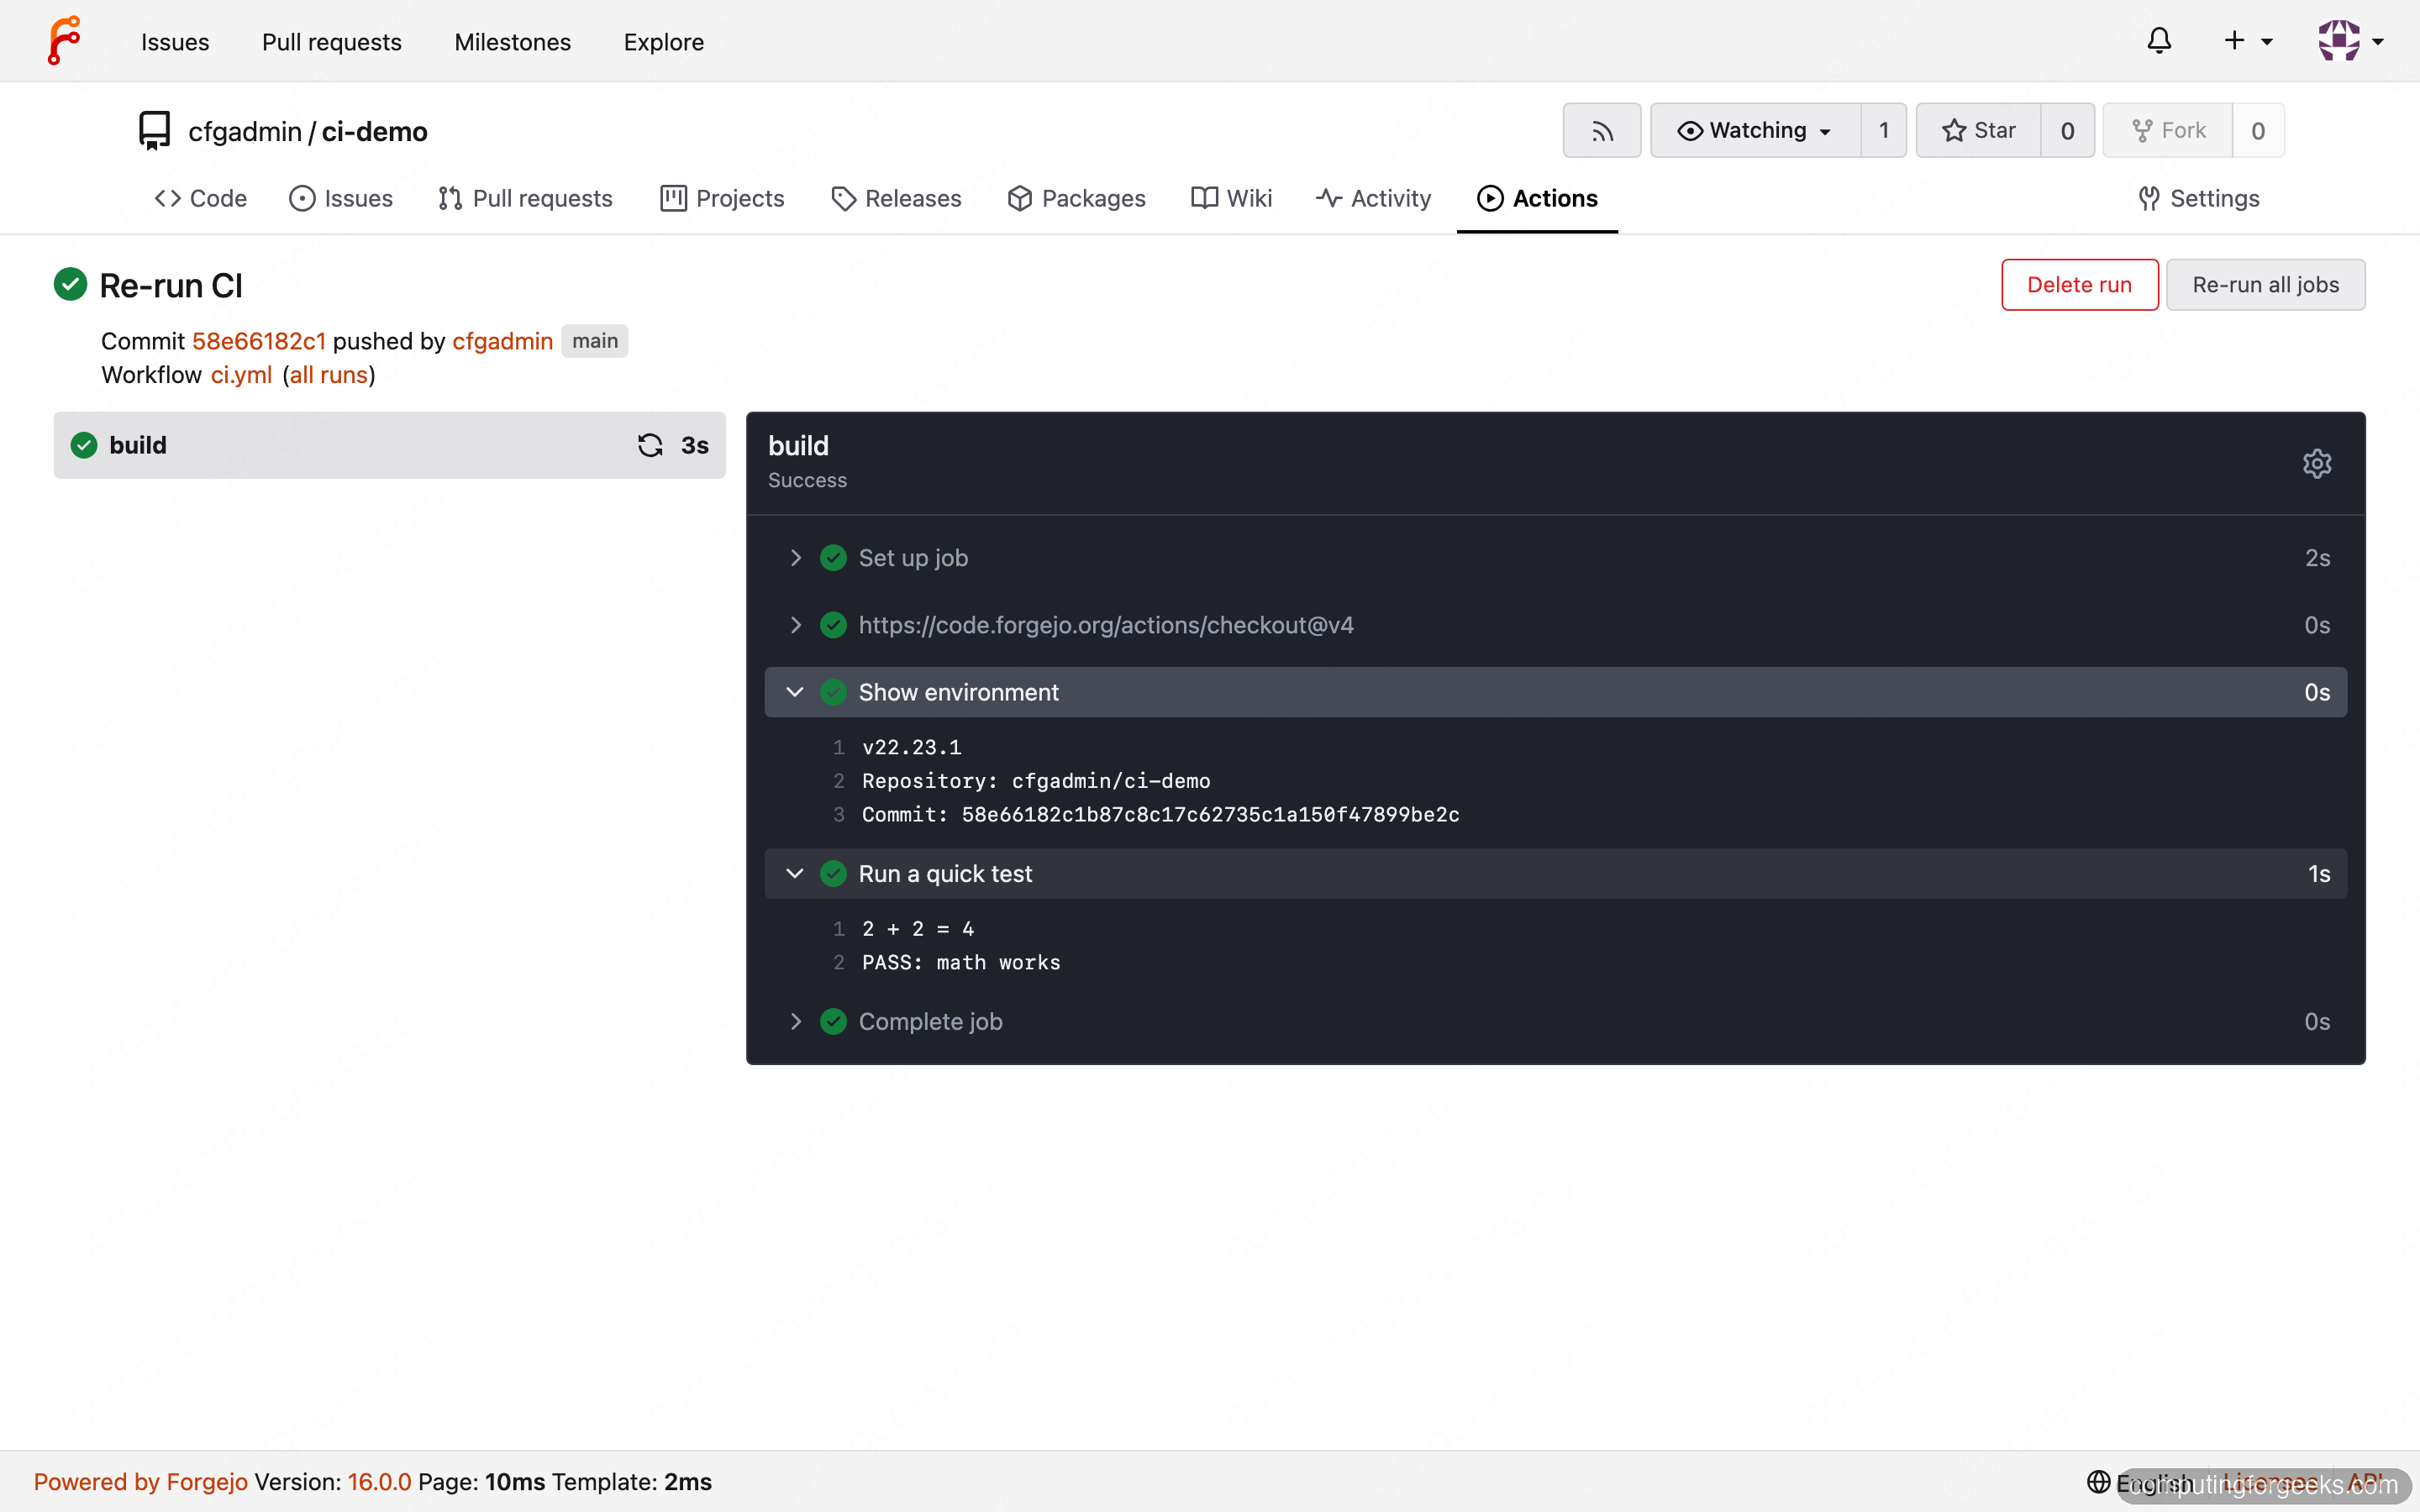
That output is the proof the whole chain works: the forge queued the job, the runner pulled it, checked out the code, and ran the steps in a container.
When the checkout step cannot reach the server
The most common first-run failure is the checkout step reporting fatal: unable to access ... Couldn't connect to server. It means the job container cannot resolve or reach your Forgejo domain. Because the build runs inside Docker, the domain must resolve to an address the container can route to, which is your server’s real LAN or public IP, never a 127.0.0.1 entry in the host’s /etc/hosts. Confirm a plain container can reach the instance, and fix DNS or the hosts file if it cannot:
sudo docker run --rm node:22-bookworm \
  bash -c "getent hosts ${FORGEJO_DOMAIN}; git ls-remote https://${FORGEJO_DOMAIN}/OWNER/REPO"
When that command lists the remote refs, the container has a working path to the forge and the pipeline will pass.
Forgejo versus Gitea, and where Woodpecker fits
The reason to pick Forgejo over Gitea is governance, not features, and the two are close enough that migration is straightforward. Gitea became a for-profit company in 2022; Forgejo is the fork the community stood up in response, hosted by Codeberg e.V. and developed in the open. They share a lineage up to the 2022 fork, so migrating off Gitea is documented and clean for that era (newer Gitea releases have diverged, so check the migration guide for your version), and the day-to-day experience is the same. If a copyleft guarantee and community control matter to you, Forgejo is the safer long-term home for your code.
On CI, the choice is about coupling. Forgejo Actions is the right default because it lives inside the forge, speaks the GitHub Actions syntax your team already knows, and needs only a runner. We would reach for Woodpecker CI instead when we want the pipeline engine decoupled from the forge, running as its own service that any repository can point at through an OAuth app, which suits shops standardising one CI plane across several Git backends. For heavier, multi-stage delivery you would look past both to a GitLab-style pipeline or Jenkins, accepting more to run in exchange for more control.
Start with Forgejo Actions and one runner, which is what this guide built. Add runners on separate hosts as your build volume grows, and only introduce a second CI system when a real requirement, not a hypothetical one, forces the decoupling.