

To install VirtualBox on Fedora 44, 43, or 42, Oracle ships a single RPM repo that targets every supported release. The install path is effectively the same on each: pin the build dependencies to the running kernel, drop the repo file in, install the meta package, and let DKMS compile the kernel modules. The article that ships with this skill set works the same way on Workstation, Server, and any other Fedora spin where you have a graphical session or want VBoxManage on the CLI. If you just finished a fresh install, the post-install Fedora 44 Workstation guide pairs nicely with this one.
VirtualBox 7.2 brought a redesigned toolbar, NVMe support in the open-source base package, and Linux kernel coverage that reaches into the 7.x series, which is what Fedora 44 ships. If you also have a KVM stack on the same box, see the KVM on Fedora guide for how the two coexist. For a remote host with no desktop, VBoxManage is the same binary you would script around on RHEL or AlmaLinux.
Tested May 2026 on Fedora 44 (kernel 7.0.9) with VirtualBox 7.2.8 from Oracle’s RPM repo. Same commands verified to issue clean on Fedora 43 and 42 against the matching $releasever repo URL.
Prerequisites
- Fedora 44, 43, or 42 (Workstation, Server, or Spin). The repo file picks the right path automatically using
$releasever. - A regular user with
sudoprivileges. The install touches DKMS, kernel modules, and a system group. - Secure Boot disabled in BIOS/UEFI. The VirtualBox kernel modules ship unsigned and the kernel will reject them under Secure Boot unless you enroll a Machine Owner Key.
- At least 4 GB of free disk under
/varfor the VirtualBox install plus whatever your guest VMs will consume under~/VirtualBox VMs/.
Step 1: Upgrade the System and Match the Kernel Headers
DKMS builds the VirtualBox modules against the headers of the running kernel. The cleanest way to keep both in sync is to pull a full upgrade, install kernel and kernel-devel together, then reboot into the matching kernel before touching VirtualBox:
sudo dnf -y upgrade --refresh
sudo dnf -y install kernel kernel-devel kernel-headers dkms elfutils-libelf-devel make gcc
sudo reboot
After the reboot, confirm the running kernel and the installed kernel-devel match. The DKMS build fails immediately if they do not.
uname -r
rpm -q kernel-devel
On a freshly updated Fedora 44 lab box, both return the same string:
7.0.9-205.fc44.x86_64
kernel-devel-7.0.9-205.fc44.x86_64
If the version strings differ, the running kernel is older than what dnf just installed. Reboot again so GRUB picks the latest kernel. On Fedora 43 you will see a 6.x kernel; on Fedora 42 a 6.14-class kernel. The commands are identical; only the version strings shift.
Step 2: Add the Oracle VirtualBox Repository
Oracle hosts a single repo file that references $releasever in the baseurl, which means the same file works on every supported Fedora release. Pull it into /etc/yum.repos.d/:
sudo dnf -y install wget
sudo wget https://download.virtualbox.org/virtualbox/rpm/fedora/virtualbox.repo \
  -O /etc/yum.repos.d/virtualbox.repo
Check the result. The repo should be enabled and tagged with the right Fedora number:
sudo dnf repolist | grep -i virtualboxOn Fedora 44 the line reads:
virtualbox Fedora 44 - x86_64 - VirtualBoxOn Fedora 43 it prints Fedora 43 - x86_64, and on Fedora 42 Fedora 42 - x86_64. Same file, different rendering of $releasever.
Step 3: Install VirtualBox on Fedora
Install the meta package for the current major series. dnf imports Oracle’s GPG key the first time, asks you to accept it once, then pulls VirtualBox and its dependencies:
sudo dnf -y install VirtualBox-7.2The package post-install script compiles vboxdrv, vboxnetflt, and vboxnetadp against the running kernel. If the build succeeds, the install ends with a plain Complete! line. If it fails, dnf still completes and you have to rerun the build manually, which the Troubleshooting section covers.
Step 4: Verify the Kernel Modules and Service
Check that VBoxManage runs and the three kernel modules are loaded:
VBoxManage --version
lsmod | grep ^vbox
sudo systemctl status vboxdrv --no-pager | head -8
A healthy install looks like the screenshot below from a Fedora 44 box. VBoxManage --version prints the installed version, lsmod shows all three vbox modules, and the vboxdrv service is active (exited), which is how a one-shot module loader reports success.
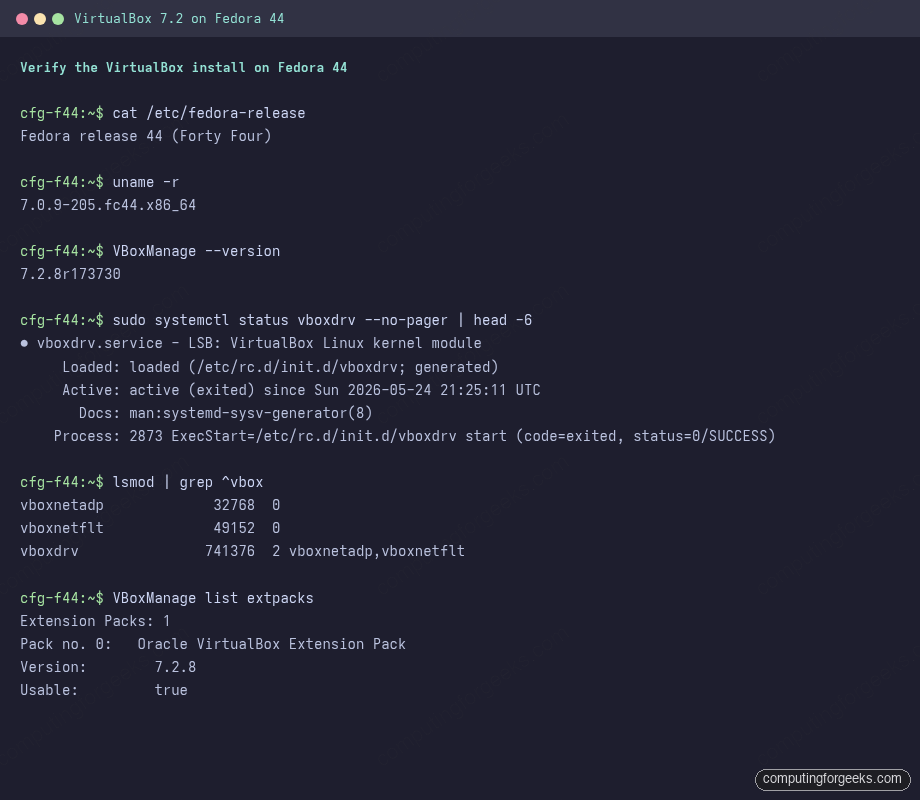
If lsmod | grep ^vbox returns nothing, the build failed and you are likely hitting Secure Boot or a kernel header mismatch. Both are covered in the troubleshooting section.
Step 5: Add Your User to the vboxusers Group
Out of the gate, only root has rights to attach USB devices or operate host-only networks. Adding your account to vboxusers avoids prefixing every command with sudo:
sudo usermod -aG vboxusers $USER
newgrp vboxusers
The newgrp call refreshes the active shell’s group list without making you log out. Confirm membership:
id $USERThe output should include vboxusers in the groups list, alongside whatever your default groups already are. A new graphical session inherits the same membership automatically.
Step 6: Install the Oracle Extension Pack
The Extension Pack lives outside the open-source base because of its licensing. It adds USB 2.0 and 3.0 host controllers, RDP support for guests, PXE ROMs for Intel NICs, full disk encryption, and the Oracle Cloud integration bits. It is free for personal, educational, and evaluation use; verify the EULA against your situation before deploying it in production.
Match the Extension Pack version to the installed VirtualBox version. The cleanest way is to read the version from VBoxManage itself, so the same lines work on every host:
VER=$(VBoxManage --version | cut -dr -f1)
cd /tmp
wget "https://download.virtualbox.org/virtualbox/${VER}/Oracle_VirtualBox_Extension_Pack-${VER}.vbox-extpack"
sudo VBoxManage extpack install --replace \
  "Oracle_VirtualBox_Extension_Pack-${VER}.vbox-extpack"
VBoxManage prompts you to accept the EULA. Type y once, then confirm the install:
VBoxManage list extpacksThe expected output shows one usable pack with the same version as VBoxManage itself:
Extension Packs: 1
Pack no. 0:   Oracle VirtualBox Extension Pack
Version:        7.2.8
Revision:       173730
Edition:
Description:    Oracle Cloud Infrastructure integration, PXE ROM.
Usable:         true
Why unusable:
Do not pull the Extension Pack URL from a hardcoded version. If you upgrade VirtualBox later and the Extension Pack drifts, USB passthrough silently breaks. Re-running the snippet above with the new VBoxManage output keeps them aligned.
Step 7: Launch the VirtualBox GUI
On a Workstation or Spin install with a desktop session, open the launcher and search for VirtualBox, or run the binary from a terminal:
virtualbox &The 7.2 Manager opens with the redesigned toolbar across the top, a tools sidebar on the far left, and a Get Started panel in the main area on a fresh install. On a Fedora 44 GNOME 50 session it looks like this:
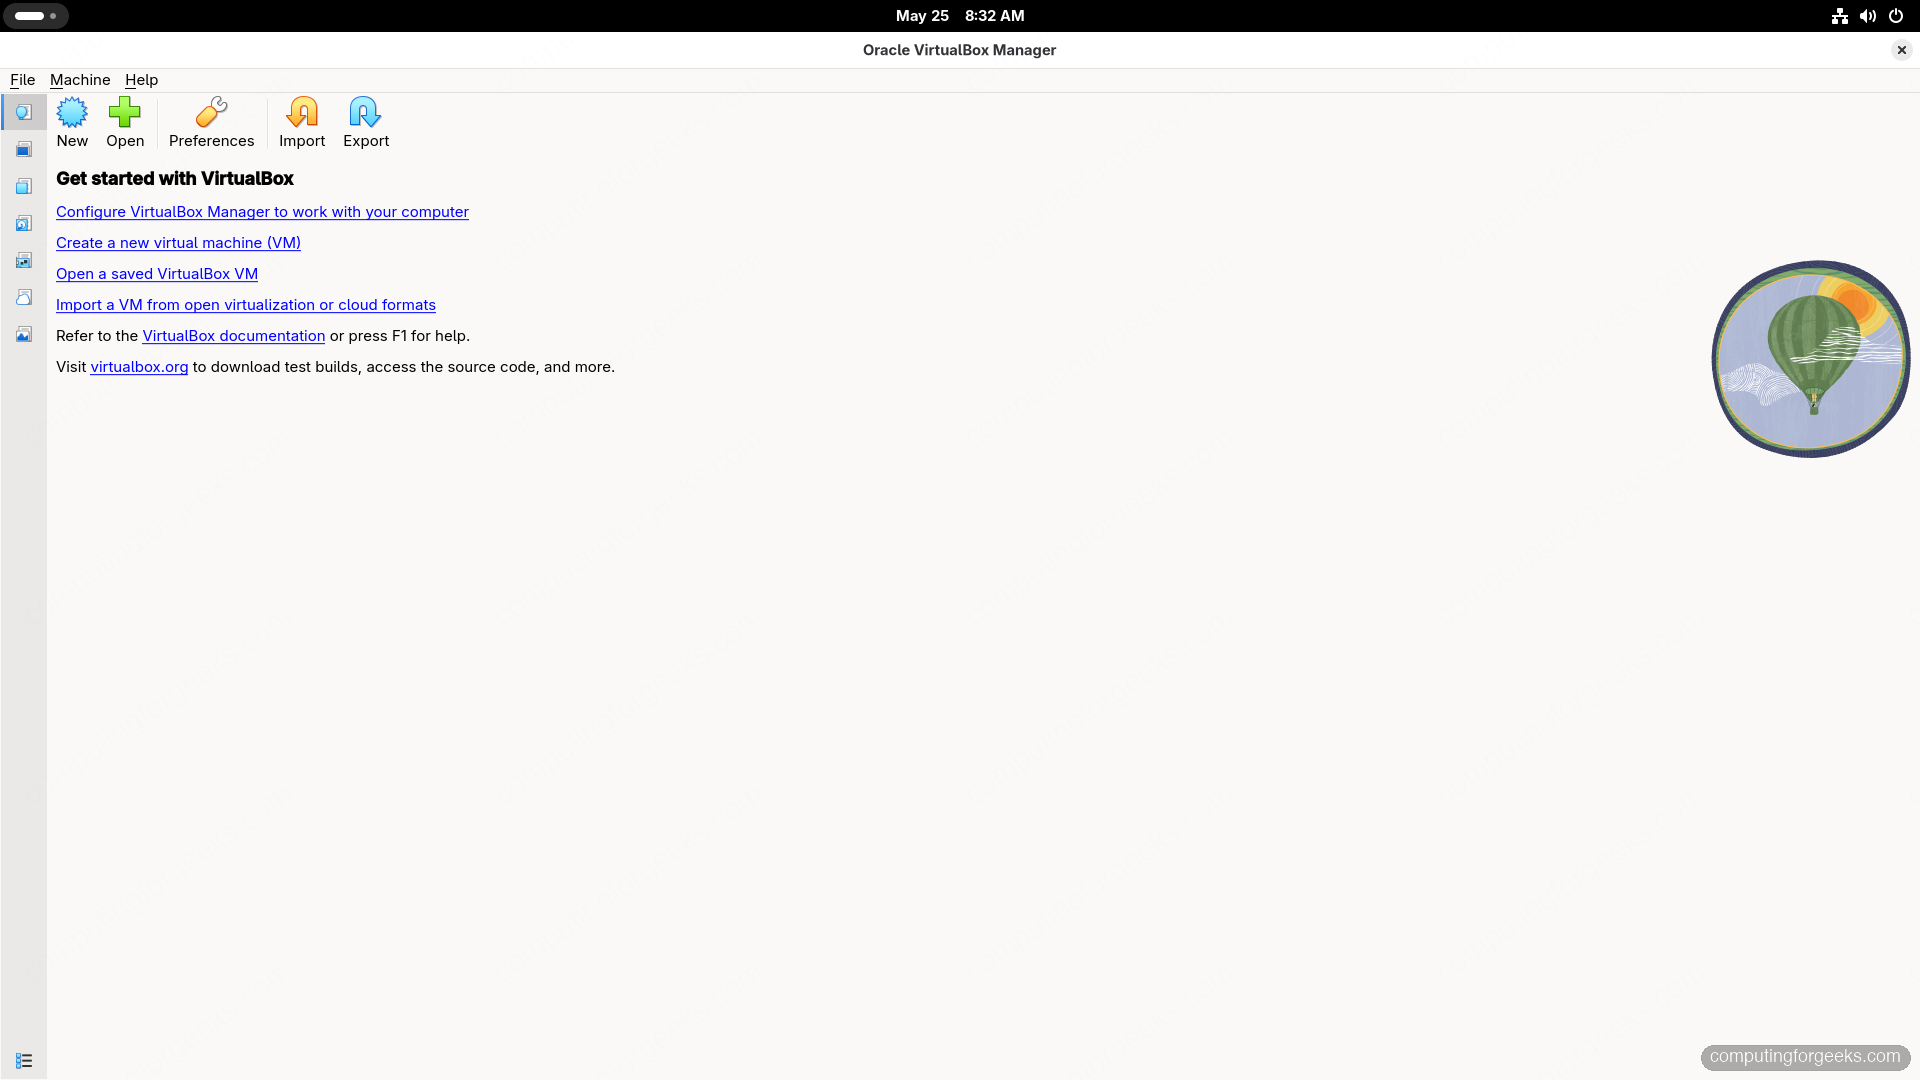
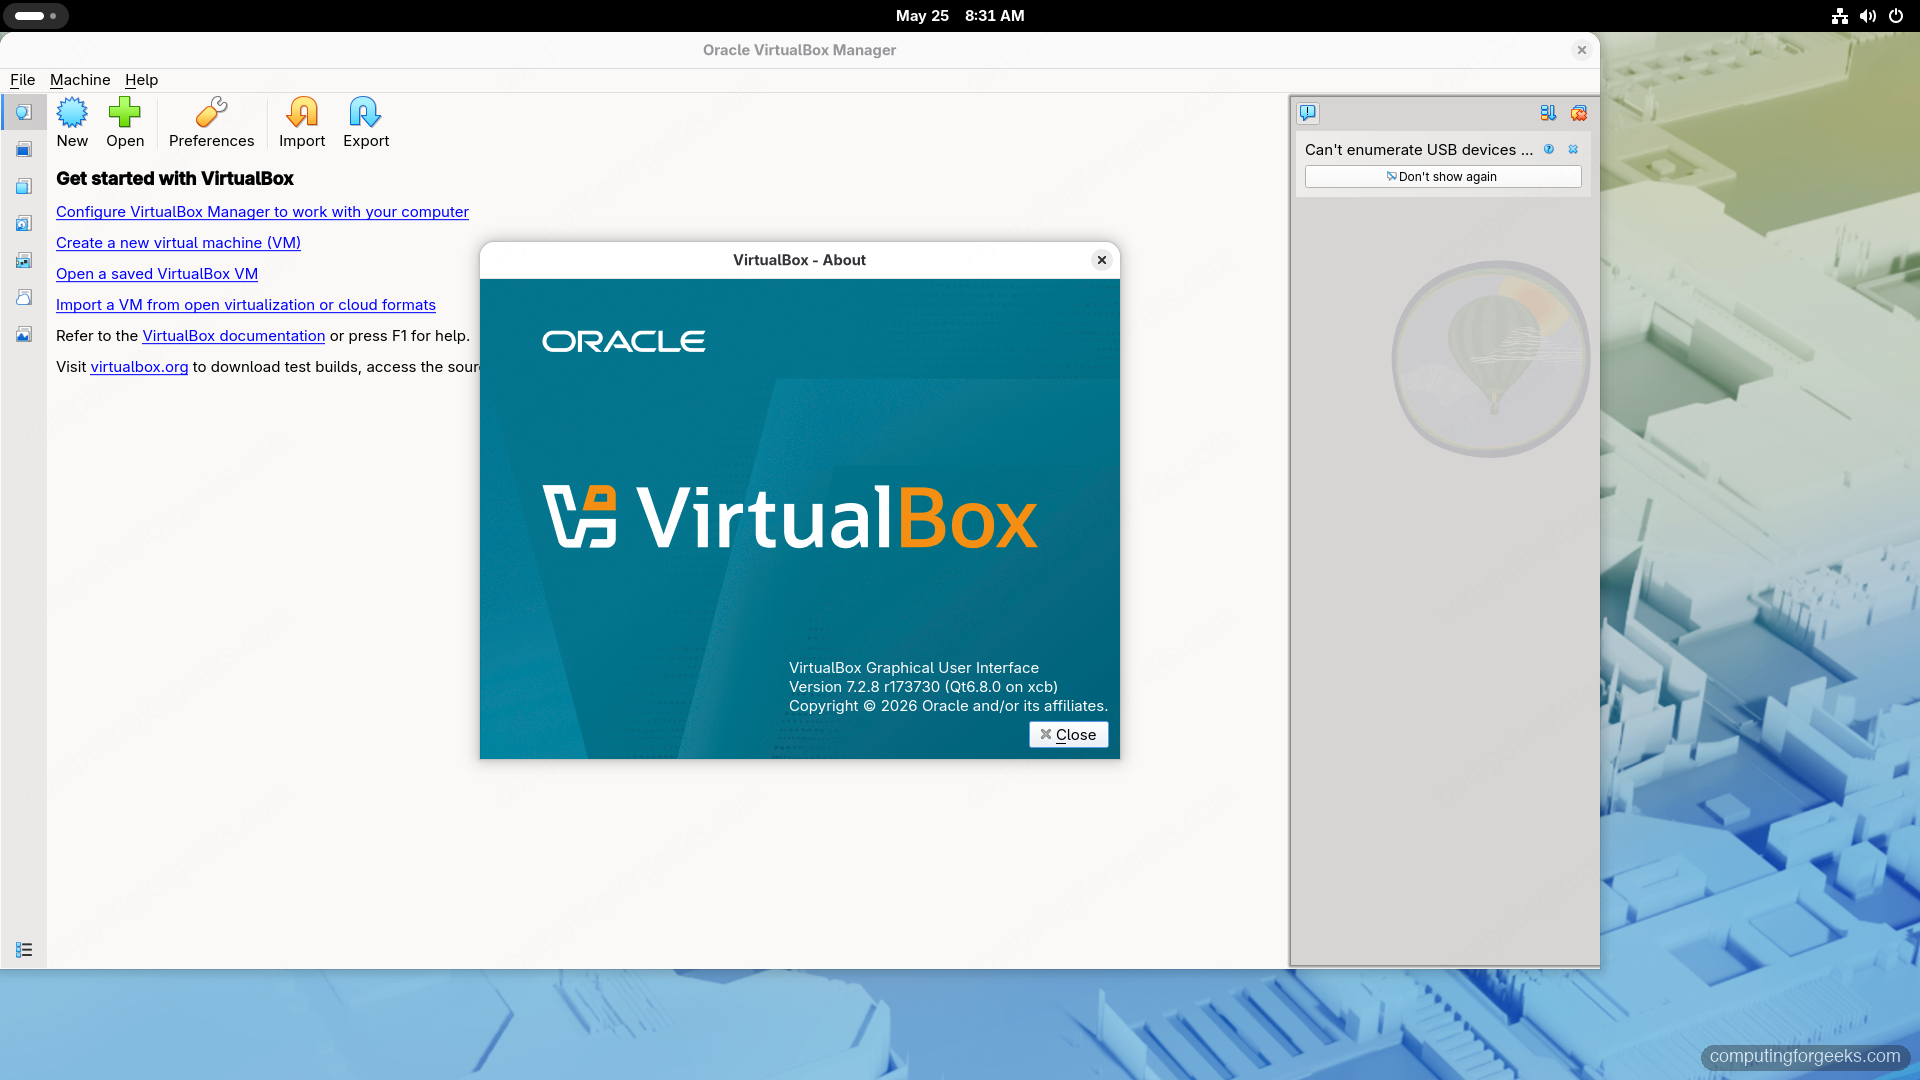
From here you can create a VM, import an OVA, or open the host-only network preferences. To confirm the exact build that registered, pop the Help menu and select About. The dialog shows the same revision string that VBoxManage --version printed earlier:
If the GUI did not start, check the launch error in the terminal. The two common causes on Fedora are missing Qt6 plugins (rare on Workstation, common on minimal Server installs) and the same Secure Boot or kernel-headers issue covered below.
Step 8: Create Your First VM from the Command Line
Even when you plan to run the GUI day-to-day, VBoxManage is the fastest way to confirm the full stack works without clicking through wizards. Spin up a 20 GB Fedora-class VM with 2 GB of RAM and a NAT NIC:
VBoxManage createvm --name "Fedora-Test" --ostype Fedora_64 --register
VBoxManage modifyvm "Fedora-Test" --memory 2048 --cpus 2 --nic1 nat
VBoxManage createmedium disk \
  --filename "$HOME/VirtualBox VMs/Fedora-Test/disk.vdi" --size 20480
VBoxManage storagectl "Fedora-Test" --name "SATA" --add sata --controller IntelAhci
VBoxManage storageattach "Fedora-Test" --storagectl "SATA" \
  --port 0 --device 0 --type hdd \
  --medium "$HOME/VirtualBox VMs/Fedora-Test/disk.vdi"
List the machines to confirm the registration:
VBoxManage list vmsAttach an ISO with another VBoxManage storageattach on a separate IDE controller, then start the VM with VBoxManage startvm "Fedora-Test". If you want a headless boot, pass --type headless. For the full set of VBoxManage subcommands worth memorizing, see the VBoxManage reference.
Troubleshooting
Error: “modprobe: ERROR: could not insert ‘vboxdrv’: Key was rejected by service”
Secure Boot is on. The kernel will not load Oracle’s unsigned modules. The simplest fix on a workstation is to disable Secure Boot in your firmware setup screen and reboot. Confirm the state from the running system:
mokutil --sb-stateIf you cannot turn Secure Boot off, generate and enroll a Machine Owner Key so the modules can be signed at build time:
sudo mkdir -m 0700 -p /var/lib/shim-signed/mok
sudo openssl req -nodes -new -x509 -newkey rsa:2048 -outform DER \
  -addext "extendedKeyUsage=codeSigning" \
  -keyout /var/lib/shim-signed/mok/MOK.priv \
  -out /var/lib/shim-signed/mok/MOK.der
sudo mokutil --import /var/lib/shim-signed/mok/MOK.der
sudo reboot
Complete the MOK enrollment from the blue shim screen at the next boot, then re-run sudo /sbin/vboxconfig to rebuild and sign the modules.
Error: “No match for argument: kernel-devel-X.Y.Z”
This shows up when the running kernel is newer than the kernel-devel currently in the updates repo, which can happen mid-cycle when Fedora ships a new kernel before the kernel-devel mirror catches up. The fastest path is to install whatever kernel-devel is available, plus the matching kernel, then reboot so the system boots into the kernel that has matching headers:
sudo dnf -y install kernel kernel-devel
sudo reboot
After the reboot, uname -r and rpm -q kernel-devel should agree. Re-run the install if dnf rolled back any VirtualBox dependencies.
vboxdrv builds but the service stays inactive
If lsmod | grep ^vbox is empty but the build itself reported success, restart the SysV-style init script that ships with the RPM:
sudo /sbin/vboxconfig
sudo systemctl restart vboxdrv
sudo systemctl status vboxdrv --no-pager
The state you want is Active: active (exited). Anything else, dig into /var/log/vbox-setup.log for the actual gcc error.
USB devices do not appear in the guest
Two conditions have to be true at the same time: the Extension Pack must be installed, and your user must be in vboxusers. Re-check both:
VBoxManage list extpacks
groups $USER | grep vboxusers
If the group is missing, run sudo usermod -aG vboxusers $USER and start a fresh login session. A running VirtualBox process keeps the old group list until you restart it.
Uninstall VirtualBox
If you need to remove VirtualBox cleanly, drop the package, the Extension Pack, and the repo file:
sudo VBoxManage extpack uninstall "Oracle VirtualBox Extension Pack"
sudo dnf -y remove VirtualBox-7.2
sudo rm -f /etc/yum.repos.d/virtualbox.repo
Your VM definitions and disk images under ~/VirtualBox VMs/ survive a package uninstall on purpose, so a future reinstall finds them again. Delete that directory by hand if you genuinely want to start over. For an alternative virtualization stack on the same Fedora host, the KVM install guide works well alongside or in place of VirtualBox; the two can coexist on one machine as long as you do not try to run both on the same VM concurrently. If you mostly drive Vagrant on top of VirtualBox, the Vagrant on Fedora guide picks up where this one leaves off, and for a network lab on the same host, the GNS3 on Fedora walkthrough hands off cleanly. On the RHEL side, the same Oracle repo pattern is covered in VirtualBox on Rocky and AlmaLinux.


Tank you for the time. I think I am in over my head at this moment yet I tried.
Article professionally done!
Welcome!
And how install VirtualBox with secureboot ON?
Did you test it?
I’d like to ask you (as an author) the same. I tested it and got a message telling me to sign the modules:
vboxdrv.sh: failed: modprobe vboxdrv failed. Please use ‘dmesg’ to find out why.
There were problems setting up VirtualBox. To re-start the set-up process, run
/sbin/vboxconfig
as root. If your system is using EFI Secure Boot you may need to sign the
kernel modules (vboxdrv, vboxnetflt, vboxnetadp, vboxpci) before you can load
them. Please see your Linux system’s documentation for more information.
(1) Quote the dollar sign in:
name=Fedora \$releasever – \$basearch – VirtualBox
(2) curl tells me:
Curl error (56): Failure when receiving data from the peer for https://www.virtualbox.org/download/oracle_vbox.asc [OpenSSL SSL_read: Connection reset by peer, errno 104]
I tried installing fedora but couldn’t get to the GUI setting. it displayed ‘failed to display gnome display manager’ etc.what could be the problem?
It is about VirtualBox 6.1. installing of VB6.1 is trivial. It is much harder to install VirtualBox 6.0 on modern Fedora.
This system is currently not set up to build kernel modules.
Please install the Linux kernel “header” files matching the current kernel
for adding new hardware support to the system.
The distribution packages containing the headers are probably:
kernel-devel kernel-devel-5.15.7-200.fc35.x86_64
There were problems setting up VirtualBox. To re-start the set-up process, run
/sbin/vboxconfig
as root. If your system is using EFI Secure Boot you may need to sign the
kernel modules (vboxdrv, vboxnetflt, vboxnetadp, vboxpci) before you can load
them. Please see your Linux system’s documentation for more information.
worked for me! Thankyou.
Awesome that’s amazing!
I tried installing. It is installed, but when I try to run a virtual machine, it says to run /sbin/vboxconfig.
When I try to do that, I get:
# sh /sbin/vboxconfig
vboxdrv.sh: Stopping VirtualBox services.
vboxdrv.sh: Starting VirtualBox services.
vboxdrv.sh: Building VirtualBox kernel modules.
This system is currently not set up to build kernel modules.
Please install the Linux kernel “header” files matching the current kernel
for adding new hardware support to the system.
The distribution packages containing the headers are probably:
kernel-devel kernel-devel-5.15.13-100.fc34.x86_64
This system is currently not set up to build kernel modules.
Please install the Linux kernel “header” files matching the current kernel
for adding new hardware support to the system.
The distribution packages containing the headers are probably:
kernel-devel kernel-devel-5.15.13-100.fc34.x86_64
There were problems setting up VirtualBox. To re-start the set-up process, run
/sbin/vboxconfig
as root. If your system is using EFI Secure Boot you may need to sign the
kernel modules (vboxdrv, vboxnetflt, vboxnetadp, vboxpci) before you can load
them. Please see your Linux system’s documentation for more information.
for the Fedora 35 /etc/yum.repos.d/virtualbox.repo file you have an incorrect backslash (right before $basearch). The repo wouldn’t resolve for me until I removed it.
sorry, it is in there as an escape when you input the file the way you did, it didn’t work for me because I c/p that into vim
Sorry
Sure Eugene.
I was trying to install virtualbox on fedora 35 for a long time, but in vain. Since virtualbox has been removed from the official repository of fedora, it became almost impossible for me to install virtualbox. But this tutorial oof yours made installing virtualbox possible. So, thank you very much.
does not work for Fedora 36:
Error:
Problem: conflicting requests
– nothing provides libvpx.so.6()(64bit) needed by VirtualBox-6.1-6.1.20_143896_fedora33-1.x86_64
OS: Fedora 36 Plasma Workstation
All prior commands to the “sudo dnf install VirtualBox-6.1” command
Error:
Problem: conflicting requests
– nothing provides libvpx.so.6()(64bit) needed by VirtualBox-6.1-6.1.34_150636_fedora35-2.x86_64
(try to add ‘–skip-broken’ to skip uninstallable packages)
Check updated guide which uses correct repo for Fedora 36.
Fedora 36 gives me the warning:
ARNING: The vboxdrv kernel module is not loaded. Either there is no module
available for the current kernel (5.18.7-200.fc36.x86_64) or it failed to
load. Please recompile the kernel module and install it by
sudo /sbin/vboxconfig
You will not be able to start VMs until this problem is fixed.
But running it does not compile because a function “netif_rx_ni” does not exist.
I’m having problem:
vboxdrv.sh: failed: Look at /var/log/vbox-setup.log to find out what went wrong.
There were problems setting up VirtualBox. To re-start the set-up process, run
/sbin/vboxconfig
as root. If your system is using EFI Secure Boot you may need to sign the
kernel modules (vboxdrv, vboxnetflt, vboxnetadp, vboxpci) before you can load
them. Please see your Linux system’s documentation for more information.
Please help.
There were problems setting up VirtualBox. To re-start the set-up process, run
/sbin/vboxconfig
as root. If your system is using EFI Secure Boot you may need to sign the
kernel modules (vboxdrv, vboxnetflt, vboxnetadp, vboxpci) before you can load
them.
canyou help//?
THANKS derick
Thanks a lot!
The article looks very nice, but has 2 very big problems:
– The gpgkey in the repo is incorrect and will not allow you to use the repo.
The correct/working gpgkey is: https://www.virtualbox.org/download/oracle_vbox_2016.asc
– VirtualBox will NOT run this easy, when Secureboot is enabled.
Check with “dmesg | grep -i secure”
You can start the GUI, but it will start to warn you about usb redirection not working, and creating a VM is out of the question.
Perfect.
Thanks.
Works fine on fedora xfce 44 !
Thanks a lot for this guide.
Good to know it still works on Fedora 44 XFCE. Thanks for confirming.