A stack of mini PCs on a shelf works fine right up until the day you knock a power brick loose reaching for the one cable you actually need. That is usually the moment people go looking for a rack, discover a full 19-inch cabinet is the size of a dishwasher, and quietly give up.
A 10-inch mini rack is the fix. It holds the same mini PCs, a managed switch, a patch panel and a small PDU in a footprint about the size of a toaster, and it turns “which cable was that” into a thirty-second job. This guide is the parts list and the layout: which rack to buy, what goes in it, how to power it, and the order to stack things so the little cabinet does not tip over or cook itself. Every pick is a real, current DeskPi or GeeekPi part with the model and a price band.
Priced and planned in July 2026 against the DeskPi and GeeekPi parts on sale today. Read it as a parts list and a copyable layout rather than a photo build log, and treat every price as a band because the small-rack market is jumpy right now.
The parts, at a glance
Six parts turn a pile of gear into a rack. Here is the whole shopping list before we go through each one. A sensible starter build lands around $250 to $400 depending on whether you add the managed switch, so the switch is the one part worth thinking hardest about.
| Part | Pick | Price band | Why it is here |
|---|---|---|---|
| The rack | DeskPi RackMate T1 (8U) | ~$110 to $130 | Die-cast aluminium 10-inch cabinet, the standard mini-rack body |
| Network core | QNAP QSW-M2108R-2C | ~$180 to $220 | Half-width managed switch, 8x 2.5GbE + 2x 10GbE, fits the rack |
| Compute shelf | GeeekPi vented shelf (0.5U) | ~$15 to $22 | Mini PCs have no rack ears, so they ride on a tray |
| Power | GeeekPi DC PDU Lite 7-CH | ~$25 to $35 | One wall brick becomes seven fused DC feeds |
| Cabling | GeeekPi 10-inch 12-port patch panel | ~$13 to $18 | Terminates your runs so the front stays tidy |
| Cable entry | GeeekPi 1U brush strip | ~$10 to $14 | Passes cables through cleanly and keeps dust out |
The compute itself is not on that list on purpose. Whatever mini PCs, Pis or a firewall you already run go on the shelf, and picking those is a whole topic of its own. If you are still choosing, our guide to a mini PC sized for Home Assistant and the one on a mini PC for local AI both cover boxes that slot straight onto a 0.5U tray.
1. Start with the right 10-inch rack
A 10-inch rack, also called a half rack, keeps the same 1U height standard as a big rack (44.45 mm per U) but sets the mounting rails just 236.525 mm apart instead of 19 inches. That is the number the whole ecosystem is built around, so any part sold as “10-inch” or “for DeskPi RackMate” will line up. Jeff Geerling’s Project Mini Rack is the community reference for what fits.
The DeskPi RackMate T1 is the one most builds start with. It is 8U of die-cast aluminium with translucent acrylic sides, and it feels solid rather than like a toy. Pick the size by how much you actually own:
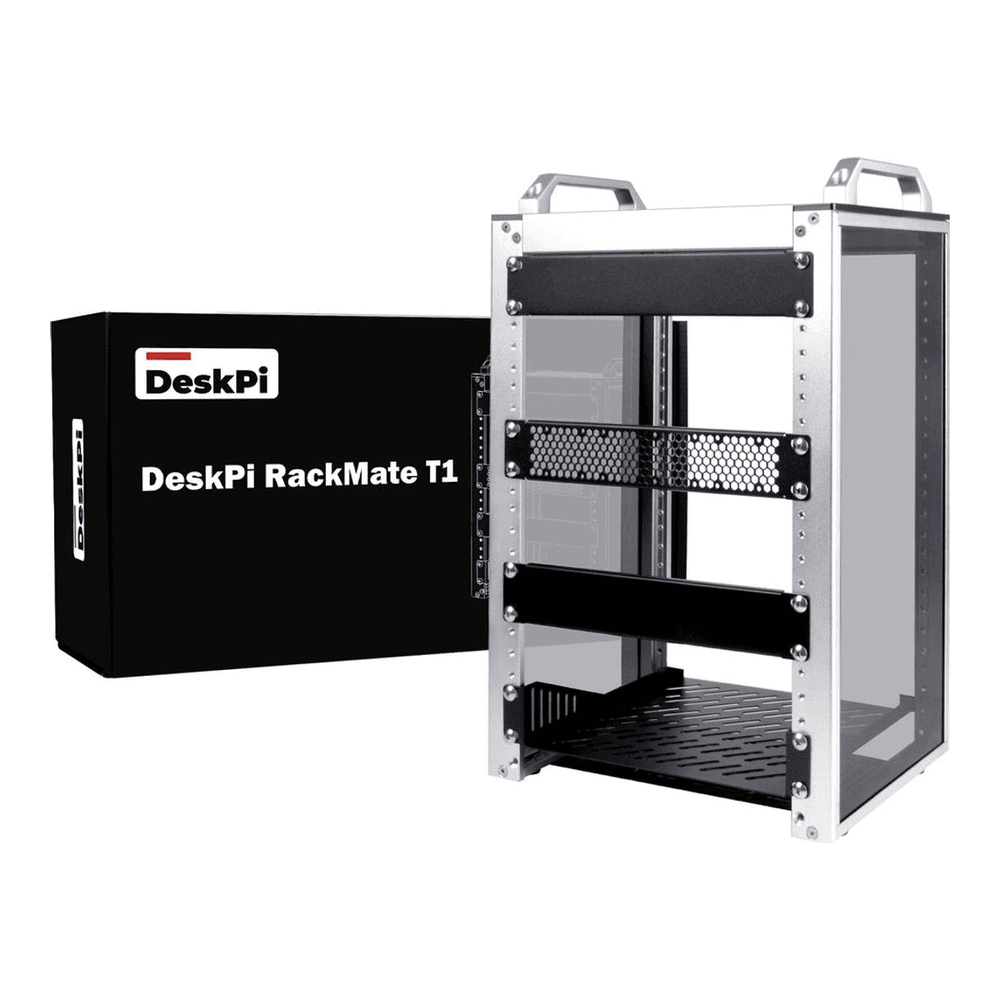
- RackMate T1 (8U): the default. Room for a switch, a patch panel, a PDU and two or three shelves. Enough for a first cluster.
- RackMate T2 (12U): same width, taller, and deeper. Get it if you already know you want more nodes or a small NAS.
- RackMate T1-Plus: the 8U T1 with a deeper body (260 mm instead of 200 mm) for gear that will not fit the shallow standard T1.
The gotcha here is depth, and it is the mistake that bites first. The plain T1 is shallow, only a couple of inches of real clearance behind the front posts, which is fine for single-board computers, most mini PCs on a tray, and a half-width switch. A full-depth 19-inch device or a mini-ITX board will hang out the back. If your gear is deep, buy the T1-Plus or the T2 and save yourself a return.
2. Put the network switch up top
The one device made to bolt straight into a 10-inch rack is a half-width switch, and the QNAP QSW-M2108R-2C is the pick that fits without a shelf. It is a Layer 2 web-managed switch with eight 2.5GbE ports and two 10GbE SFP+/RJ45 combo ports, so it handles both the mini PCs and a 10-gig uplink to a NAS or a bigger switch.
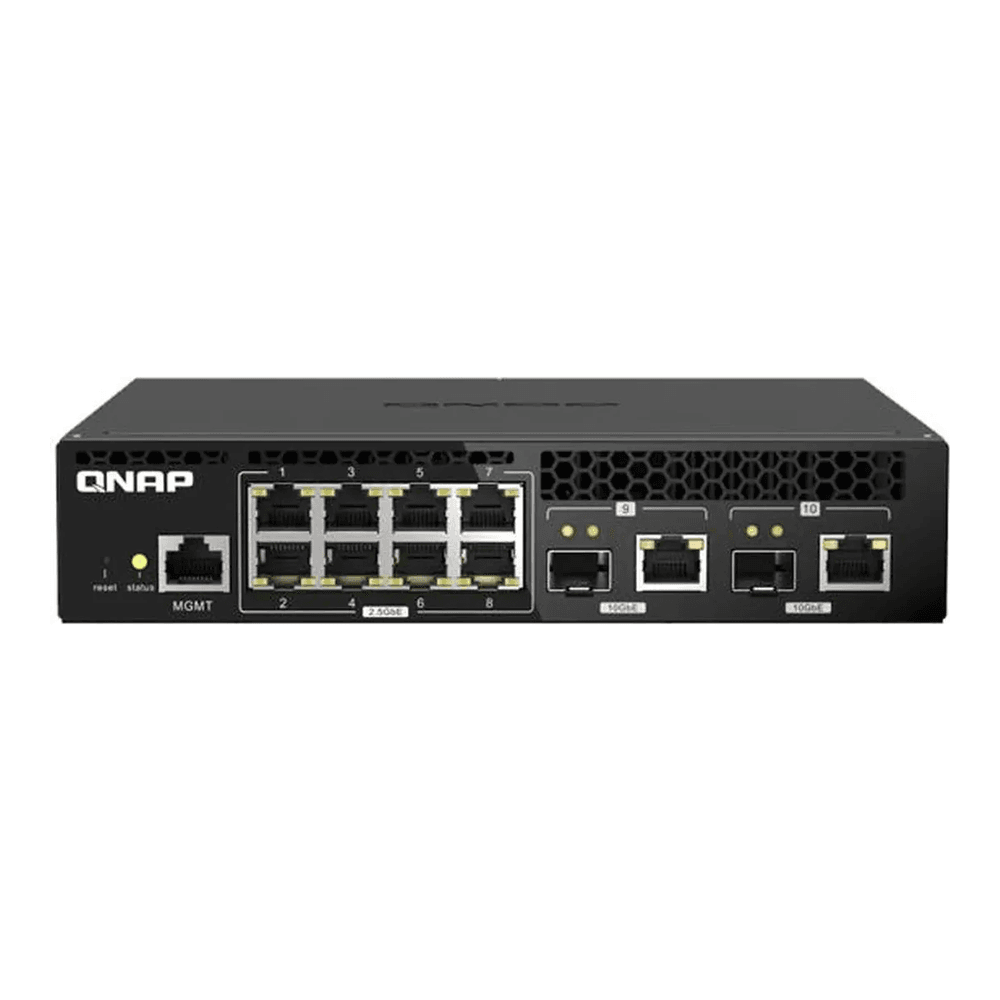
QNAP designed it so two of them sit side by side in a 1U slot of a 19-inch rack, which is exactly why a single one is the right width for a 10-inch cabinet. One thing to add to the cart: the rackmount kit in the box mounts it in a 19-inch rack, so grab QNAP’s short 10-inch ear kit (SP-EAR-QSWHALFRACK-01) to bolt it to the mini-rack rails. Want PoE for cameras or access points? The QSW-M2106PR-2S2T is the same half-width shape with 90W PoE++ on six ports. If you would rather not rack the switch at all, the MikroTik CRS310-8G+2S+IN gives you the same 8x 2.5GbE plus 2x 10G SFP+ in a small metal box that sits happily on a shelf. Either way, the switch belongs at the top: everything patches up to it, so keeping it above the patch panel gives you the shortest cable runs. For choosing the switch on speed and features, the 2.5GbE and 10GbE switch guide goes deeper.
3. Rack the mini PCs on a vented shelf
Here is the thing nobody tells you before the first build: mini PCs, Pis and small firewalls have no rack ears. They cannot bolt to the rails. They ride on a shelf, and the shelf is what actually mounts. So a mini rack needs one tray per node you want to keep serviceable.
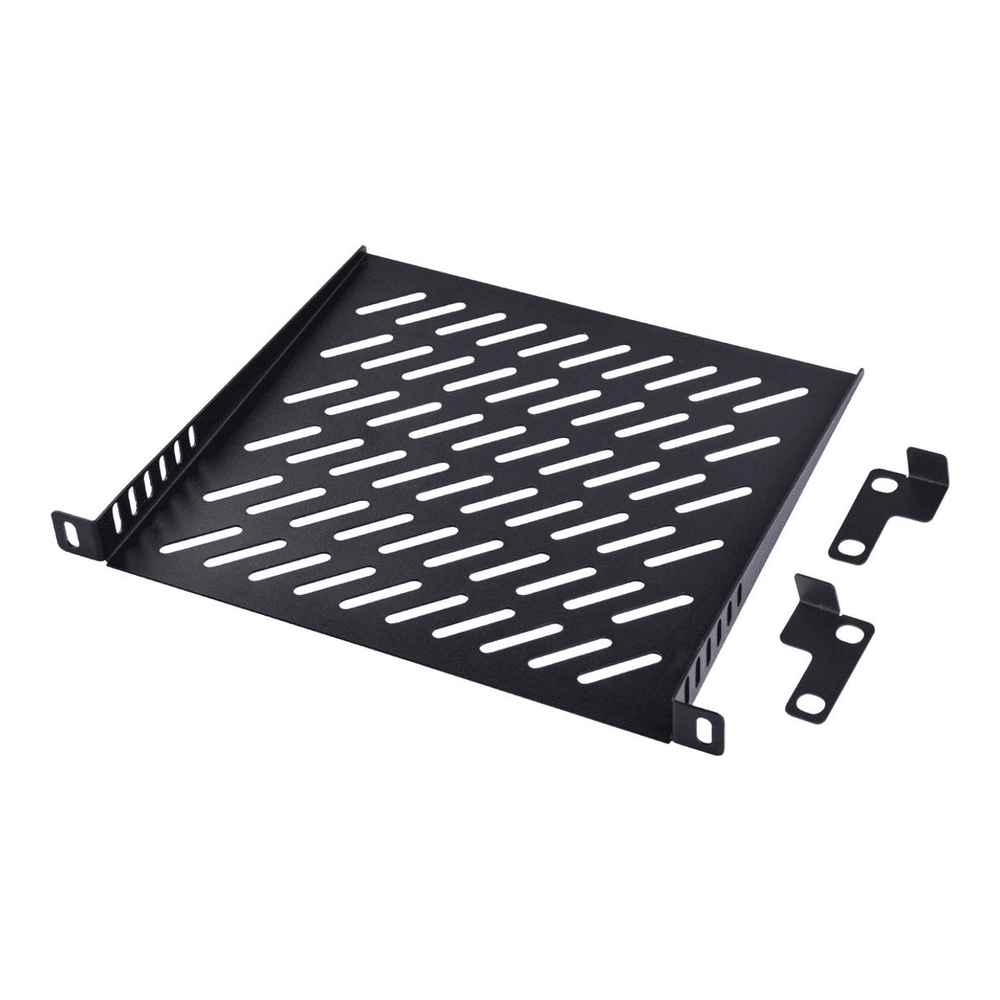
Buy the vented version, not a solid one, because a sealed acrylic box has no fans moving air and the holes let heat rise off the boxes. Match the depth to the rack: a short 7.87-inch shelf for the standard T1, a 10.23-inch one for the T1-Plus or T2. One trap to plan around is quantity. A rack ships with one or two shelves, which covers a third of the space at most, so if you are running three nodes, order three trays up front. This is the layer where your actual homelab lives, whether that is a Proxmox host, a NAS, or a firewall.
4. Wire power with a DC PDU
Most mini-rack gear runs on 12V DC barrel jacks, so instead of six wall bricks fighting over a power strip, a DC PDU takes one input and splits it into several clean feeds. The GeeekPi DC PDU Lite gives you seven channels in half a U, accepts up to 24V at 8A, and fuses each channel so one shorted device trips only its own outlet and recovers after a few seconds.
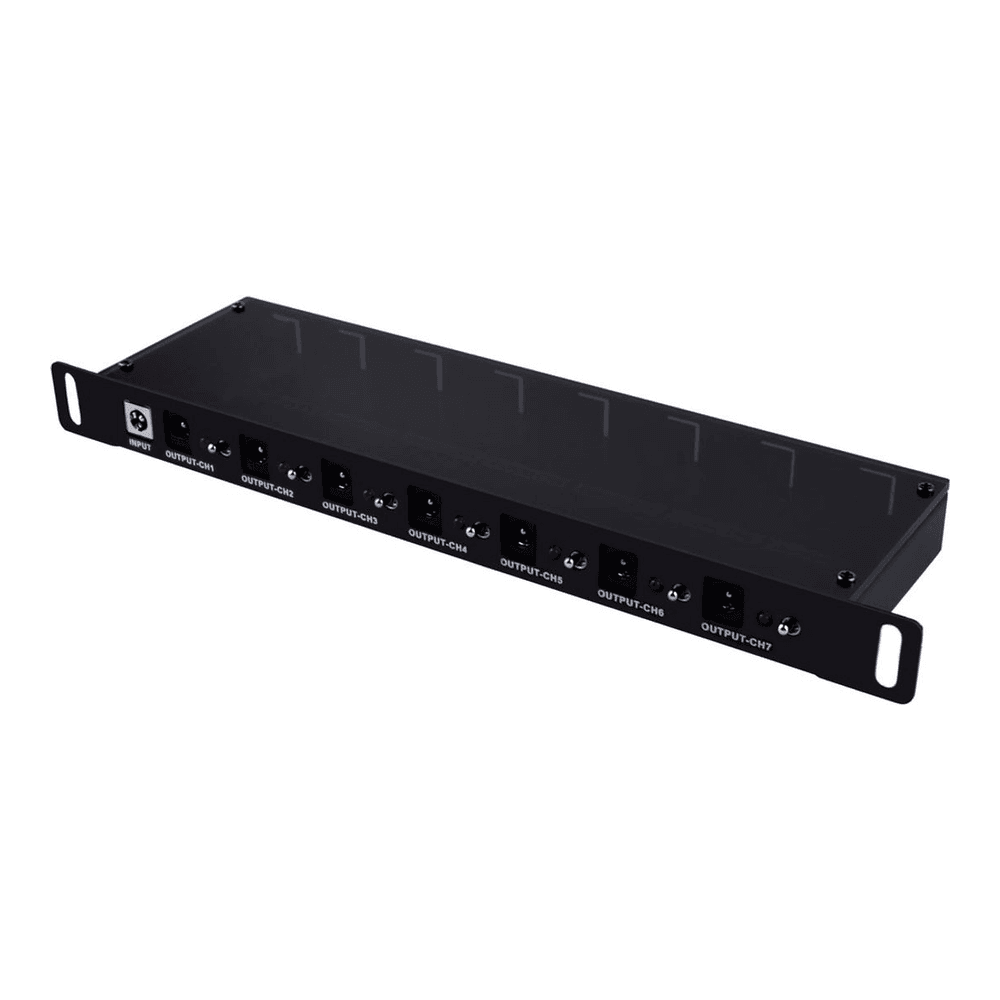
The honest caveat is that this is DC only. It feeds the boxes that take a barrel jack, which is most Pis, mini PCs and small switches. Anything with its own AC brick, and some mini PCs still do, plugs into a normal surge strip you zip-tie to the bottom of the frame. Check the voltage on each device before you wire it, because a 12V PDU will not run a 19V laptop-style brick. A common setup is a DC PDU for the small stuff and one short AC strip for the two odd bricks that refuse to conform.
5. Patch panel and brush strip for the cabling
A patch panel is what separates a rack from a nest of wires. You terminate your permanent runs into the back of a 12-port keystone panel and use short patch cables from the panel to the switch. The GeeekPi 10-inch 0.5U CAT6 panel is the right form factor and numbered 1 to 12 so you can label ports.
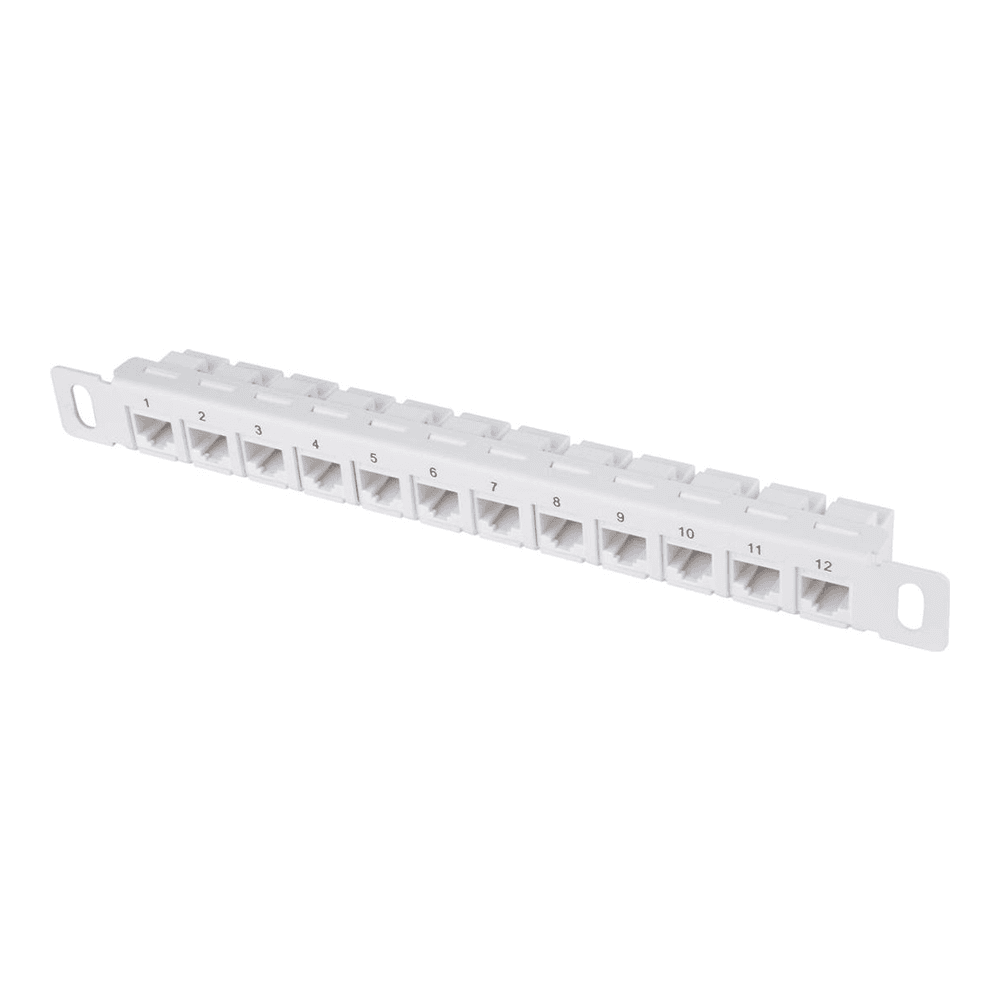
Pair it with a 1U brush strip mounted just below. Cables pass through the bristles into the rack, the brush hides the slack and keeps dust out, and the whole front reads as one tidy path instead of a knot. Buy the patch panel even for a three-node lab. It is cheap, it takes ten minutes, and it is the single change that makes a mini rack look like it was built by someone who knew what they were doing.
6. Plan the layout before you screw anything in
Stacking order matters more in a small rack than a big one, because the thing is light and easy to tip. Here is a layout that works for a first 8U build, and the reasoning behind each choice so you can adapt it to your own gear.
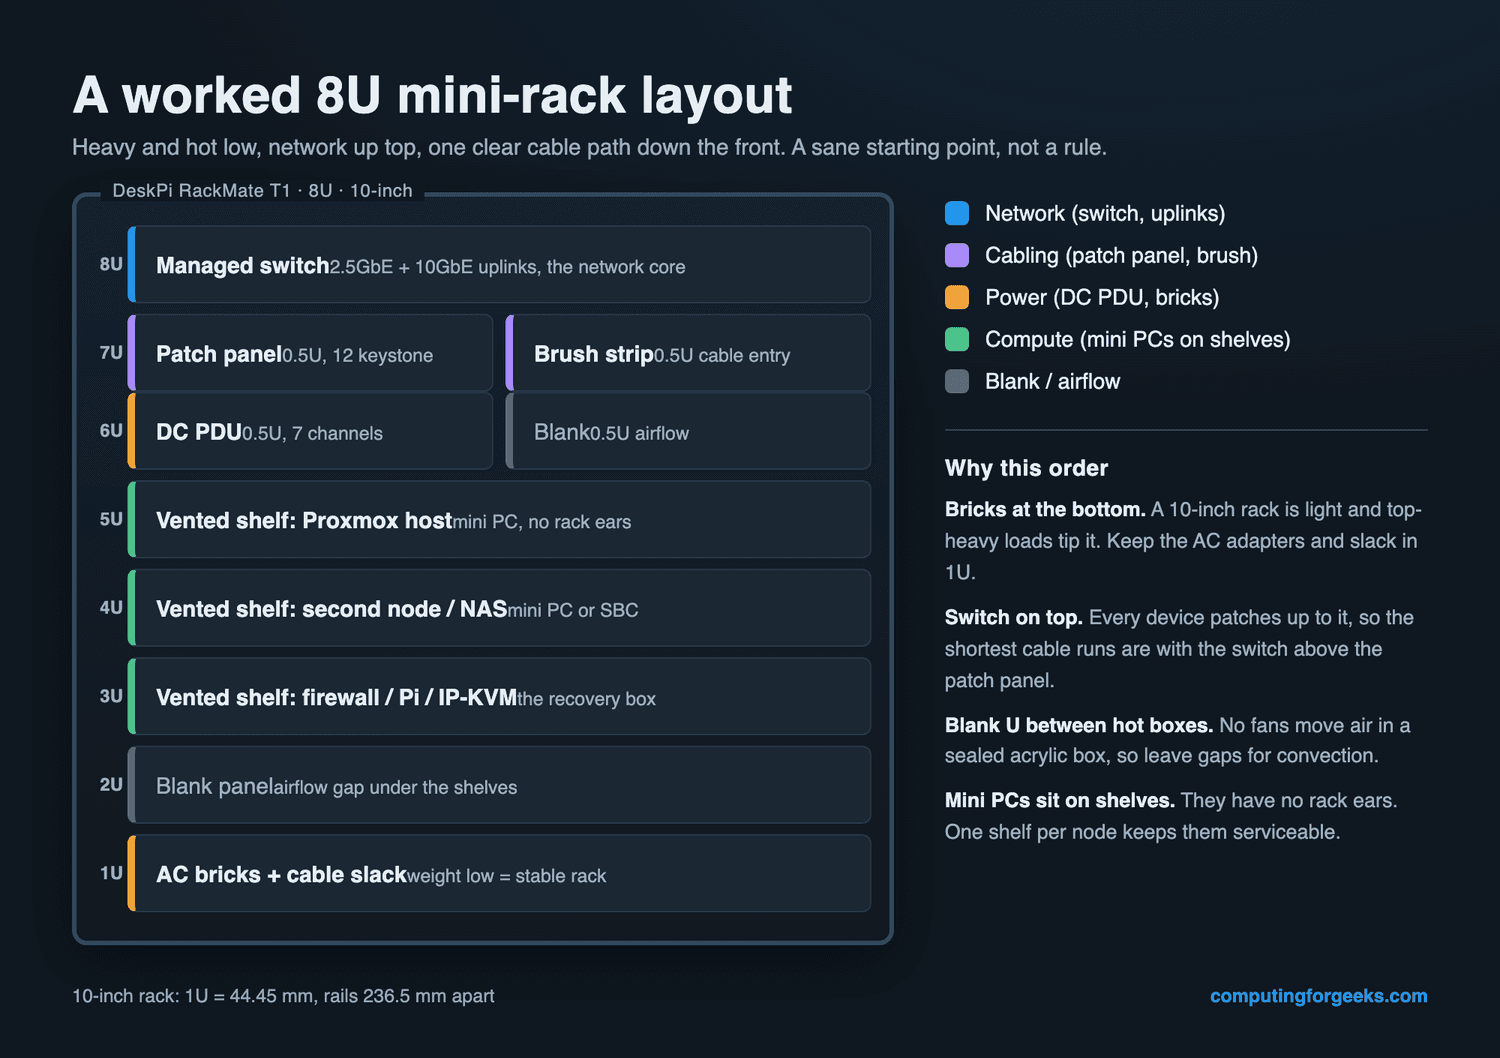
Three rules drive it. Put the switch at the top so every device patches up to it over the shortest run. Keep the compute in the middle, one shelf per node, with a blank U between hot boxes so convection can pull heat up through the vents. And put the weight, the AC bricks and the cable slack, in the bottom U so the rack stays planted. If you slot an IP-KVM onto one of those shelves, you can also recover a headless box in the rack without dragging a monitor over, which pairs well with picking an IP-KVM that fits the space.
What fits and what does not in a 10-inch rack
The 10-inch form factor is young enough that not everything you want exists yet, and knowing the gaps before you shop saves real frustration.
- Half-width switches fit, full-depth ones do not. QNAP and a handful of others make genuine half-width units. Most consumer switches are too wide or too deep and have to sit on a shelf instead.
- There is no purpose-built 10-inch UPS. This is the real gap. If you want battery backup, a normal desktop UPS lives next to the rack, not in it. Plan the space for it.
- Mini PCs and Pis fit, on shelves. No ears, so every one needs a tray. Budget a shelf per node, not per rack.
- Deep gear needs the deep rack. The standard T1 is shallow. A NAS or an ITX board wants the T1-Plus or T2, or it will not close.
If you find yourself wanting rack-ear servers, hot-swap bays and a real UPS, that is the signal you have outgrown 10-inch and should step up to a small 19-inch open frame instead. There is no shame in it, but a mini rack is happiest holding mini gear.
Power and heat in a sealed little box
The acrylic sides that make a mini rack look good also trap heat, and there is no chassis fan doing anything about it. So airflow is a design choice, not an afterthought. Use vented shelves rather than solid ones, leave a blank U between anything that runs warm, and if two mini PCs plus a switch push the inside temperature up, a single quiet 80 mm or 120 mm USB fan clipped to the frame moves enough air to matter.
On the power side, add up the draw of everything you are plugging in before you pick a brick for the DC PDU. Three mini PCs at 15W idle plus a switch is comfortable inside the PDU’s headroom, but a hungry node with a discrete GPU is not a DC-barrel device and belongs on its own AC feed. Measuring real idle and load watts on your own boxes is worth the ten minutes, because it tells you both the brick you need and the heat you have to shed.
Mistakes to avoid on your first mini rack
Almost every first build hits the same handful of snags. None are expensive if you see them coming, all are annoying if you do not.
- Buying a 19-inch panel by accident. Plenty of cheap patch panels and PDUs are 19-inch and will never bolt into a 10-inch rack. Filter for “10-inch” or “for DeskPi RackMate” on every accessory, every time.
- Shelf depth mismatch. A 10.23-inch shelf will not seat in a shallow T1, and a short shelf looks lost in a T2. Buy the shelf that matches the rack you bought.
- Loading it top-heavy. Put the bricks and slack low. A rack this light will tip if the mass is up high and you tug a cable.
- One shelf, three nodes. The included tray is never enough. Order the shelves and the patch panel with the rack so you are not waiting on a second shipment to finish the build.
- Skipping the patch panel. It feels optional on day one and essential the first time you trace a cable. Do it now.
Get those right and a 10-inch rack pays for itself the first time you need to swap a node or chase a bad cable. The gear you already own is the same. It just stops being a pile and starts being infrastructure you can actually reason about.