The one time you cannot SSH into a server is the one time you need to most. The kernel panicked, a bad /etc/network/interfaces edit took the NIC offline, an upgrade left GRUB looping, or someone changed a BIOS setting and the box will not POST. SSH is an in-band tool: it needs a booted kernel, a working network stack, and a running sshd. Lose any one of those and the door you always use is gone.
An IP-KVM is the out-of-band door. It captures the machine’s video output, presents a virtual keyboard and mouse, and often controls power, all over the network and independent of whatever the operating system is doing. When the box is a headless Proxmox node in a closet or a colocated server three hours away, that difference is the line between a five-minute fix and a drive to the rack. This guide walks the real scenarios where you recover a headless server over that console: reaching the firmware, booting into a rescue shell, resetting a lost root password, fixing a network config that locked out SSH, and mounting a rescue image over the wire.
Verified July 2026 on Debian 13 (the base Proxmox VE runs on), driven entirely over an out-of-band console with no SSH.
One honesty note before we start. The console screenshots below were captured on a Debian 13 virtual machine through its hypervisor console, which renders the exact same firmware, GRUB, and rescue screens a hardware IP-KVM relays for a physical box. The recovery steps are identical either way. Which physical unit to buy is a separate decision covered in the IP-KVM buyer guide; this article is about what you do once you have one.
Why SSH is not enough
SSH, VNC, RDP, and Proxmox’s own web console all run on top of a healthy, booted system. They are useless in the exact failure modes that strand a headless box:
- The kernel panicked or the boot hangs before the network comes up.
- A network change (wrong address, wrong gateway, a typo in a bridge) left the box running but unreachable.
- GRUB is stuck, or an initramfs or fstab problem drops the box to an emergency prompt only the console can see.
- You need the BIOS or UEFI setup: change boot order, toggle virtualization, or clear a setting that stops POST.
- The machine is powered off or frozen solid, and you need to force a power cycle.
An IP-KVM sees all of it because it sits below the operating system. Here it is showing the UEFI firmware POST over the console, well before any bootloader or kernel has run. No in-band tool can reach this screen.

This is also the difference between an IP-KVM and Wake-on-LAN or a smart plug. A plug can cut power, but it cannot show you why the box will not boot or let you fix it. Treat the IP-KVM as a permanent fixture on any node you cannot walk up to, the same way you would not run a remote server without a way back in.
Set up console access before you need it
Recovery is not the time to be learning the interface. Wire the unit in while the box is healthy: HDMI (or DisplayPort adapter) from the server to the KVM’s capture input, the KVM’s USB emulation lead to a USB port on the server so it registers as a keyboard and mouse, and the KVM’s own power and network. On a Proxmox host, plug the KVM into your management network, not the same bridge your VMs use, so a VM-side network problem never takes your recovery path down with it.
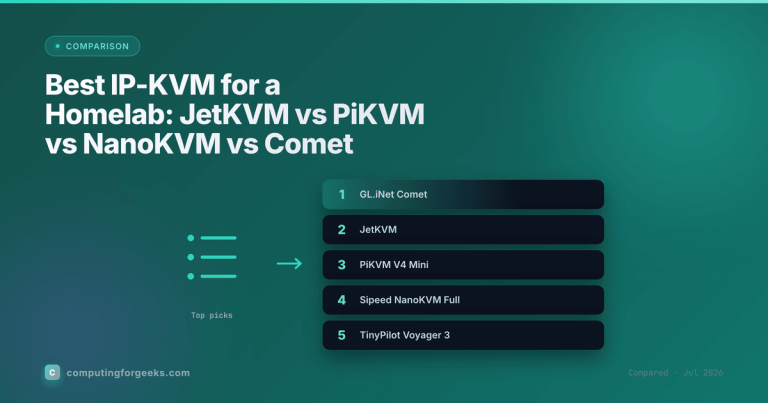
Then open the KVM’s web interface and confirm you can see the live console and type into it. A cheap, capable starting point is the GL.iNet Comet (GL-RM1), which runs about $100, streams the console in the browser, and needs no subscription. For open-source diehards and full BIOS-level virtual media, the PiKVM V4 Mini is the reference build. Check the live price on either; the full trade-offs and the rest of the field are in the buyer guide. Whatever you pick pairs naturally with a small Proxmox host that has no display attached.
Boot into a rescue shell from GRUB
The most common recovery is getting a root shell when the system will not finish booting or you cannot log in normally. From the console you interrupt the bootloader, edit the kernel command line for a single boot, and land in a minimal maintenance environment. On a UEFI box, press Esc as the firmware hands off; on legacy BIOS, hold Shift. The GRUB menu appears.
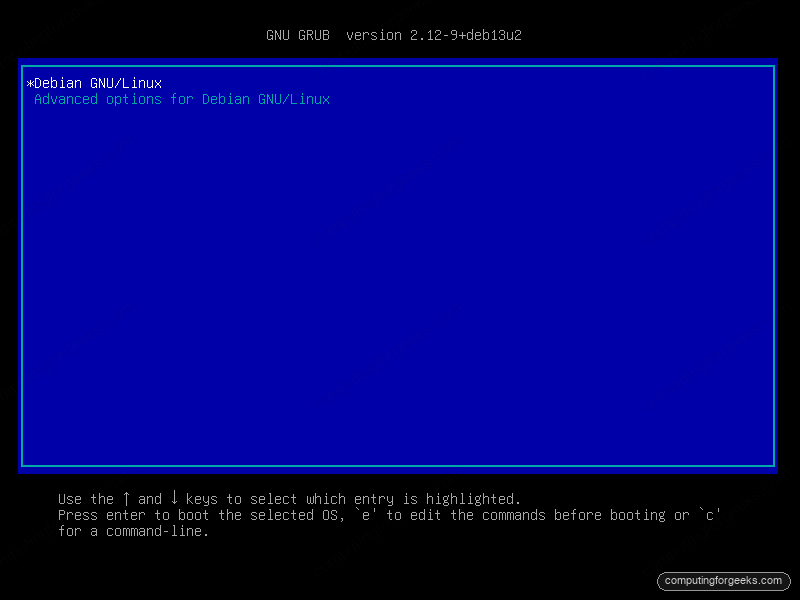
With the default entry highlighted, press e to edit it. GRUB opens the boot commands in a small editor. Find the line that starts with linux (it references /boot/vmlinuz), move to the end of it, and append the target you want.
Add systemd.unit=rescue.target for single-user maintenance mode, which mounts the local filesystems and gives you a root shell after asking for the root password:
systemd.unit=rescue.targetThe kernel line now ends with the rescue target appended, ready to boot:
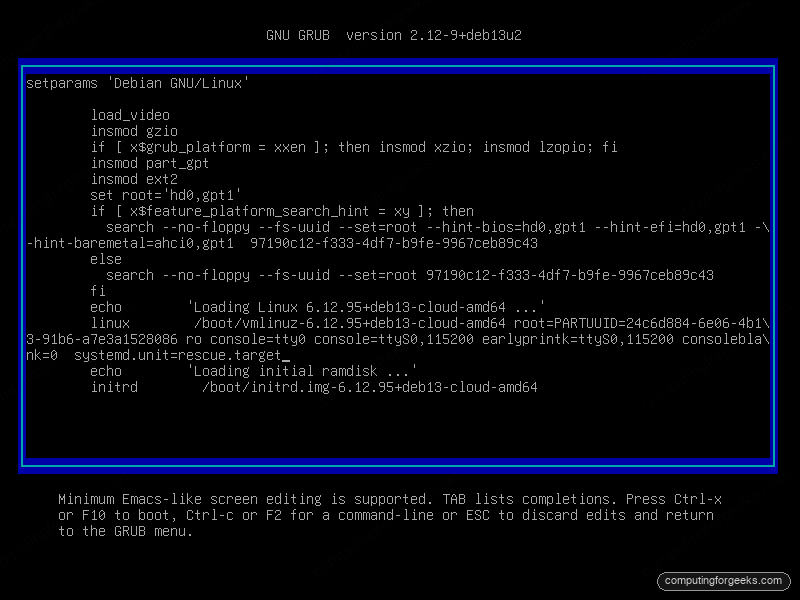
Press Ctrl+X or F10 to boot that entry. The edit is not permanent; a normal reboot goes back to the standard boot. If the box is failing so early that even local mounts are a problem, use systemd.unit=emergency.target instead. It starts almost nothing and drops you to a shell with only the root filesystem mounted read-only, which is the right place to repair a broken /etc/fstab.
After entering the root password you get a maintenance shell. This is where the out-of-band path proves itself: the network is down, so SSH could never have reached this box, yet you have a root prompt.
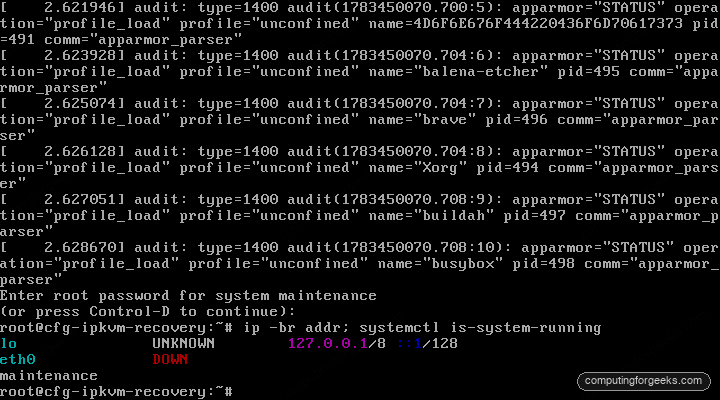
From here, read the logs to find what stopped the boot. The two commands that answer most cases:
systemctl --failed
journalctl -xb -p err --no-pager
The first lists every unit that failed this boot; the second shows the error-level journal entries with the explanations attached. Fix the offending unit or config, then continue booting with systemctl default or reboot from the console.
Reset a lost root password
Locked out entirely, with no working password and no SSH key that gets you to root? The console lets you bypass the login by booting straight into a shell as PID 1. At the GRUB edit screen, append this to the linux line instead of a systemd target:
rw init=/bin/bashThe rw asks the kernel to mount root read-write, and init=/bin/bash replaces the normal init with a bare shell. There is no login and no password prompt. If the root filesystem still comes up read-only, remount it before changing anything:
mount -o remount,rw /Set a new password:
passwd rootBecause init is a plain shell, you cannot simply reboot cleanly with the usual tools. Flush the change to disk and hand control back to the real init:
sync
exec /sbin/init
The system continues a normal boot with the new password in place. On a RHEL-family box with SELinux enforcing, run touch /.autorelabel before you hand control back, otherwise the mislabeled /etc/shadow can reject the new password on the next login. Debian, Ubuntu, and Proxmox use AppArmor and need no relabel. This is the single most common reason a homelab admin wishes they had an IP-KVM. It is also why physical and console access to a server is equivalent to root: anyone who can reach the console can do exactly this. On Proxmox nodes that means the KVM itself must be locked away behind a VPN, which the last section covers.
Fix a network change that locked out SSH
This is the Proxmox classic. You edit the network config over SSH, apply it, and the session freezes because the address or gateway is now wrong. The box is up and healthy, just unreachable. Without a console you are driving to it. With one, you log in at the console and fix the file directly.
Proxmox VE and plain Debian use ifupdown2, so the file to fix is /etc/network/interfaces. Open it from the console:
sudo vim /etc/network/interfacesCorrect the bridge stanza back to a working address and gateway. A minimal, sane Proxmox management bridge looks like this:
auto lo
iface lo inet loopback

auto vmbr0
iface vmbr0 inet static
    address 192.168.1.10/24
    gateway 192.168.1.1
    bridge-ports enp1s0
    bridge-stp off
    bridge-fd 0
Apply it without a reboot. On ifupdown2, reload the config in place:
ifreload -aIf you only need to get back onto the network long enough to finish the repair over SSH, add a temporary address and route by hand. This does not survive a reboot, which is fine for a quick fix:
ip addr add 192.168.1.10/24 dev vmbr0
ip route add default via 192.168.1.1
Ubuntu Server and generic Debian cloud images use Netplan with systemd-networkd rather than ifupdown. There the file lives under /etc/netplan/:
sudo vim /etc/netplan/50-cloud-init.yamlAfter correcting the addressing, apply it with a timed rollback so a second mistake does not lock you out again:
sudo netplan trynetplan try applies the change and, if you confirm the prompt, keeps it; if you do nothing it reverts automatically after 120 seconds. On a remote box that safety net alone saves a trip. When you are certain the change is right, sudo netplan apply commits it directly without the countdown. The Proxmox post-install steps cover getting the bridge right the first time.
Mount a rescue image as virtual media
Some failures need a full live environment, not the installed system’s own broken shell: a corrupted root filesystem, a missing kernel, a bootloader that will not reinstall from within the OS. A hardware IP-KVM handles this by emulating a USB drive. You upload or point it at an ISO, and the server sees a bootable USB stick that is not physically there.
All the mainstream units do this. PiKVM’s mass-storage emulation is available even in the BIOS or UEFI, so you can pick it as a boot device from firmware. JetKVM exposes the same through its mount-drive feature, and the Sipeed NanoKVM emulates a USB ISO as well. The flow is always: attach the ISO in the KVM’s web UI, open the boot menu from the console (usually F11 or F12), pick the virtual USB device, and boot the live image.
Once in a live environment, repairing the installed system is a chroot away, but find the root device first. It is rarely a bare /dev/sda1 on a real server. List the block devices:
lsblkA default Proxmox VE install keeps root on LVM (/dev/pve/root) or on ZFS (rpool/ROOT/pve-1, which you import first with zpool import -f rpool). A plain Debian or Ubuntu box is usually a partition such as /dev/sda1. Mount your root device, bind the kernel filesystems into it, and enter the chroot:
mount /dev/pve/root /mnt
for d in dev proc sys run; do mount --rbind /$d /mnt/$d; done
chroot /mnt
Now you are operating as if booted into the installed system: reinstall GRUB, rebuild the initramfs, roll back a bad package, or restore a config. When you are done, exit the chroot, unmount, and reboot from the local disk. Detach the virtual media in the KVM afterward so the next reboot does not land back on the ISO.
Power-cycle a frozen or powered-off box
A console is no help if the machine is hung so hard the keyboard does nothing, or if it is simply off. Two mechanisms cover this, and they are not equal.
Wake-on-LAN can turn a box on from a soft-off state, but it is best-effort: it depends on the NIC and BIOS being configured for it, and it cannot force a hung, powered-on machine to reset. Do not rely on it as your only power path.
Real power control comes from the motherboard’s front-panel header. PiKVM has an onboard ATX controller; GL.iNet and JetKVM sell a small ATX board that wires to the power and reset pins and, in GL.iNet’s words, operates independently of the operating system. That is the point: it presses the physical power and reset buttons for you, so a fully locked machine still responds to a hard reset from the browser. If you run anything you cannot physically reach, budget for the ATX accessory alongside the KVM, not as an afterthought.
Never expose the console to the internet
Everything above is proof of how much power the console holds: a root shell, a password reset, virtual media, a hard reset, all without credentials in some cases. That is exactly why an exposed IP-KVM is one of the worst things you can put on a public IP. Do not port-forward it. Do not give it a public address. Treat it as an open door into the machine it controls, because that is what it is.
The safe pattern is two layers. Put the KVM on an isolated management VLAN with no route to the internet, carved out on your firewall, so nothing but your admin network can even reach it. Then reach that network remotely over a mesh VPN. PiKVM ships an official Tailscale package, JetKVM and GL.iNet both support Tailscale, and its own documentation states plainly that a VPN is more secure than port forwarding. Tailscale or WireGuard means the KVM is invisible from the internet and only reachable once you are on the tailnet. Set a strong password and enable two-factor authentication on the KVM’s own web UI on top of that, not instead of it.
Run the recovery drill before you need it
An out-of-band path you have never tested is a guess. The failure everyone hits is discovering during a real outage that the USB lead was in the wrong port, the boot menu key is different on this board, or the VPN app was never installed on the KVM. Fix that on a calm afternoon, not at 2am. While the box is healthy, run through the whole path once and confirm each step works:
- Open the KVM over your VPN, from off your home network, and confirm you see the live console and can type into it.
- Reboot the server from the console and interrupt GRUB, so you know the keystroke and timing for this machine.
- Mount a small ISO as virtual media and confirm it shows up in the firmware boot menu.
- If you have the ATX board wired, trigger a power-off and power-on from the browser.
Four checks, ten minutes, and the next time a node goes dark you already know the door opens. That preparation is the whole value of out-of-band management. The hardware only earns its place if the path is proven before the emergency, so pick the unit that fits your rack in the IP-KVM comparison and drill it in this week.