Sooner or later a homelab box dies in exactly the way SSH cannot fix. The kernel panics before the network comes up, a BIOS update resets the boot order, or a firewall rule you pushed remotely locks you out of the machine that enforces it. Enterprise servers solve this with a BMC (iLO, iDRAC, IPMI), but the mini PCs and desktop boards most of us actually run have nothing of the sort. An IP-KVM is the fix: a small box that plugs into HDMI and USB, and gives you the screen, keyboard, and BIOS of a dead machine from anywhere.
The category has exploded since JetKVM’s crowdfunding run turned out-of-band management into a consumer product, and in 2026 you can pick from five serious contenders between $70 and $400. This guide compares the GL.iNet Comet, JetKVM, PiKVM V4 Mini, Sipeed NanoKVM, and TinyPilot Voyager 3 on the things that decide the purchase: video latency, ATX power control, virtual media, remote access, and how much you can trust the firmware. Every spec and price was checked against the vendor pages and live retail listings in July 2026. Nothing here was lab-benchmarked by us, so where a latency figure appears it is the vendor’s stated number, cross-checked against independent hands-on testing where it exists.
The verdicts
- Best for most homelabs: GL.iNet Comet (GL-RM1), around $100. 4K capture, Tailscale built into the UI, no subscription, and sold on Amazon by GL.iNet itself with the biggest review base in the group.
- Community favorite: JetKVM, $103 from authorized resellers. The best hardware feel and software momentum in the category, but no official Amazon channel.
- Most capable open-source unit: PiKVM V4 Mini, around $270 to $280. GPLv3 stack, IPMI and Redfish emulation, and the deepest feature set.
- Best budget pick: Sipeed NanoKVM Full, around $70. Real IP-KVM ability for a third of the usual money, with a security history you should read first.
- Best for business use: TinyPilot Voyager 3, around $380 to $400. Role-based access, advance-replacement warranty, and procurement-friendly channels.
How we picked
Every claim in this guide traces to the vendor’s own documentation loaded this week: the product and docs pages for JetKVM, PiKVM, Sipeed’s NanoKVM GitHub and wiki, GL.iNet’s Comet pages, and TinyPilot’s store. For independent corroboration we leaned on Jeff Geerling’s June 2026 hands-on roundup of the whole category, since he measured what we did not. Amazon listings were loaded live with a US delivery address, and where a listing turned out to be a third-party reseller marking up the authorized price, this guide says so and skips the link rather than pretending it is a deal.
The ranking weighs five things: video pipeline (H.264 with WebRTC beats MJPEG on both latency and bandwidth), power control done properly through an ATX header rather than hoping Wake-on-LAN works, virtual media support so you can mount an ISO and reinstall an OS remotely, a sane remote access story that does not require exposing the device to the internet, and firmware you can audit or at least trust. Price matters, but in this category the cheap unit you cannot trust costs more than the expensive one you can.
At a glance
| Spec | Comet GL-RM1 | JetKVM | PiKVM V4 Mini | NanoKVM Full | Voyager 3 |
|---|---|---|---|---|---|
| Max capture | 4K@30 | 1080p@60 | 1920×1200@60 | 1080p@60 | 1920×1200@60 |
| Encoding | H.264 | H.264 (WebRTC) | H.264 + MJPEG | MJPEG, H.264 in progress | H.264 |
| Vendor latency claim | 30-60 ms | 30-60 ms | 35-50 ms | 90-230 ms | not stated |
| ATX power control | $15.90 add-on board | $19 add-on board | Included | Included (Full kit) | No header kit |
| Virtual media (ISO mount) | Yes | Yes | Yes, works in BIOS | Yes | Yes |
| Ethernet | Gigabit | 100 Mbps | Gigabit | 100 Mbps | Gigabit |
| Tailscale | Built into UI | Official script | Official package | Supported | Not documented |
| Open source | UI forked from PiKVM | App GPLv2 | Fully, GPLv3 | GPL-3.0 since 2025 | Community MIT + paid Pro |
| Price band | ~$100 | $103 authorized | $270-280 | ~$70 | $380-400 |
1. GL.iNet Comet (GL-RM1)
The Comet is the pick we would hand to most homelab owners, because it lands the best combination of capture spec, access options, and buying experience in the group.
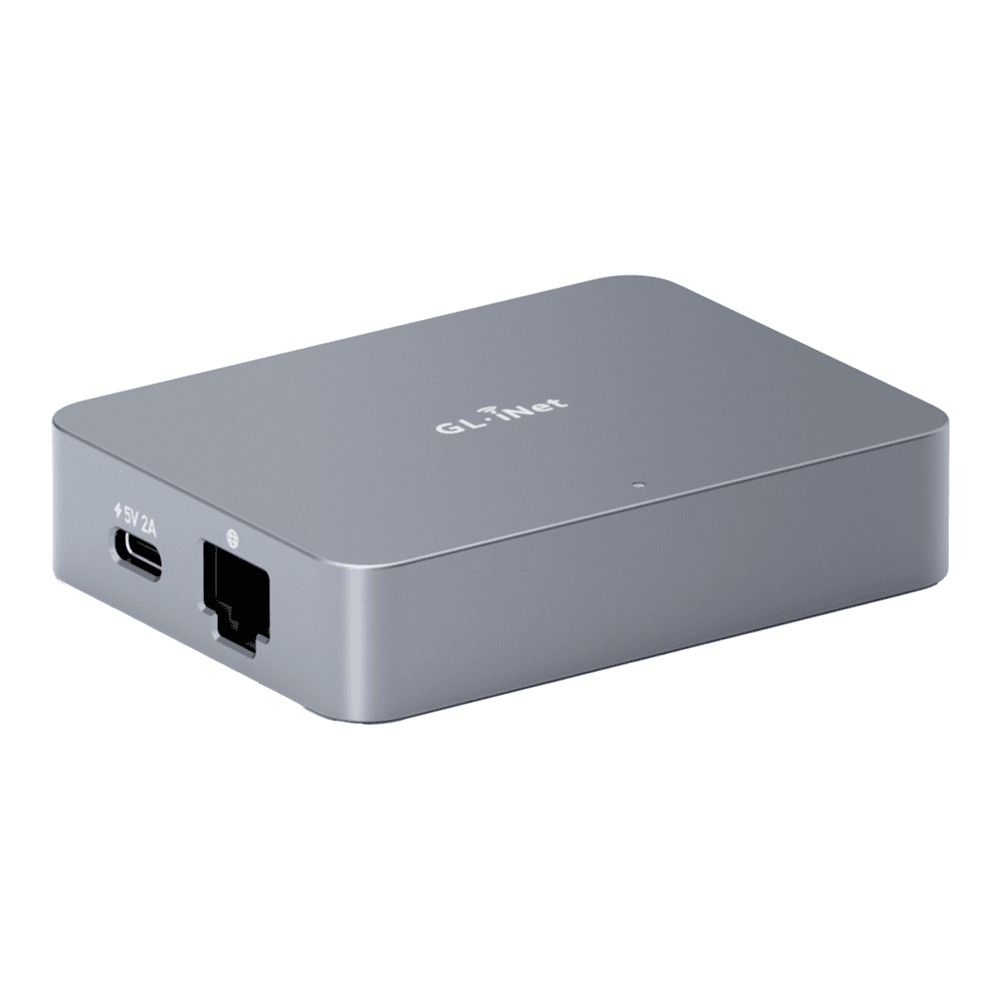
On paper it is the strongest capture pipeline here: 4K at 30 fps with hardware H.264 encoding and a 30 to 60 ms latency claim, on a quad-core ARM platform with 1 GB of RAM, 8 GB of eMMC, and gigabit Ethernet. In practice the 4K ceiling matters less than the encoding, since a BIOS screen is not 4K, but it means the Comet never becomes the bottleneck when you point it at a modern desktop. Remote access is where GL.iNet clearly studied the competition: you get local browser access, an optional cloud relay with no subscription, a phone app, a self-hosted server option for fleets, and Tailscale as a toggle in the Apps Center rather than an SSH exercise. The UI is a fork of PiKVM’s, which is a sensible place to start, though GL.iNet does not open the whole platform.
Power control is honest too. Wake-on-LAN is built in, but GL.iNet itself positions the $15.90 ATX board as the reliable path, because it works at the front-panel header level even when the OS is gone. There is also a Fingerbot accessory, about $30, that physically presses a power button, which sounds like a joke until you need to power-cycle a sealed appliance. A PoE variant, the Comet PoE (GL-RM1PE), adds 802.3af power and 32 GB of storage for about $16 more and is the version we would pick for a rack.
Buy it when you want the least friction between unboxing and a working, safely reachable KVM. Skip it if a fully open-source stack is the requirement: the Comet’s UI is PiKVM-derived, but GL.iNet does not publish the whole platform, and the trade-off is convenience over auditability. It runs about $100 on Amazon, sold by GL.iNet’s own storefront with the largest review base in this roundup; check the live price.
2. JetKVM
JetKVM is the device that made this category mainstream, and it remains the one with the most software momentum behind it.
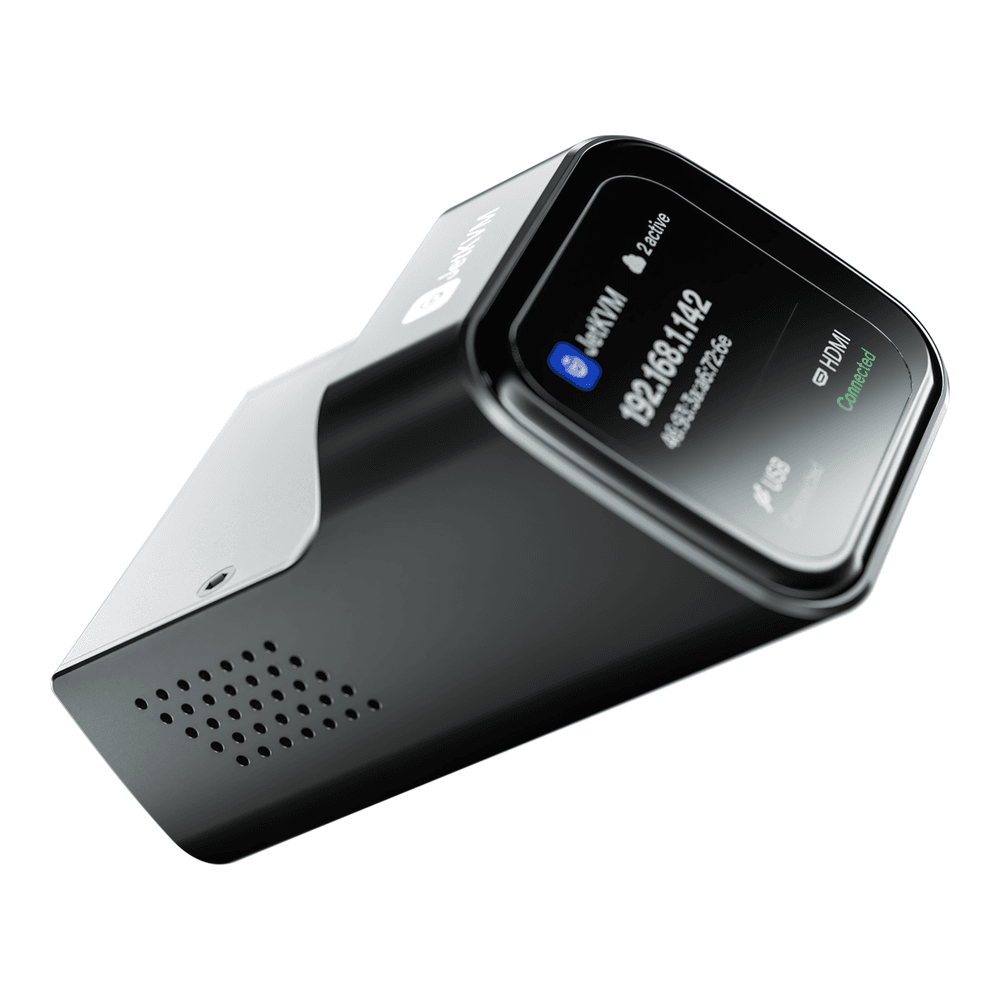
The hardware is a small machined unit with a 1.69 inch touchscreen that shows the device IP and connection state, which sounds like a gimmick and is actually the feature you appreciate every time you walk past the rack. Capture is 1080p at 60 fps over WebRTC with a 30 to 60 ms latency claim, driven by a Rockchip RV1106G3 with hardware H.264. The 2026 hardware revision swapped the mini HDMI port for full-size HDMI, moved from soldered eMMC to a 32 GB microSD, and raised the price from $89 to $103. The application is open source under GPLv2, the cloud relay is opt-in and itself open source, and Tailscale has out-of-the-box support for JetKVM with an official install script, so keeping it off the public internet is a one-liner. An ATX extension board, about $19 from the authorized resellers, adds real front-panel power control, with pass-through headers so the case buttons keep working.
The catch is buying one. JetKVM sells through exactly two authorized resellers, WisdPi and iKoolCore, and has no official Amazon presence. Every Amazon listing we loaded was a third-party reseller at $129 or more, a markup of about 26 percent over the authorized $103, and the ATX board was listed at more than double its real price. We do not link scalpers, so this pick goes through the official JetKVM site and its named resellers. The other honest limits: Ethernet is 100 Mbps, which is fine for a KVM stream and irrelevant for anything else, and capture tops out at 1080p. Buy it when you want the category’s best hardware feel and the most active open-source development. Skip it if you need to buy through Amazon or need more than 1080p capture.
3. PiKVM V4 Mini
PiKVM is the project everything else in this list borrows from, and the V4 Mini is the packaged version of it: a Raspberry Pi CM4 in a proper case with the capture, ATX, and power problems already solved.
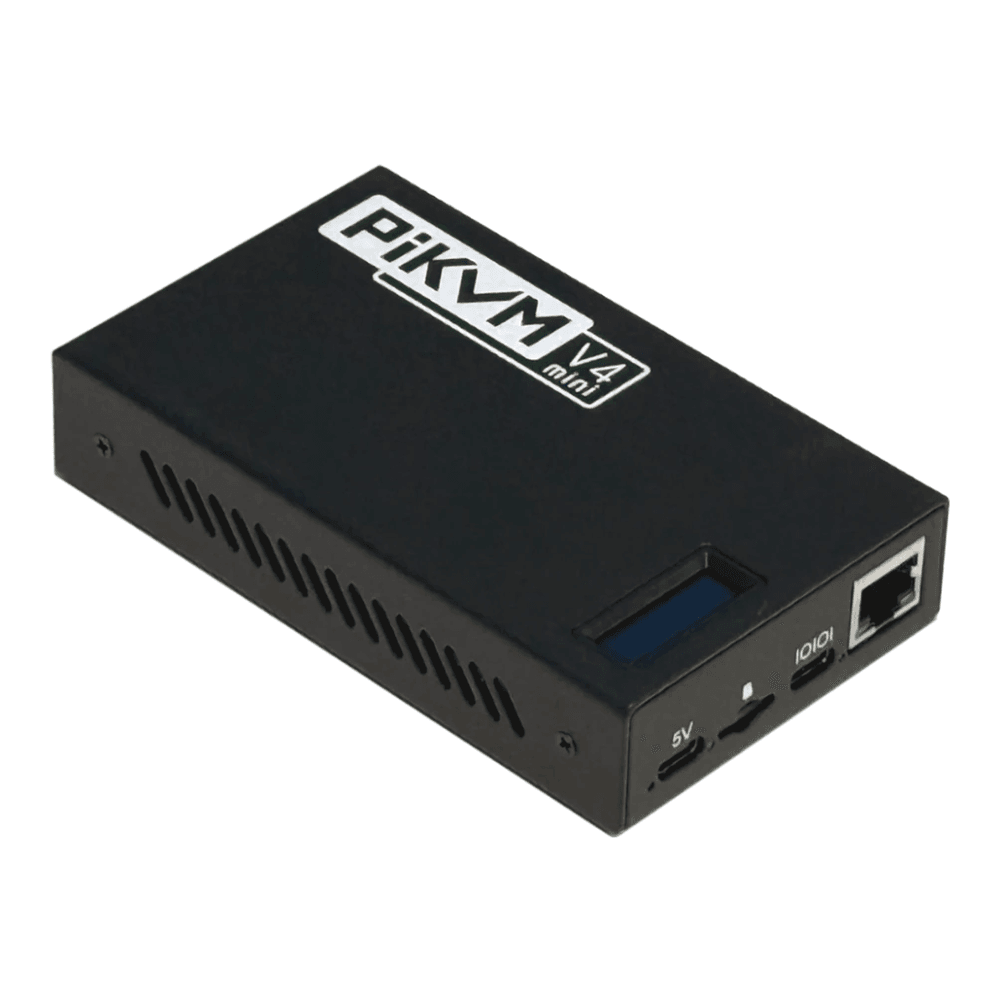
The feature list is the deepest here because the project has been at this the longest. Capture runs to 1920×1200 at 60 Hz with both H.264 and MJPEG pipelines and the lowest latency claim in the group at 35 to 50 ms. The ATX controller is included rather than an add-on. The virtual mass-storage emulation is the most mature implementation of the five, explicitly designed so a mounted ISO is available in the BIOS, which is exactly the moment you need it during a rescue. And it is the only unit that documents IPMI and Redfish emulation: point your existing tooling at its IPMI or Redfish endpoints and a $270 dongle behaves like the management controller your desktop board never had. In practice this means one management workflow across real servers and homelab boxes.
The whole stack is GPLv3, there is an official Tailscale package, and if the price stings you can build one yourself from a spare Pi, which is how the project started. The V4 Plus (about $400, also from PiShop US) adds HDMI passthrough, audio, and an mPCIe slot for an LTE modem, a genuinely useful option for a site with no second uplink. Buy the Mini when you want maximum capability with nothing closed. Skip it if $270 to $280 for a single-host KVM is out of proportion to the box it will rescue; at that delta, the Comet does most of this for a third of the money. The Amazon listing is sold by PiShop US, the official US distributor, at roughly a $10 premium over their own store; check the live price.
4. Sipeed NanoKVM Full
The NanoKVM is the budget answer, a RISC-V based cube the size of a large die that does real IP-KVM work for around $70, and it comes with a history you should know before you buy.
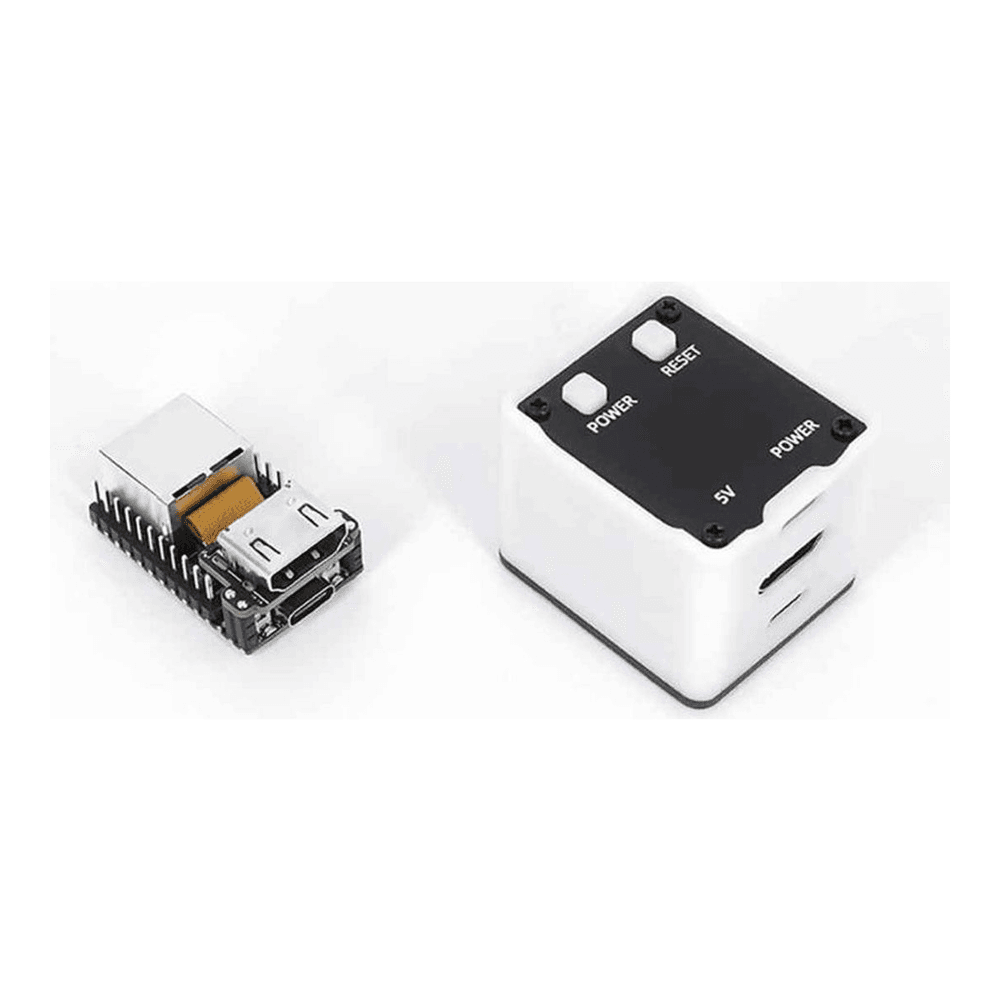
The Full kit gets you the assembled cube with an OLED status display, ATX power control wiring, and a pre-flashed SD card, built around a Sophgo SG2002 RISC-V chip with 256 MB of RAM. Capture is 1080p, streaming is MJPEG with H.264 still a work in progress, and Sipeed’s own wiki quotes 90 to 230 ms of latency, which is honest and noticeably behind the H.264 units. For watching a boot sequence and fixing a BIOS setting that gap does not matter much; for extended interactive sessions it does. ISO mounting and Tailscale are supported, and the software is GPL-3.0 on GitHub.
Now the history. In early 2025 a security researcher took the early firmware apart and found default root SSH access, weak default credentials, a hardcoded encryption key, and a closed-source binary blob, and the resulting coverage was rough. Sipeed’s public response on GitHub acknowledged the findings as leftovers from a rushed early development phase, and through 2025 the company open-sourced the previously closed components and shipped fixes for the headline issues; the researcher found no evidence of an intentional backdoor, and the undocumented microphone that made headlines turned out to be a stock component of the dev board the product is built on. Our read: the 2026 NanoKVM is a defensible budget buy for a homelab that keeps it on an isolated VLAN behind Tailscale, which is how every device on this page should run anyway. Buy it when the budget is the constraint and you are willing to update firmware promptly. Skip it if the security history is disqualifying for your environment, or if stream smoothness matters; the Comet is $30 more and better on both counts. The Amazon listing is the Full variant sold by WayPonDEV, a known Sipeed distributor, at about $70; check the live price.
5. TinyPilot Voyager 3
The Voyager 3 is the pick for the reader whose “homelab” is drifting toward production, where the questions become who accessed the console and what happens when the unit fails.
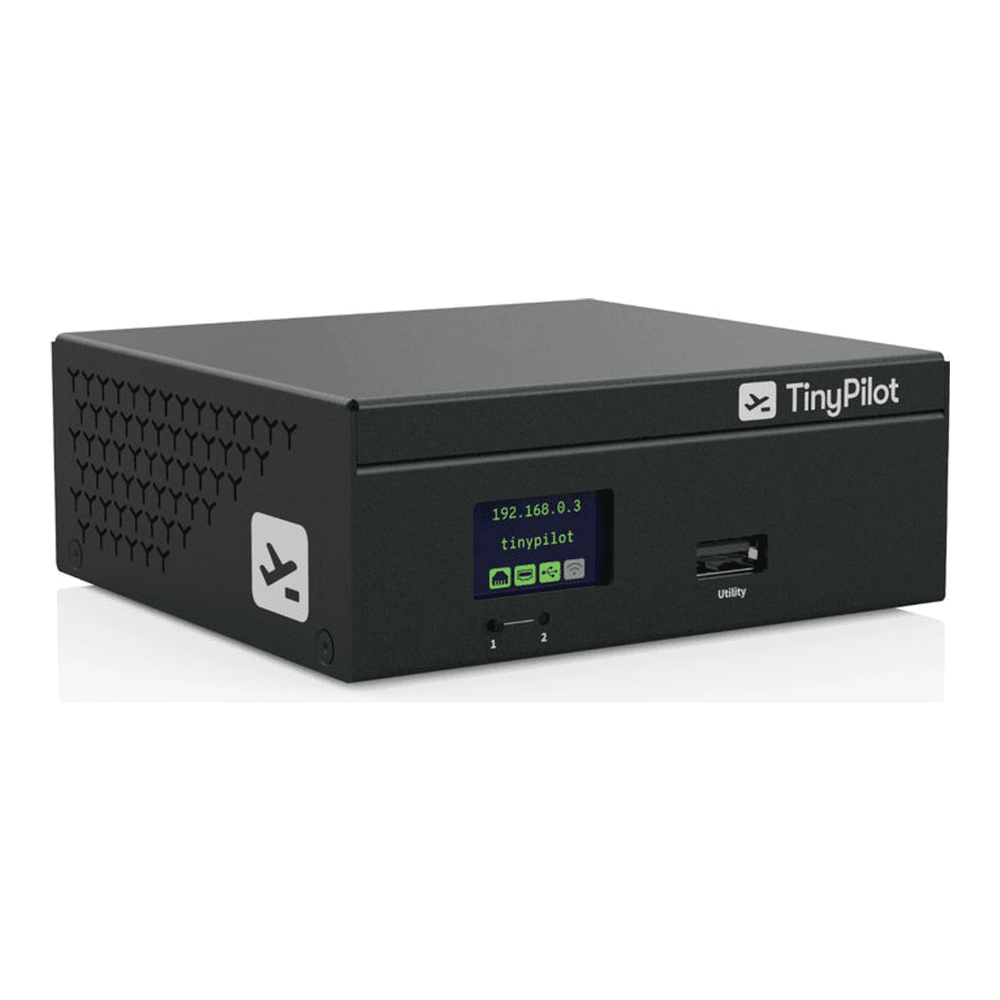
Under the metal case it is CM4-class hardware, so the raw capability tracks the PiKVM V4: 1920×1200 at 60 Hz capture, virtual media for remote installs, gigabit Ethernet, and a front status display. What you are paying the premium for is everything around the hardware. It brings role-based access control and support for up to eight simultaneous users, the warranty is a 12-month advance-replacement arrangement with paid extensions available, units ship from North Carolina or Ontario, and the product is stocked through CDW, Insight, SHI, and DigiKey, which is the sentence that matters if a purchasing department stands between you and the hardware. The community edition of the software is MIT-licensed, with a perpetual per-device Pro license on the paid units. A PoE variant with a second LAN port runs about $550.
Two things to weigh. TinyPilot’s founder sold the company in 2025, and while the store is active and the Voyager 3 is current, long-term roadmap confidence rests on the new owner. And at $380 to $400 for capture parity with a $270 PiKVM, you are buying support and process, not speed. Buy it when audit trails, warranty terms, and procurement channels are requirements. Skip it for a personal rack, where the same money buys a Comet for every host you own. The Amazon listing is sold directly by TinyPilot, LLC; check the live price.
What actually matters in an IP-KVM
If you are evaluating something outside this list, these are the specs that decide whether the box does its job when a machine is down.
Encoding beats resolution. H.264 over WebRTC is what makes a remote console feel local; the vendor latency claims cluster at 30 to 60 ms for the H.264 units versus 90 to 230 ms for MJPEG streaming. A 4K capture ceiling is nice, but you will spend your time in BIOS screens and terminals where the encoder, not the resolution, sets the experience.
ATX header control is the real power button. Wake-on-LAN depends on a NIC that still has standby power and firmware in a good mood, which is precisely what you cannot assume during a failure. A board wired to the front-panel header can force a hard reset with the OS completely gone. PiKVM and the NanoKVM Full include this; the Comet and JetKVM sell it as a cheap add-on that you should put in the cart on day one.
Virtual media turns a rescue into a reinstall. All five picks can present an ISO to the target as USB storage, which means the worst case of a dead OS becomes bootable rescue media you mount from your couch. PiKVM’s implementation is explicit that the emulated drive is available in the BIOS, and that detail is the whole point.
Never expose one to the internet. An IP-KVM is BIOS-level access to your machines by design, so treat it like an open door. PiKVM’s own docs push strong passwords plus two-factor before any port forwarding and note that a VPN is the more secure option; four of the five picks support Tailscale in an official form (TinyPilot is the exception, so pair it with WireGuard), and a mesh VPN plus an isolated management VLAN carved out on your firewall box is the pattern we would run. Our Tailscale on Proxmox guide and the WireGuard setup walkthrough both slot straight into that design.
Open source is a security feature here. This device sees your disk encryption passphrases and your BIOS passwords. The NanoKVM episode is the case study: closed components plus weak defaults produced a trust crisis that open-sourcing largely defused. Weight auditable firmware more heavily in this category than you would for, say, a switch.
Lock it down before you rely on it
Whichever unit you pick, the setup that makes it trustworthy is the same. Put the KVM on a management VLAN that client devices cannot reach, join it to a Tailscale or WireGuard mesh instead of forwarding ports, change every default credential before the first HDMI cable goes in, and turn on two-factor where the firmware offers it. Then update the firmware on a schedule, because this is the one device on your network whose compromise hands over everything else. Done that way, a $100 Comet on your Proxmox mini PC quietly removes the last reason you ever needed to drive to the rack, and it will sit unused for months until the night it pays for itself in the first ten minutes. Pair it with the Proxmox post-install checklist and boot-order problems stop being incidents at all.