

Qdrant is the open source vector database for self hosted semantic search and RAG. This guide installs Qdrant on Debian 13 (Trixie) and Debian 12 (Bookworm) two ways: Docker Compose for the fast path most teams take, and the native .deb package with a systemd unit when you prefer your services managed by systemctl rather than a container engine. If you are new to dense retrieval as a category, our vector search vs traditional search explainer covers the why.
We tested every command on a fresh Debian 13.5 cloud image and document two real gotchas along the way. The Qdrant .deb installs the binary and config but ships no systemd unit, no system user, and does not create the snapshots directory the binary needs at startup. You have to write all three. Companion code lives at c4geeks/qdrant/install-debian, and the canonical reference for any flag in this article is the official Qdrant documentation.
Before you begin
You will need:
- Debian 13 (Trixie) or Debian 12 (Bookworm), amd64 or arm64, with at least 2 GB of RAM.
- A non root user with
sudorights. - Network access to
github.com,download.docker.com, and the Debian mirrors. - Two free TCP ports:
6333for REST and the Web UI,6334for gRPC.
Pick a few helpers up front so the rest of the steps run cleanly:
sudo apt update
sudo apt install -y ca-certificates curl jq
Method 1: Install Qdrant with Docker Compose
Docker is the recommended path. The upstream image is identical across distros and the Compose file checks into git alongside the rest of your stack. Debian ships an older Docker version in its repos. Use the official Docker CE repo instead so you get the latest engine.
Step 1: Add the Docker CE repo and install
Pull in the official Docker repository and install the engine plus the Compose plugin:
sudo install -m 0755 -d /etc/apt/keyrings
sudo curl -fsSL https://download.docker.com/linux/debian/gpg \
  -o /etc/apt/keyrings/docker.asc
sudo chmod a+r /etc/apt/keyrings/docker.asc

. /etc/os-release
echo "deb [arch=$(dpkg --print-architecture) signed-by=/etc/apt/keyrings/docker.asc] \
  https://download.docker.com/linux/debian ${VERSION_CODENAME} stable" \
  | sudo tee /etc/apt/sources.list.d/docker.list >/dev/null

sudo apt update
sudo apt install -y docker-ce docker-ce-cli containerd.io \
  docker-buildx-plugin docker-compose-plugin

docker --version
docker compose version
Add yourself to the docker group so the daily commands do not need sudo. Log out and back in for the group to take effect:
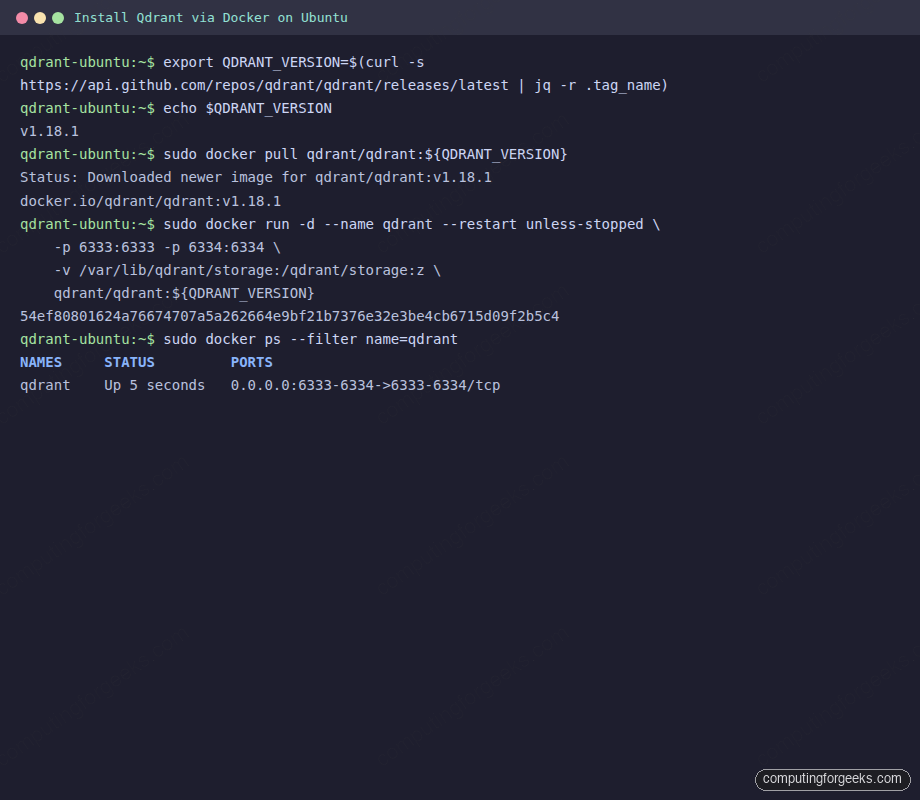
sudo usermod -aG docker $USERThe whole install flow looks like this on a fresh Trixie host:
Step 2: Forward container logs to journald
Debian and systemd belong together, and journalctl is the easier read path than docker logs for long lived services. Tell Docker to use the journald log driver in /etc/docker/daemon.json before you start any container so the setting applies from the first run:
echo '{"log-driver":"journald"}' | sudo tee /etc/docker/daemon.json
sudo systemctl restart docker
The log driver is a per container setting baked in at create time. Existing containers keep their old driver until you recreate them. We start fresh below, so the next docker run will pick it up:
Step 3: Start Qdrant with Docker
Detect the latest Qdrant release into a shell variable, create the storage directory, and run the container. The container picks up the journald driver and Qdrant logs flow into the system journal:
export QDRANT_VERSION=$(curl -s https://api.github.com/repos/qdrant/qdrant/releases/latest | jq -r .tag_name)
echo $QDRANT_VERSION   # v1.18.1 at the time of writing

sudo mkdir -p /var/lib/qdrant/storage

docker run -d \
  --name qdrant \
  --restart unless-stopped \
  -p 6333:6333 -p 6334:6334 \
  -v /var/lib/qdrant/storage:/qdrant/storage \
  qdrant/qdrant:${QDRANT_VERSION}  # https://github.com/qdrant/qdrant/releases
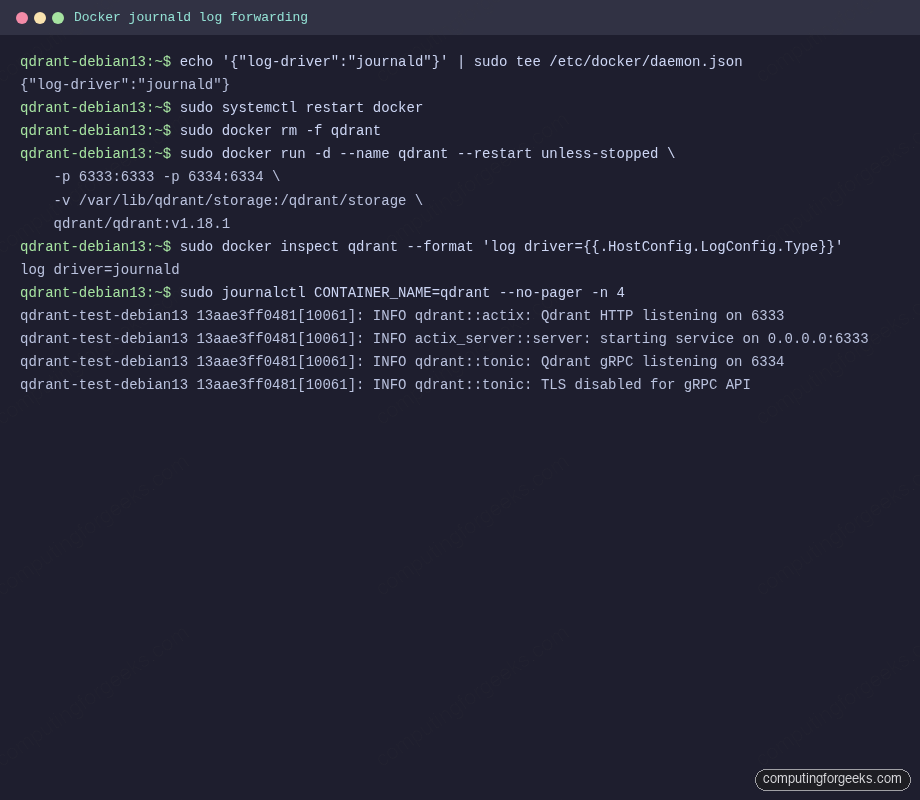
Verify the driver landed and the container’s logs show up in journald:
docker inspect qdrant --format 'log driver={{.HostConfig.LogConfig.Type}}'
curl -sf http://localhost:6333/healthz
sudo journalctl CONTAINER_NAME=qdrant --no-pager -n 5
The driver shows as journald, the health probe passes, and the last few Qdrant log lines come straight out of the system journal:
Step 4: Promote to Docker Compose
One off docker run commands are fine for the first try. For anything you will tweak more than twice, move to Compose. The file below sets an API key, a memory limit, persistent storage, and journald logging in 20 lines:
services:
  qdrant:
    image: qdrant/qdrant:${QDRANT_VERSION}  # https://github.com/qdrant/qdrant/releases
    container_name: qdrant
    restart: unless-stopped
    ports:
      - "6333:6333"
      - "6334:6334"
    volumes:
      - ./qdrant_storage:/qdrant/storage
      - ./qdrant_snapshots:/qdrant/snapshots
    environment:
      QDRANT__SERVICE__API_KEY: ${QDRANT_API_KEY}
      QDRANT__TELEMETRY_DISABLED: "true"
    logging:
      driver: journald
    deploy:
      resources:
        limits:
          memory: 4G
Generate a strong API key, drop both values into .env, and bring the stack up:
echo "QDRANT_VERSION=${QDRANT_VERSION}" > .env
echo "QDRANT_API_KEY=$(openssl rand -base64 32)" >> .env

docker compose up -d
docker compose logs -f --tail=20 qdrant
Method 2: Native .deb with a systemd unit
Qdrant ships an official .deb package on every GitHub release. It works on Debian because Debian and Ubuntu share apt, even though the package targets Ubuntu codenames. The catch is that the package installs the binary, the default config, and the Web UI assets but nothing else. You write the systemd unit, create the system user, and provision the storage and snapshots directories yourself.
Step 1: Install the .deb
If you ran the Docker section above, stop the container first so the native binary can bind to port 6333:
docker stop qdrant 2>/dev/null

cd /tmp
curl -fL -o "qdrant_${QDRANT_VERSION#v}-1_amd64.deb" \
  "https://github.com/qdrant/qdrant/releases/download/${QDRANT_VERSION}/qdrant_${QDRANT_VERSION#v}-1_amd64.deb"  # https://github.com/qdrant/qdrant/releases

sudo apt install -y "./qdrant_${QDRANT_VERSION#v}-1_amd64.deb"

qdrant --version
systemctl status qdrant 2>&1 | head -3
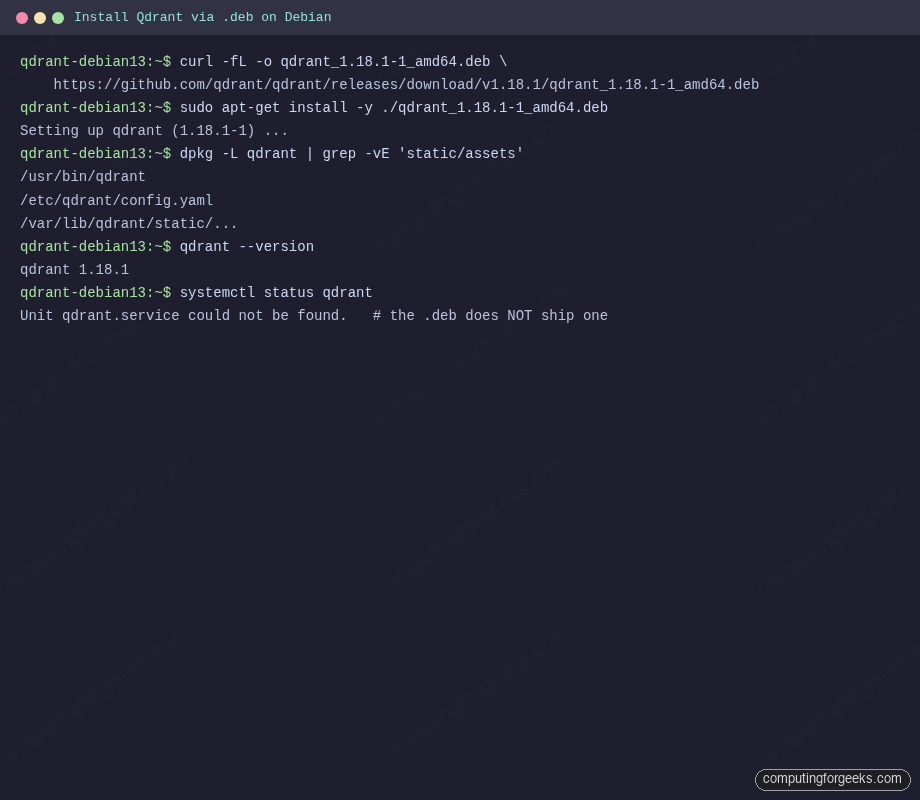
The version reports correctly, and systemctl status tells you what we already promised: there is no unit. The .deb installs the binary at /usr/bin/qdrant, the default config at /etc/qdrant/config.yaml, and the Web UI under /var/lib/qdrant/static:
Step 2: Create the user, storage, and systemd unit
Make a dedicated system user, create both the storage and snapshots directories the binary expects, and chown the whole tree. The default config in /etc/qdrant/config.yaml uses absolute paths /var/lib/qdrant/storage and /var/lib/qdrant/snapshots:
sudo useradd -r -s /usr/sbin/nologin qdrant
sudo mkdir -p /var/lib/qdrant/storage /var/lib/qdrant/snapshots
sudo chown -R qdrant:qdrant /var/lib/qdrant
Write the unit file. Use --config-path so the binary picks up the packaged config rather than searching its working directory:
sudo tee /etc/systemd/system/qdrant.service >/dev/null <<'EOF'
[Unit]
Description=Qdrant Vector Database
After=network.target

[Service]
Type=simple
User=qdrant
Group=qdrant
WorkingDirectory=/var/lib/qdrant
ExecStart=/usr/bin/qdrant --config-path /etc/qdrant/config.yaml
Restart=on-failure
RestartSec=5
LimitNOFILE=65536

[Install]
WantedBy=multi-user.target
EOF

sudo systemctl daemon-reload
sudo systemctl enable --now qdrant
sudo systemctl is-active qdrant
curl -sf http://localhost:6333/healthz
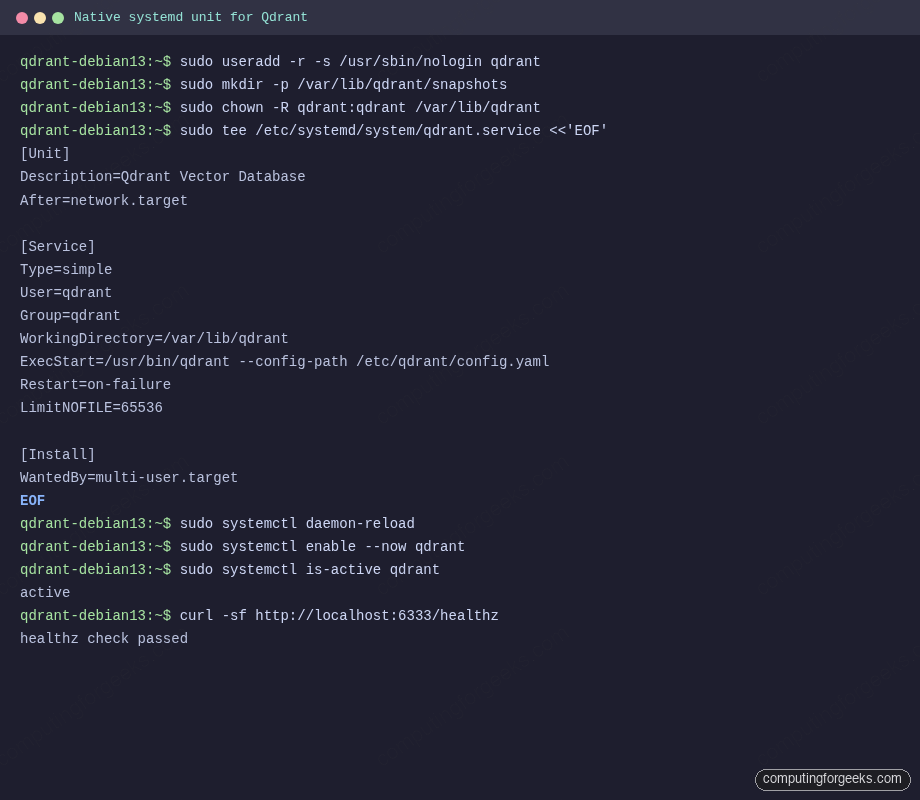
The unit reports active and the health probe passes:
If you skip the snapshots directory and start the service, the daemon will panic on the first startup with Failed to create snapshots temp directory. We hit that exact error during testing because the .deb does not create it for you. Always create both directories before systemctl start.
Sanity check: a first collection and search
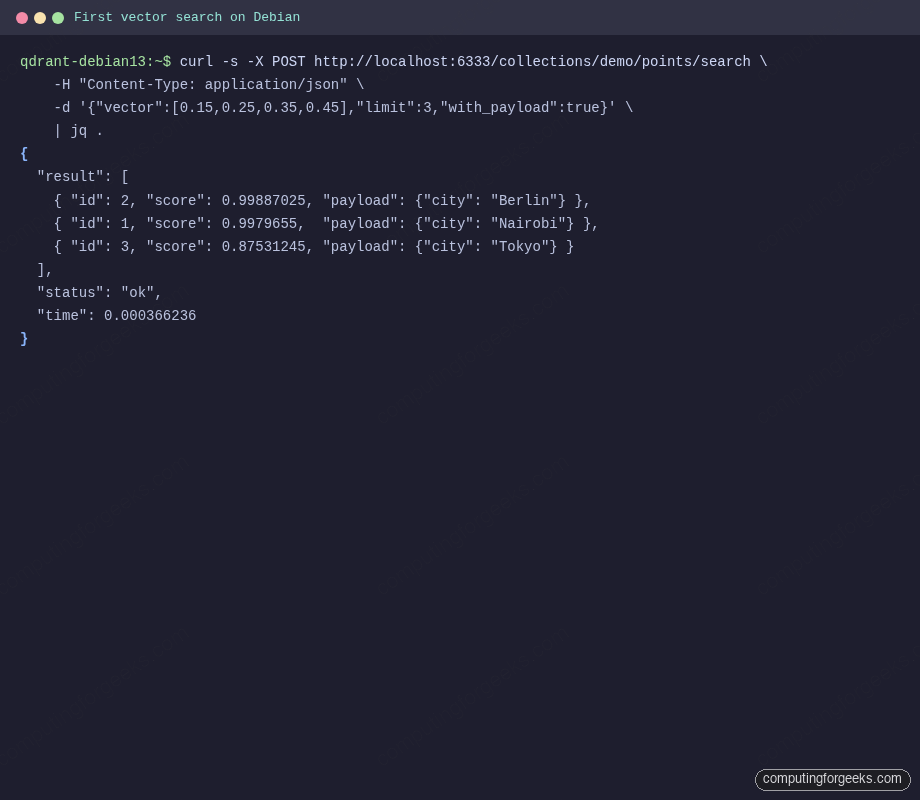
Regardless of which path you took, the REST API on port 6333 behaves the same. Create a small demo collection, upsert three points with payload, then search for the nearest neighbour:
curl -s -X PUT http://localhost:6333/collections/demo \
  -H "Content-Type: application/json" \
  -d '{"vectors":{"size":4,"distance":"Cosine"}}' | jq .

curl -s -X PUT http://localhost:6333/collections/demo/points \
  -H "Content-Type: application/json" \
  -d '{
    "points": [
      {"id":1, "vector":[0.1,0.2,0.3,0.4], "payload":{"city":"Nairobi"}},
      {"id":2, "vector":[0.2,0.3,0.4,0.5], "payload":{"city":"Berlin"}},
      {"id":3, "vector":[0.9,0.8,0.7,0.6], "payload":{"city":"Tokyo"}}
    ]
  }' | jq .

curl -s -X POST http://localhost:6333/collections/demo/points/search \
  -H "Content-Type: application/json" \
  -d '{"vector":[0.15,0.25,0.35,0.45],"limit":3,"with_payload":true}' \
  | jq .
Berlin ranks first because its vector sits closest to the query in cosine distance, Nairobi follows, Tokyo trails. If you see the same ordering, ingest, index, and query all work end to end:
Open the Web UI
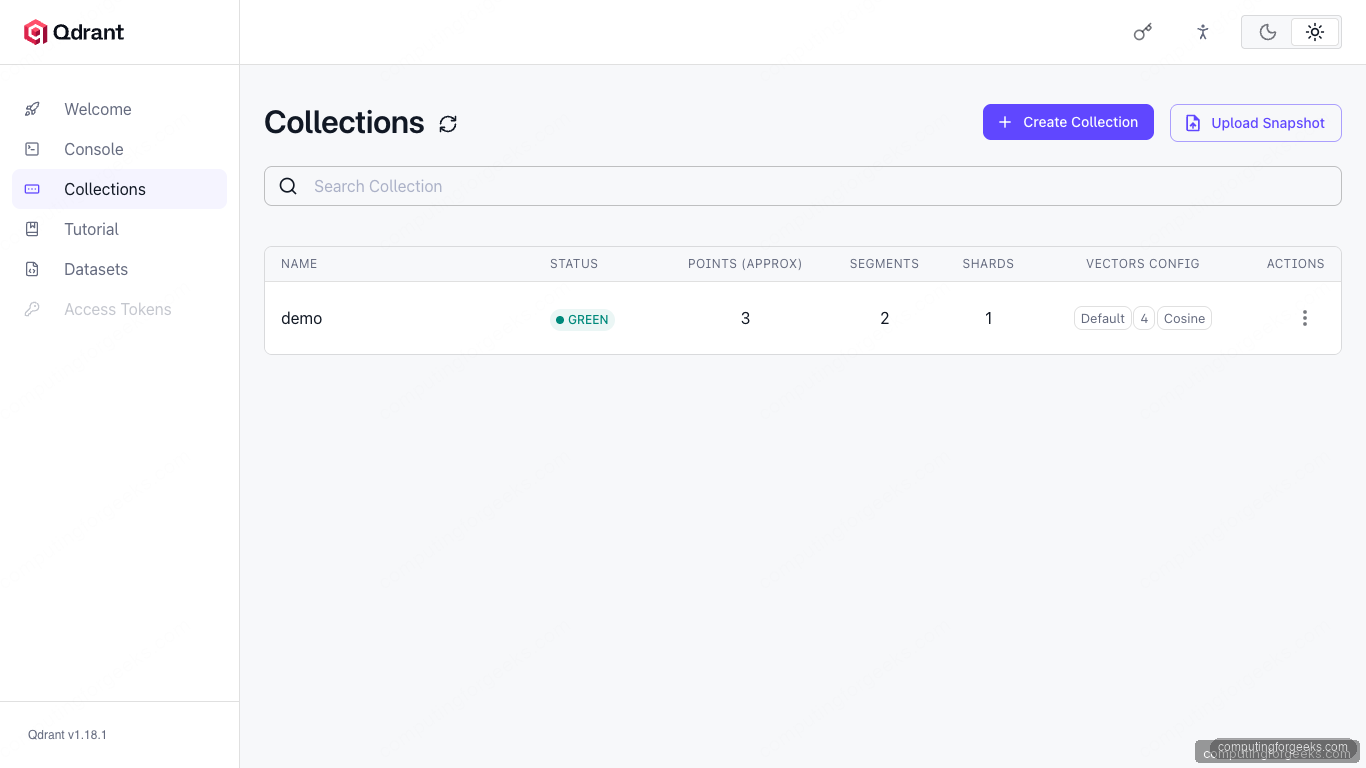
Qdrant ships a browser based UI at /dashboard. Hit http://<server-ip>:6333/dashboard and the Collections panel lists the demo collection you just created:
Open the firewall
Debian cloud images do not ship a firewall by default. If you run nftables, allow the two Qdrant ports from a trusted CIDR only. Never expose Qdrant on the public internet without an API key plus TLS first:
sudo apt install -y nftables
sudo systemctl enable --now nftables

TRUSTED_CIDR="10.0.0.0/8"   # adjust to your office or VPN range

sudo nft add table inet filter
sudo nft 'add chain inet filter input { type filter hook input priority 0 ; policy accept ; }'
sudo nft add rule inet filter input ip saddr $TRUSTED_CIDR tcp dport { 6333, 6334 } accept
sudo nft list ruleset
For full hardening, see the secure Qdrant with API key, TLS, and Nginx walkthrough in this series.
Upgrade Qdrant
The storage volume survives the upgrade in either install method, so collections and snapshots persist:
# Docker
export QDRANT_VERSION=$(curl -s https://api.github.com/repos/qdrant/qdrant/releases/latest | jq -r .tag_name)
docker pull qdrant/qdrant:${QDRANT_VERSION}  # https://github.com/qdrant/qdrant/releases
docker stop qdrant && docker rm qdrant
docker run -d --name qdrant --restart unless-stopped \
  -p 6333:6333 -p 6334:6334 \
  -v /var/lib/qdrant/storage:/qdrant/storage \
  qdrant/qdrant:${QDRANT_VERSION}

# Native .deb
cd /tmp
curl -fL -o "qdrant_${QDRANT_VERSION#v}-1_amd64.deb" \
  "https://github.com/qdrant/qdrant/releases/download/${QDRANT_VERSION}/qdrant_${QDRANT_VERSION#v}-1_amd64.deb"
sudo apt install -y "./qdrant_${QDRANT_VERSION#v}-1_amd64.deb"
sudo systemctl restart qdrant
Troubleshooting
Panic: Failed to create snapshots temp directory
You started the native service before creating /var/lib/qdrant/snapshots. Create it, chown to qdrant:qdrant, and restart the service.
Panic on load_collection with PermissionDenied on a WAL file
The native qdrant user cannot read files left behind by a previous Docker run (which created them as root). Either start with a clean /var/lib/qdrant/storage, or sudo chown -R qdrant:qdrant /var/lib/qdrant before systemctl start.
Container logs not visible in journalctl
The journald driver is per container at create time. Recreate the container with docker rm -f qdrant then docker run after writing /etc/docker/daemon.json.
Where to next
You have Qdrant running on Debian under either Docker or systemd, a sanity collection on disk, and the Web UI loaded. The next stops in this series are secure Qdrant with API key, TLS, and Nginx for any host reachable outside your network, the Qdrant Web UI tour for a walk through every dashboard panel, and the Qdrant snapshots, backup, and restore with S3 guide once the data matters. If you want a Postgres native vector store instead of running a second database, our install pgvector on PostgreSQL walkthrough is the alternative, and the self hosted RAG with Ollama pipeline drops Qdrant in as the vector store with a one line config change.
