

Proxmox VE runs KVM virtual machines and LXC containers side by side, managed from a single web console, on top of a plain Debian base. This guide is a clean bare-metal install of Proxmox VE 9 from the official ISO, captured screen by screen on a freshly installed host so you know exactly what each step looks like before you commit a disk to it.
You will download and checksum-verify the ISO, write it to a USB stick, walk through the installer (target disk and filesystem, location, root password, and the management network), boot the installed system, and log in to the web interface. Proxmox VE 9 is built on Debian 13 “Trixie”, so if you have set up a Debian server before, most of this will feel familiar; for the bigger picture of what is new in Proxmox VE 9, we cover the headline features separately. The filesystem choice in the installer matters for the long run, and we cover when to pick ext4 versus ZFS along the way.
Tested May 2026 on a clean install: Proxmox VE 9.2 (ISO 9.2-1, pve-manager 9.2.2), Debian 13 Trixie base, Linux kernel 7.0.2-6-pve.
Prerequisites
Proxmox VE installs on any reasonably modern 64-bit machine. The hardware that actually matters:
- A 64-bit CPU with hardware virtualization (Intel VT-x or AMD-V) enabled in the BIOS/UEFI. Without it you can install Proxmox but cannot run KVM guests.
- At least 2 GB RAM for the host itself. Plan 8 GB or more once you start stacking VMs and containers.
- A dedicated boot disk. The installer wipes the target disk completely, so it should not hold anything you want to keep.
- A wired network connection. The management interface expects a static IP in production.
- A spare USB stick (1 GB or larger) to write the installer to, plus a second machine to create it.
Proxmox uses KVM for full virtualization. If KVM is new to you, the introduction to KVM virtualization fills in the background, though you do not need it to follow this install.
Step 1: Download and verify the Proxmox VE ISO
Grab the latest Proxmox VE 9 installer from the official Proxmox VE download page. Pull the file name into a shell variable so the verify and write steps below stay copy-paste friendly when a newer point release ships:
PVE_ISO="proxmox-ve_9.2-1.iso"   # use the current 9.x file name from the download page
wget "https://enterprise.proxmox.com/iso/${PVE_ISO}"
Never trust an OS image you have not checksummed. The download page publishes a SHA-256 sum for every ISO. Generate the sum locally and compare it to the published value:
sha256sum "${PVE_ISO}"The hash you get back must match the one on the download page exactly:
4e88fe416df9b527624a175f24c9aa07c714d3332afb1ee3dbf3879573ef2c6c proxmox-ve_9.2-1.isoIf the two strings differ by even one character, delete the file and download it again. A mismatch means a corrupted or tampered image, not a step to “try anyway”.
Step 2: Write the ISO to a USB stick
On Linux, write the image straight to the raw USB device with dd. Identify the device first with lsblk so you do not overwrite the wrong disk, then substitute it for /dev/sdX:
sudo dd if="${PVE_ISO}" of=/dev/sdX bs=4M status=progress conv=fsyncOn Windows or macOS, use balenaEtcher, which writes the image and validates it without any command line. Rufus also works on Windows; select “DD Image” mode when it prompts, not ISO mode.
Step 3: Boot the installer
Plug the USB stick into the target server, then enter the boot menu (usually F11, F12, or Esc during POST, depending on the vendor) and pick the USB device. The Proxmox VE boot menu loads first. The default highlighted entry, Install Proxmox VE (Graphical), is the one this guide follows.
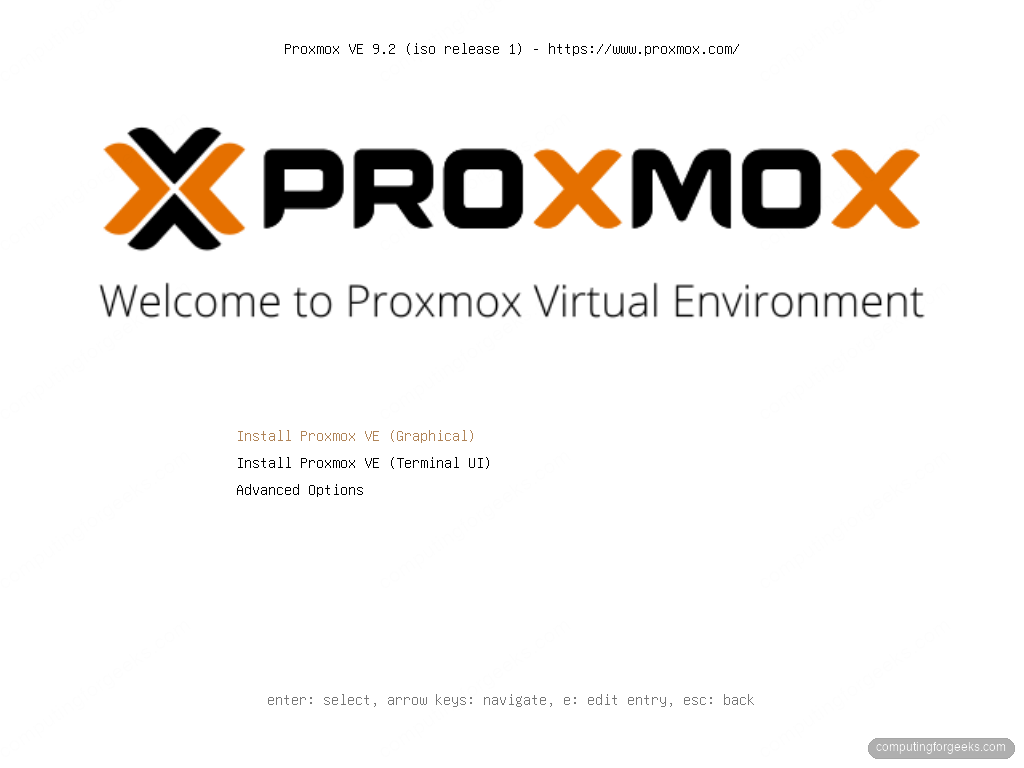
There is also a Terminal UI installer that walks through the same questions in a keyboard-driven text interface. It is handy on headless servers reached over a serial console or IPMI text redirect. The options it asks for are identical, so everything below applies to both. Press Enter on the graphical entry to continue.
Step 4: Accept the EULA and choose the target disk
The installer shows the EULA first. Click I agree to move on. Next comes the most consequential screen of the whole install: the target disk and filesystem.
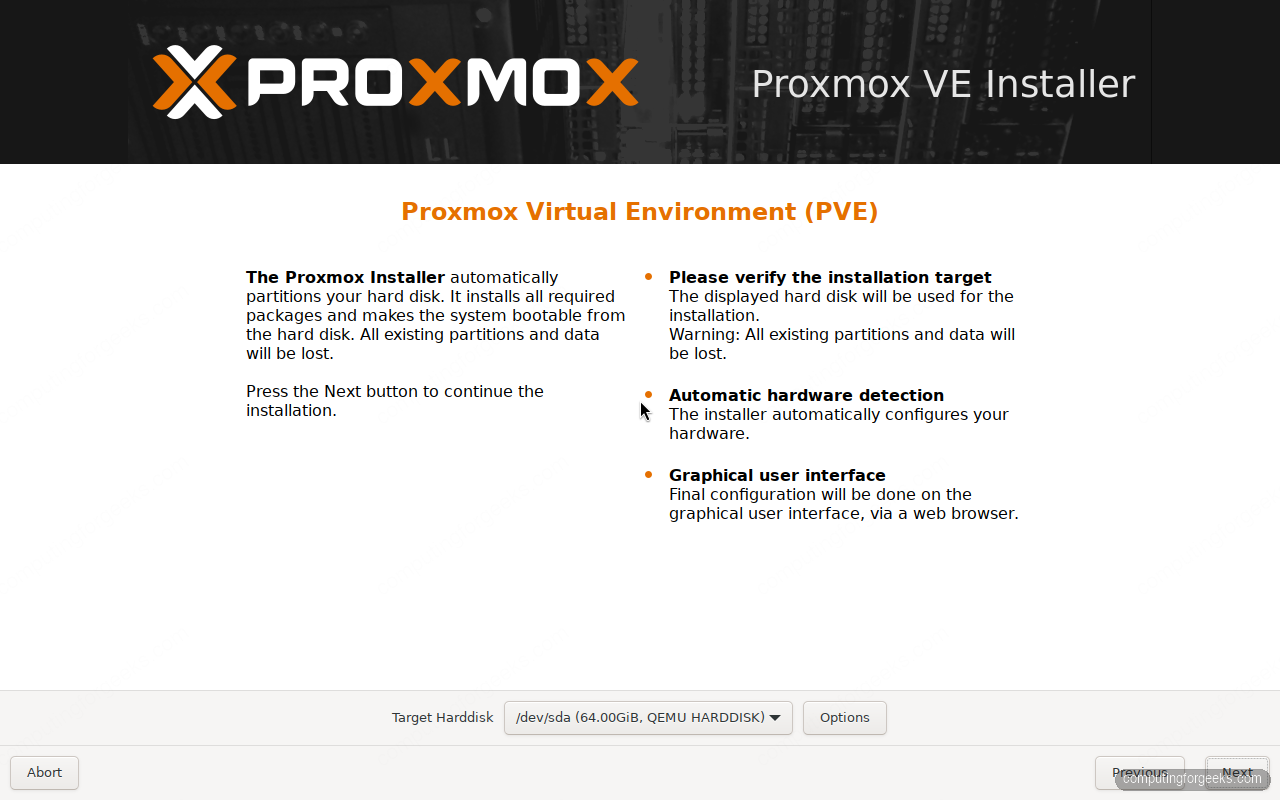
Confirm the disk shown under Target Harddisk is the one you intend to erase. The Options button is where you pick the filesystem, and the choice matters:
- ext4 (the default) sits on top of LVM. It is simple, light on RAM, and the right pick for a single disk or a hardware RAID controller. This guide uses ext4.
- ZFS gives you software RAID, snapshots, checksums, and built-in replication, at the cost of more RAM. Choose a ZFS RAID level here only if you have two or more disks dedicated to the pool.
- Btrfs is offered as a technology preview and is best left for testing rather than production.
If you are weighing software RAID layouts before you commit, the RAID vs LVM vs ZFS comparison breaks down the trade-offs. For a first single-disk install, accept ext4 and click Next.
Step 5: Set location, password, and email
The location screen sets your country, time zone, and keyboard layout. The installer usually detects these from your IP, so correct them only if they are wrong, then continue.
The next screen sets the root password and an administrator email. Use a genuinely strong password here. This account has full control of the host and the web interface is reachable over the network. The email address is where Proxmox sends alerts about failed backups, disk problems, and other events, so point it somewhere a human actually reads.
Step 6: Configure the management network
The management network is how you reach the web interface and how the host talks to the outside world. The installer pre-fills these fields from DHCP, but a hypervisor should hold a fixed address so its URL never changes underneath you.
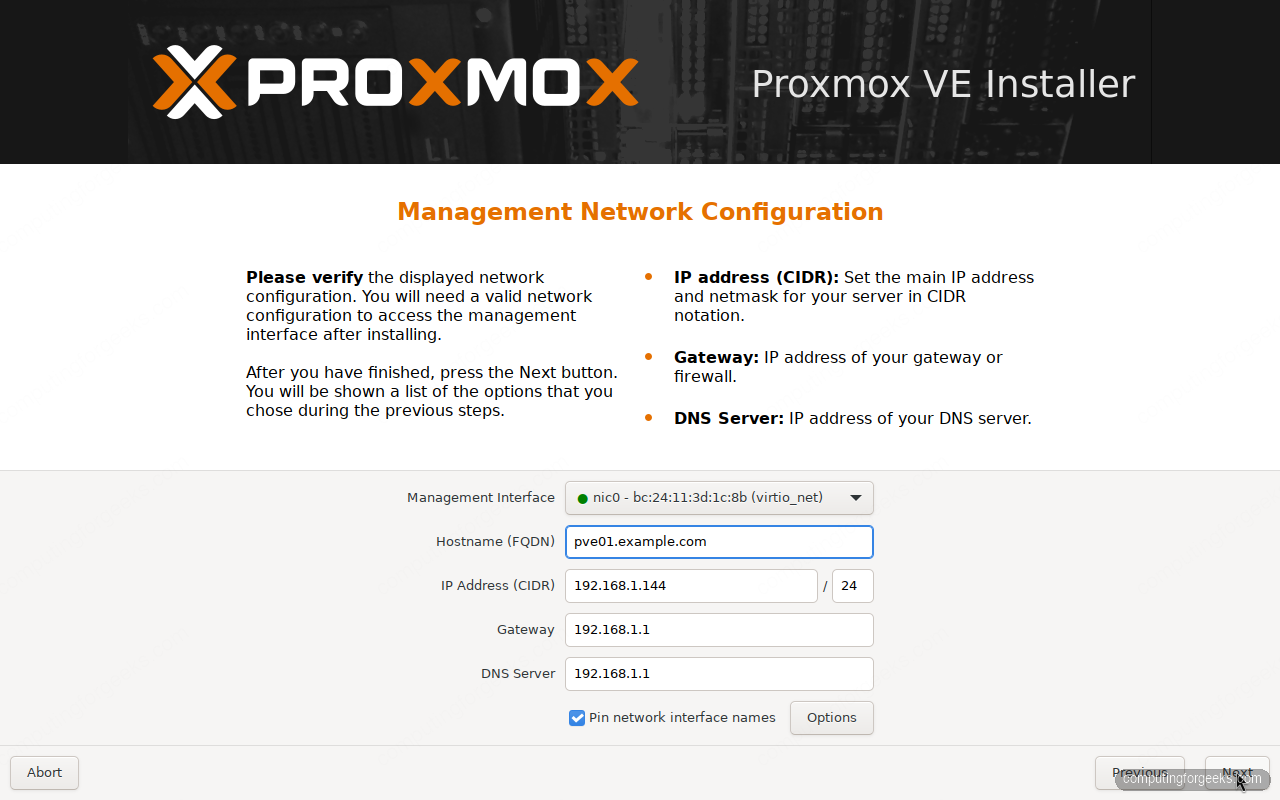
Set a fully qualified hostname (for example pve01.example.com), a static IP in CIDR notation, your gateway, and a DNS server. Either reserve the address shown in your DHCP server or type a static one outside the DHCP pool. Whatever you enter becomes the node name in the cluster, and renaming a node later is painful, so get the hostname right now.
Step 7: Review the summary and install
The summary lists every choice in one place. This is the last screen before the installer touches the disk, so read it like you mean it: filesystem, target disk, hostname, and IP are the ones people get wrong.
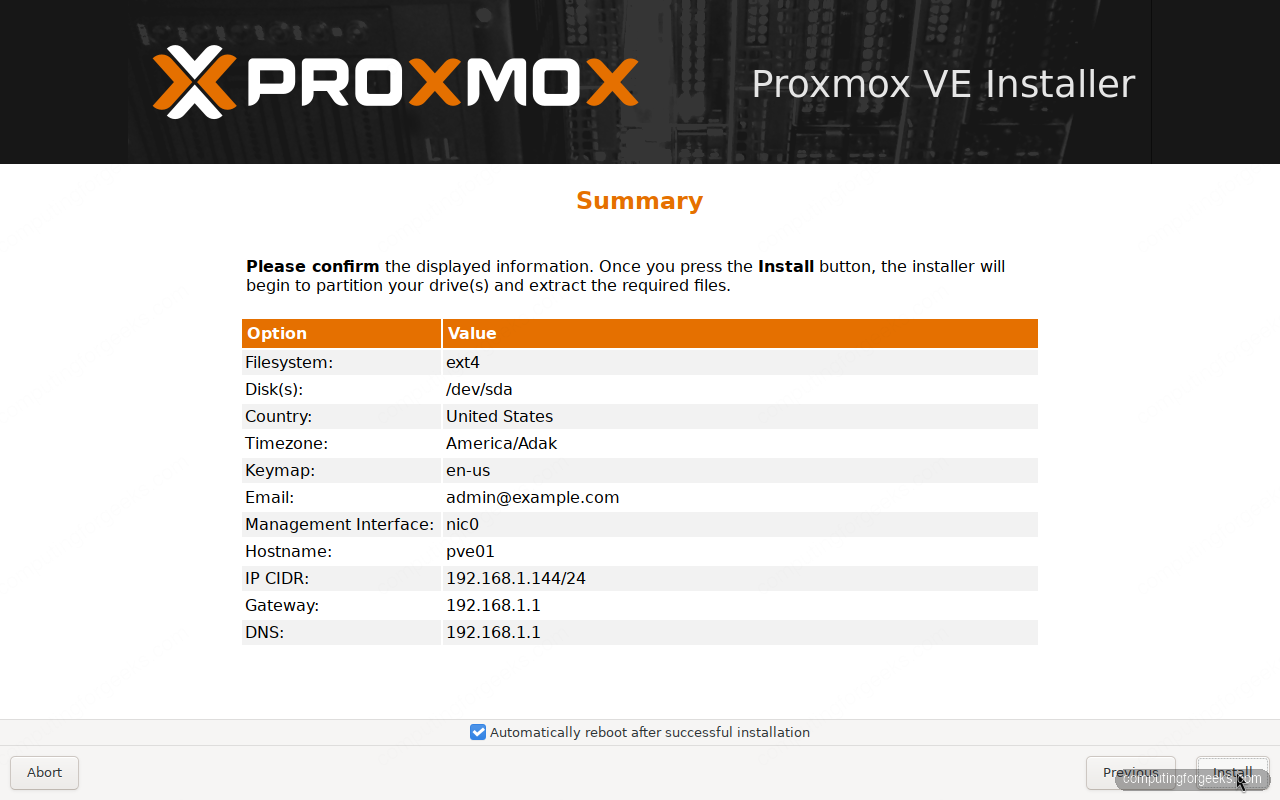
Leave Automatically reboot after successful installation ticked for an unattended finish, then click Install. The installer partitions the disk and copies the system; on a typical SSD it finishes in two to four minutes. Pull the USB stick out before it reboots so the machine boots from the freshly installed disk rather than the installer again.
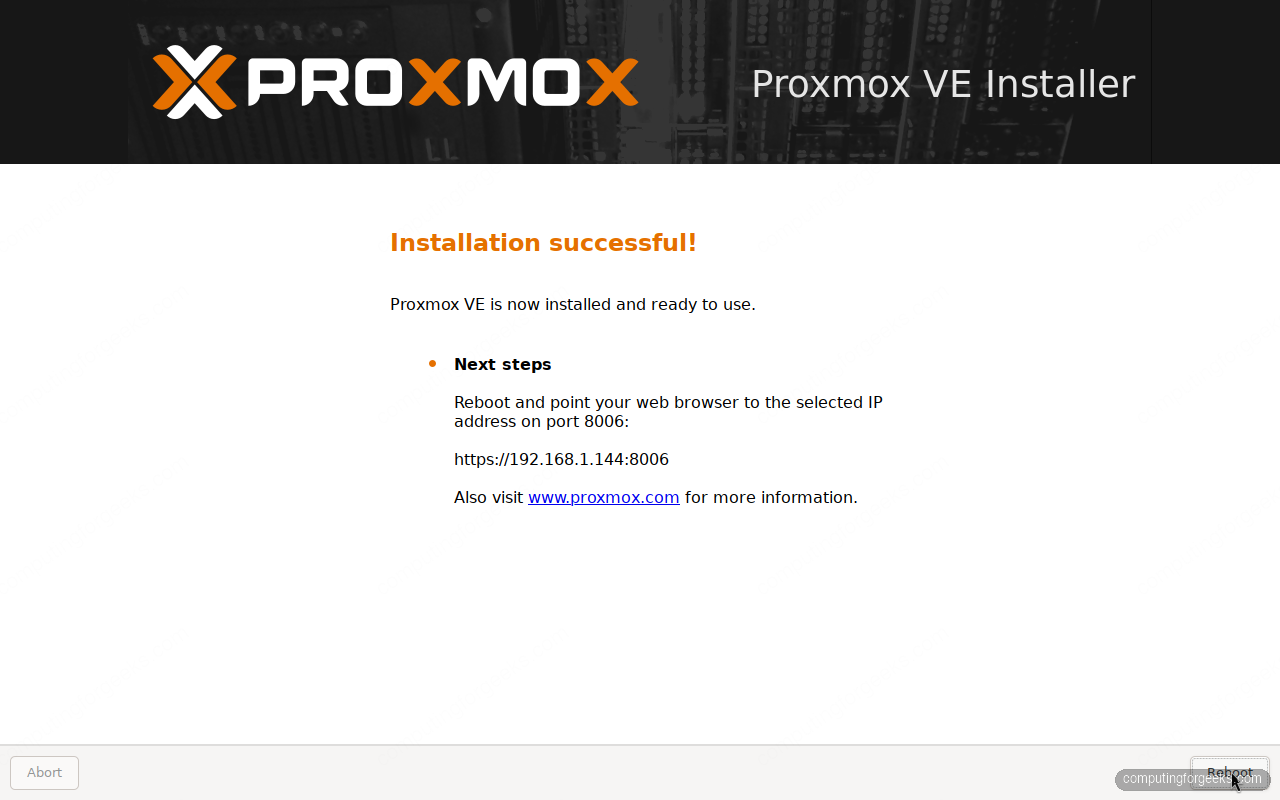
Step 8: First boot
After the reboot the host comes up to a plain login console. The banner tells you everything you need for the next step: the URL of the web interface, on port 8006.
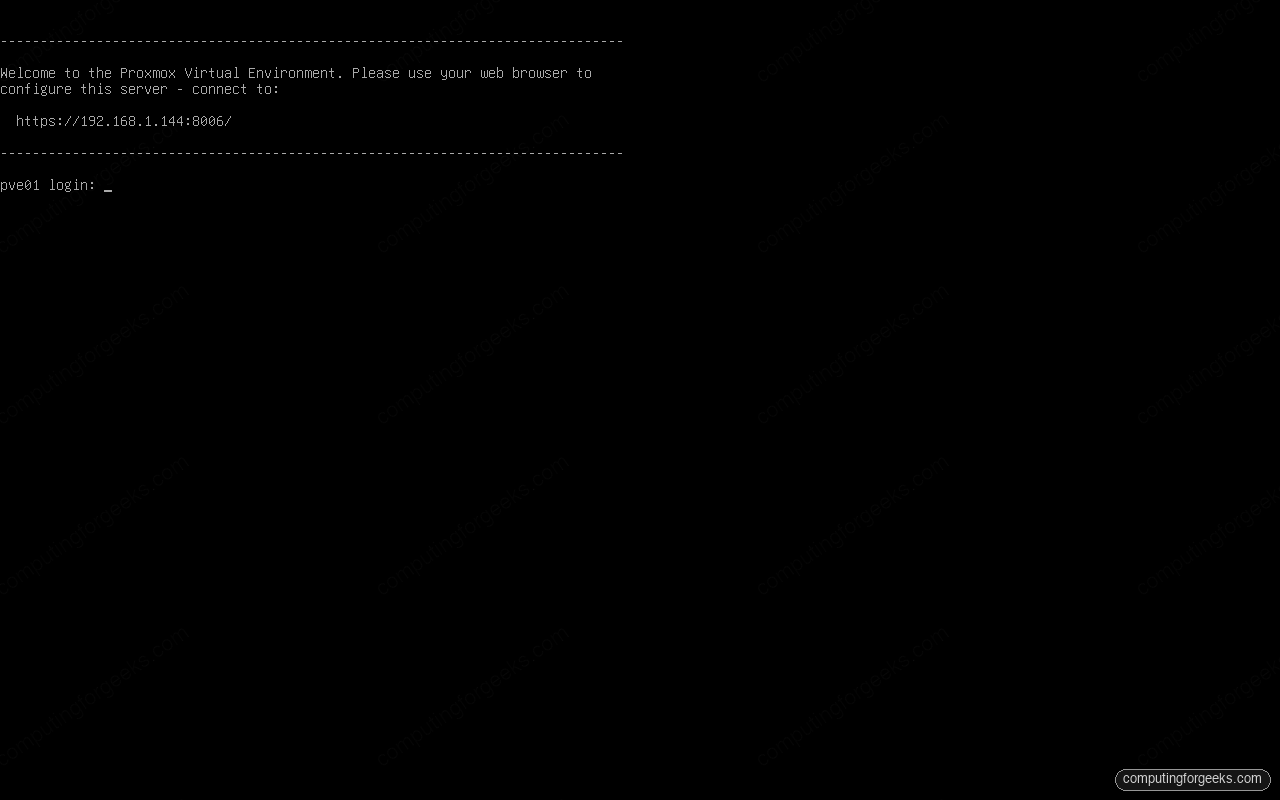
You can log in here at the console as root for command-line work, but day-to-day administration happens in the browser. Note the address and move to another machine on the same network.
Step 9: Log in to the web interface
Open the address from the console banner in a browser, for example https://192.168.1.144:8006. Proxmox ships with a self-signed certificate, so the browser warns you the first time. That warning is expected on a fresh install; accept it to reach the login dialog. Replacing that certificate with a real one from Let’s Encrypt is a worthwhile follow-up once the host is up.
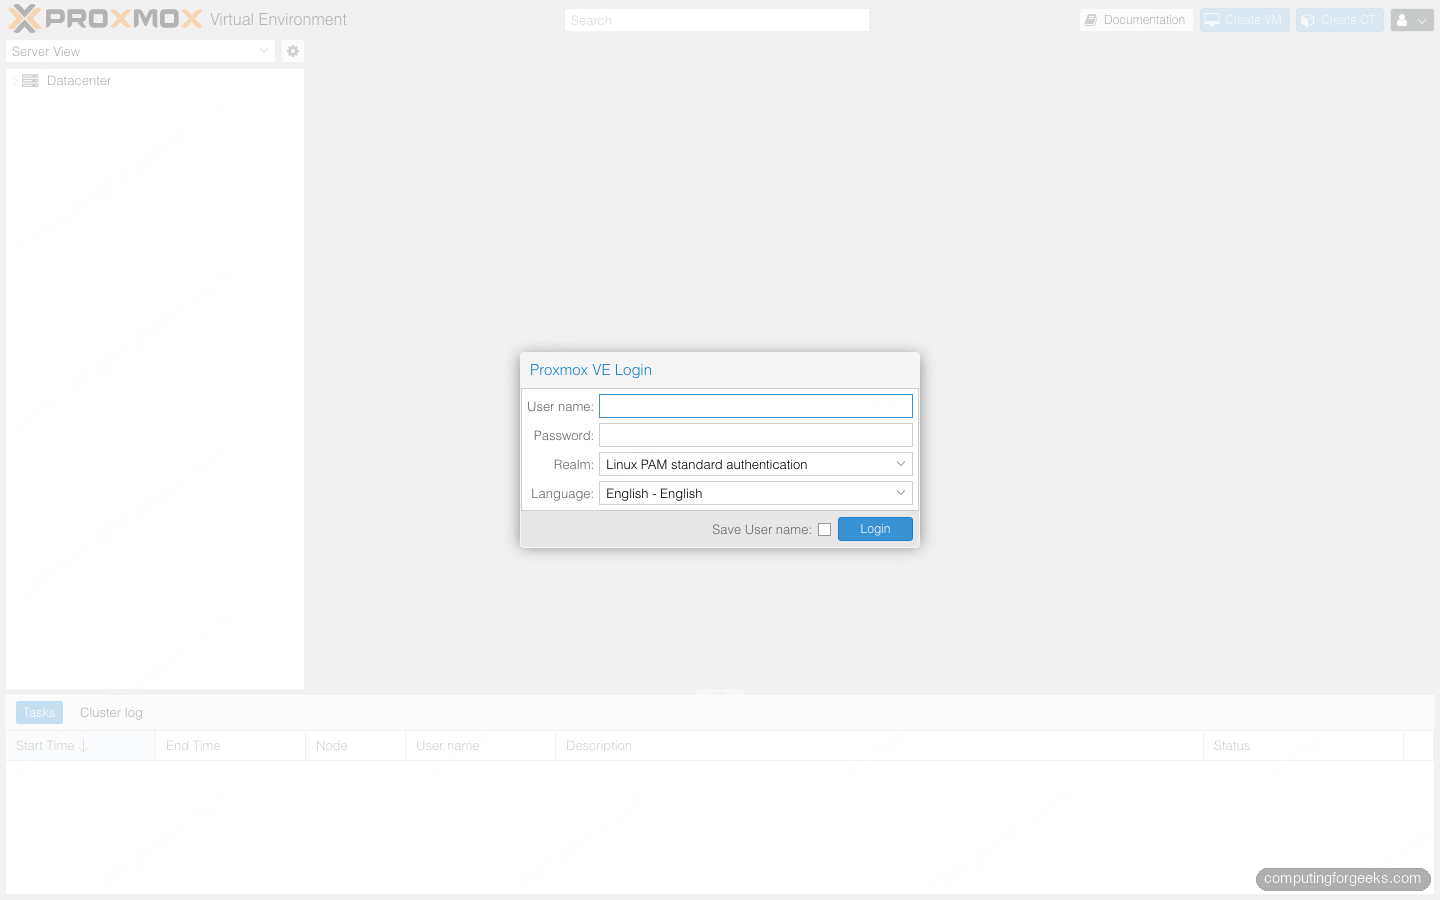
Log in with the user name root, the password you set during the install, and the realm left at Linux PAM standard authentication. That drops you straight into the datacenter view, with your single node listed in the tree on the left.
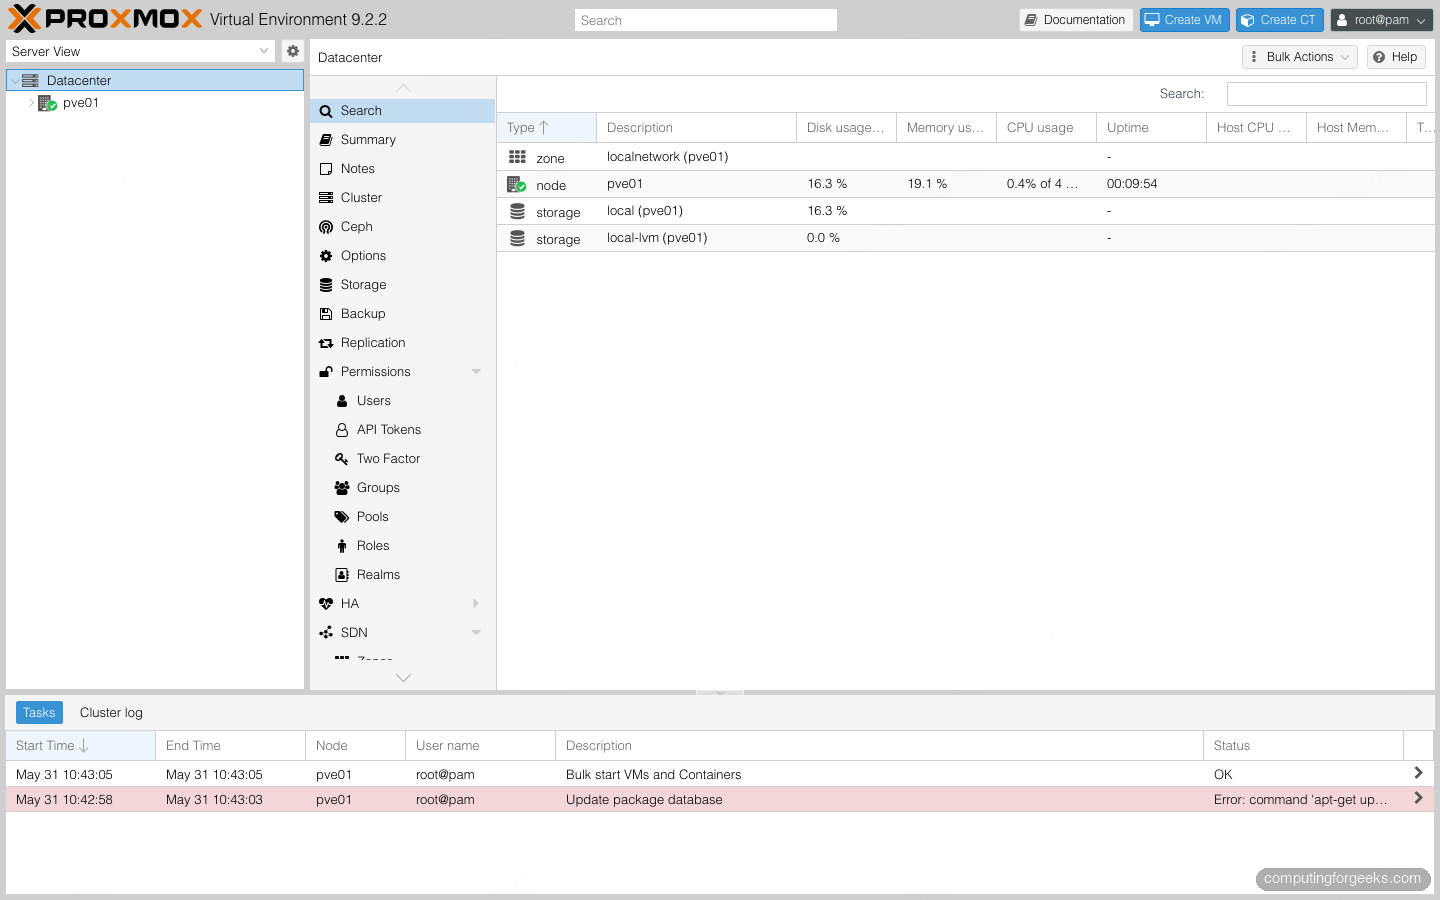
A “No valid subscription” dialog pops up on the first login. It is a reminder, not an error, and clicking OK dismisses it. By default the host points at the enterprise package repository, which needs a subscription, so an apt update fails until you switch to the free no-subscription repository. That repository change is the first thing to do after this install, and it is its own short job.
Step 10: Verify the installation
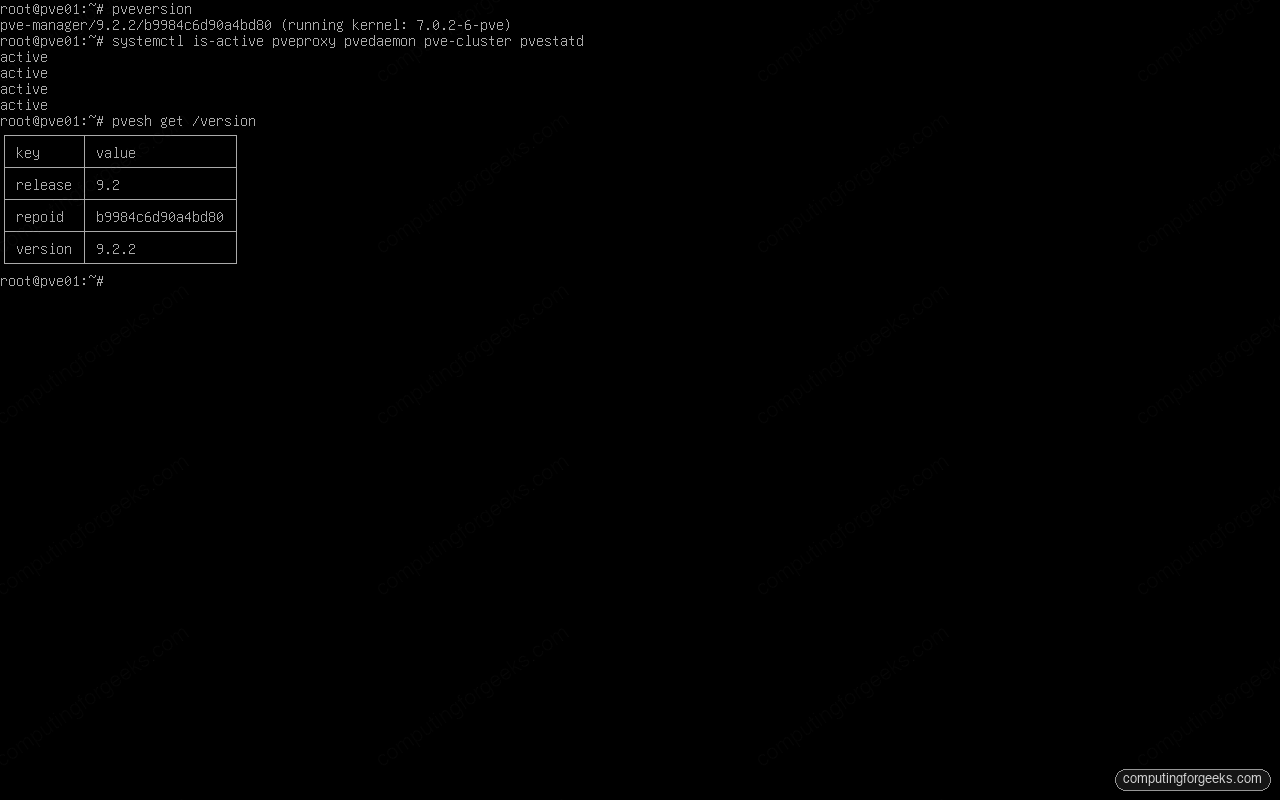
Open a shell on the node, either from the console or by clicking a node and choosing Shell in the web interface. Confirm the version and the running kernel:
pveversionYou should see the pve-manager release and the kernel it booted:
pve-manager/9.2.2/b9984c6d90a4bd80 (running kernel: 7.0.2-6-pve)The four services that make up the management stack should all report active:
systemctl is-active pveproxy pvedaemon pve-cluster pvestatdFour lines of active means the web proxy, the API daemon, the cluster filesystem, and the statistics collector are all running:
active
active
active
active
The API agrees with the web interface and the CLI. Query it directly with pvesh, the built-in API shell:
pvesh get /versionThe table confirms the release and full version of the running node:
With the host installed and verified, the next moves are short and in order: switch to the no-subscription repository and run a full apt upgrade, then create your first guest. The fastest way to a usable VM is a cloud-init template built from a cloud image, which you clone in seconds instead of installing each OS by hand. When you outgrow clicking through the web interface, you can drive the whole host from code with the Proxmox Ansible collection, and if you are coming off another hypervisor, the KVM to Proxmox migration guide covers moving existing disks across. From here, Proxmox VE is yours to build on.
